Guide: Installing the Test Bed for production use
Track |
|---|
This guide walks you through the installation of a new Test Bed instance for production use.
What you will achieve
At the end of this guide you will have installed your production Test Bed instance, i.e. the instance that your users will use to carry out their conformance testing. If you choose to not carry out an actual installation you will at least be aware of the steps and settings to configure for such a setup.
This guide acts as a counterpart to the Test Bed’s basic installation guide for development instances.
Note
Using the DIGIT Test Bed: The European Commission offers a public Test Bed instance that you can reuse for your project if you are unable to host your own. This instance, termed the DIGIT Test Bed, is available at https://www.itb.ec.europa.eu/itb and is operated by the Test Bed’s support team. The current guide concerns the setup of your own instance in case you have specific requirements not covered by the shared instance (e.g. internal network access, use of sensitive data) or if you simply want to manage all aspects of your testing services yourself.
What you will need
About 1 hour.
A text editor.
A web browser.
A machine with at least a dual core CPU, 4 GBs of RAM and 30 GBs of free storage. This machine should also be able to access the internet (for software installations).
The target machine OS should support linux-based Docker containers (meaning that it should be running Windows 10/11, Linux or MacOS).
Administrator privileges on the target machine.
An understanding of Docker or Kubernetes (depending on your preferred installation approach), and ICT concepts such as ports, firewalls and reverse proxies.
For a Kubernetes installation, an existing Kubernetes cluster.
Note
Installing on Windows Server: When installing on old Windows operating systems or Windows Server, linux-based containers are not supported. In this case you could still install the Test Bed through podman using commands and the podman client. Installing from source is also possible although not advised given the extra complexity of manual configuration and management.
How to complete this guide
Installing the Test Bed for production is supported via two approaches:
Via Docker using the Docker Compose tool.
Via Kubernetes using the Helm package manager (or via manifest files).
Regardless of the approach selected, this guide will progressively build your configuration that you will eventually use to install your Test Bed instance. Certain steps are highlighted as optional when linked to features that you can skip if not applicable for your case.
The steps of this guide follow a logical sequence matching the actions you should take during your setup. Alternatively you may of course directly refer to individual steps as focused documentation on setting up specific features. Optional features may be enabled progressively at any point during the Test Bed’s operation and can likewise be adapted and disabled.
Steps
Carry out the following steps in sequence to complete your installation.
Step 1: Install required tools
This step covers the setup of tools you will need as part of your installation. To proceed go to the the section that matches your installation approach (Docker-based installation or Kubernetes-based installation).
Docker installation
The first step is to ensure that Docker is installed on the machine that will host the Test Bed. If you already have Docker ensure it is at least at version 17.06.0, otherwise you can follow Docker’s online instructions to install or upgrade it.
Once your installation is complete, you will be able to test it using the docker --version command. This should return output as follows:
> docker --version

Docker version 23.0.5, build bc4487a
To complete your Docker setup you will also install Docker Compose, a tool for defining and running multi-container Docker
applications (such as the Test Bed). You can check whether your Docker installation already includes Docker Compose by issuing the
docker compose version command that should give output as follows:
> docker compose version
Docker Compose version 2.17.3
The minimum version of Docker Compose you need is 2.0.0. If you don’t have Docker Compose already installed follow its installation guide to set it up.
Note
Use of Docker Compose: It is not strictly necessary to use Docker Compose for a Test Bed installation although it is highly advised given the simplifications it offers. The rest of this guide assumes the use of Docker Compose for a Docker-based installation.
Kubernetes installation
The proposed way to configure, install and manage your Test Bed instance on your Kubernetes cluster is to use the Helm package manager. The Test Bed comes with a published Helm chart that simplifies the configuration of its components, ensuring all settings are consistent.
Once you have your Kubernetes cluster set up, install Helm following its installation guide. The Test Bed’s installation has been tested with Helm version 3.16.2 but any 3+ version should be fine. Note that official support for Kubernetes was added for the Test Bed with release 1.24.4.
With your installation complete, you can verify the installed Helm version by issuing helm version. This should return output as follows:
> helm version
version.BuildInfo{Version:"v3.16.2", GitCommit:"13654a52f7c70a143b1dd51416d633e1071faffb", GitTreeState:"clean", GoVersion:"go1.22.7"}
Note
The setup of your Kubernetes cluster is out of scope for this guide. Note that instead of a full cluster you may also run the Test Bed on a lightweight Kubernetes distribution such as k3s.
Installation without Helm
If you prefer to not use Helm you can also install the Test Bed by directly using the Test Bed’s manifest files. These manifest files are sequentially numbered based on the order of their execution, and are preconfigured with reasonable defaults.
The best way to use these manifests would be as follows:
Clone the GITB software repository.
Adapt the manifests in the
etc/k8s/manifestsfolder to match your needs (based on the subsequent steps in the guide).Apply the manifests sequentially using
kubectl apply.
The guidance and examples in the rest of this guide assume use of Helm for a Kubernetes installation. Having said this, mapping configurations to manifest files should be straightforward.
Step 2: Determine the access URL
It is assumed that your organisation is using a reverse proxy that manages how your services and resources are exposed to the outside world. As a result of this guide, the Test Bed will be exposed via this proxy as an additional service. It is important to define the path under which the Test Bed will be exposed given that several configuration options depend on its final address.
For the purpose of this guide we will assume that your proxy is configured to use HTTPS and that its base address is https://www.my.org. Based on this, we define
the following paths for our installation:
/itb, under which the Test Bed’s user interface will be exposed (the full address beinghttps://www.my.org/itb)./itbsrv, under which access is provided to the Test Bed’s callback endpoint (the full address beinghttps://www.my.org/itbsrv).
Note
You only need to expose the Test Bed’s callback endpoint /itbsrv if you are expecting external callbacks from custom services,
or if you are receiving calls using the Test Bed’s built-in messaging handlers.
Use of these paths is not mandatory but if you change them you would need to reflect their values in the configuration that follows.
Overall, use of a proxy is not mandatory per se but it is strongly advised given the flexibility it offers. This reverse proxy would at least be used to manage your server certificate to ensure that you connect to the Test Bed over HTTPS (which is considered mandatory for a production installation), and to hide your internal configuration from the outside world.
Step 3: Prepare basic configuration
Configuration options such as port mappings and health checks depend on whether you are installing on Docker or Kubernetes. Besides these, configuration for the Test Bed’s components is driven through environment variables. We will review the key configuration to set in the sections that follow.
An important point to mention that is common regardless of installation approach, is the version tags to use for the Test Bed’s
Docker images. Test Bed components are published as images on the Docker Hub, with tags for stable
releases (e.g. isaitb/gitb-srv:1.20.0), as well as latest tags as an alias for the latest release. You could use latest
for simplicity, however production instances should ideally be based on fixed release tags. In any case, new releases are always
backwards compatible, and upgrading to a new one involves simply pulling the new version and restarting. Besides this no manual upgrade
or migration actions are ever needed.
Docker installation
Installation using Docker will be driven via Docker Compose. In this step we will define the basic Docker Compose script that any production installation would need. This configuration will be revisited in subsequent steps to adapt it for specific features.
To begin, create a folder on the machine you will install the Test Bed on. For the purpose of this guide lets assume this is:
/opt/testbed
Within the /opt/testbed folder create a docker-compose.yml file with the following contents:
volumes:
   # Persistent volume to store files.
   gitb-repo:
   # Persistent volume to store the database's data.
   gitb-dbdata:

services:
   # Cache server used to record and verify user sessions.
   gitb-redis:
      image: isaitb/gitb-redis
      container_name: itb-redis
      restart: unless-stopped
   # Database used for data persistence (besides files stored in the gitb-repo volume).
   gitb-mysql:
      image: isaitb/gitb-mysql
      container_name: itb-mysql
      restart: unless-stopped
      environment:
       # The password for the root user of the Test Bed's MySQL database. This is used for the initial database setup
       # and subsequent health checks. This must be changed for a production instance.
       - MYSQL_ROOT_PASSWORD=CHANGE_ME
       # The password for the DB user (named gitb) that the Test Bed uses to connect to its database.
       # This must be changed for a production instance.
       - MYSQL_PASSWORD=CHANGE_ME
      volumes:
       - gitb-dbdata:/var/lib/mysql
      healthcheck:
       # The primary reason for defining a health check is to ensure that the gitb-ui component starts up only when the
       # database is ready to receive connections.
       test: "/usr/bin/mysql --user=root --password=$$MYSQL_ROOT_PASSWORD --execute \"SHOW DATABASES;\""
       interval: 3s
       retries: 50
   # The test engine component used to execute test sessions.
   gitb-srv:
      image: isaitb/gitb-srv
      container_name: itb-srv
      restart: unless-stopped
      environment:
       # The root URL at which callbacks are made from custom test services or when receiving calls using
       # built-in messaging handlers. If you don't use built-in messaging handlers and all custom test
       # services are internal, you can adapt this URL to also be internal.
       - CALLBACK_ROOT_URL=https://www.my.org/itbsrv
       # A key used to authenticate and verify calls between the gitb-ui and gitb-srv components. The value set here must
       # match the value configured for HMAC_KEY in the gitb-ui component. This must be changed for a production instance.
       - HMAC_KEY=CHANGE_ME
      ports:
       - "8080:8080"
   # The frontend component used to realise all management operations and serve the Test Bed's UI and APIs.
   gitb-ui:
      image: isaitb/gitb-ui
      container_name: itb-ui
      restart: unless-stopped
      ports:
       - "9000:9000"
      environment:
       # Used to load the European Commission built-in theme by default. Skip this for a generic theme.
       - THEME=ec
       # When set to "production" the Test Bed will ensure that all secrets are appropriately configured. Failure to do so
       # will prevent the Test Bed from starting up. While not in production mode, the Test Bed will include a warning that
       # it is configured for development purposes.
       - TESTBED_MODE=production
       # The value set here depends on how the Test Bed is publicly exposed to users and should match your proxy setup.
       - TESTBED_HOME_LINK=https://www.my.org/itb
       # This corresponds to the path at which session cookies are bound. The value here is typically the path segment
       # following the host name as configured in TESTBED_HOME_LINK.
       - AUTHENTICATION_COOKIE_PATH=/itb
       # The password used to access the Test Bed's database, which must be set to match the value provided for the MYSQL_PASSWORD
       # variable of the gitb-mysql component. This must be changed for a production instance.
       - DB_DEFAULT_PASSWORD=CHANGE_ME
       # A key used to authenticate and verify calls between the gitb-ui and gitb-srv components. The value set here must
       # match the value configured for HMAC_KEY in the gitb-srv component. This must be changed for a production instance.
       - HMAC_KEY=CHANGE_ME
       # This is used to encrypt and verify user session tokens and must be set to a random string of at least 32 characters' length.
       # This must be changed for a production instance.
       - APPLICATION_SECRET=CHANGE_ME
       # This is used to encrypt sensitive values recorded in the Test Bed's database (e.g. custom organisation properties marked as "secrets").
       # This must be changed for a production instance.
       - MASTER_PASSWORD=CHANGE_ME
      volumes:
       - gitb-repo:/gitb-repository
      depends_on:
       gitb-redis:
         condition: service_started
       gitb-mysql:
         condition: service_healthy
       gitb-srv:
         condition: service_started
Note
The sample docker-compose.yml presented above assumes that the Test Bed is exposed behind a reverse proxy with a path mapping
for the gitb-ui service of /itb. This is reflected in the values of properties TESTBED_HOME_LINK, and AUTHENTICATION_COOKIE_PATH.
For more information see how to determine the Test Bed access URL and the
setup of your reverse proxy.
This is a YAML file that defines the components you will install as well as their configuration. Please take a few minutes to review the comments in this file to understand the purpose of each component and the defined configuration (provided as environment variables).
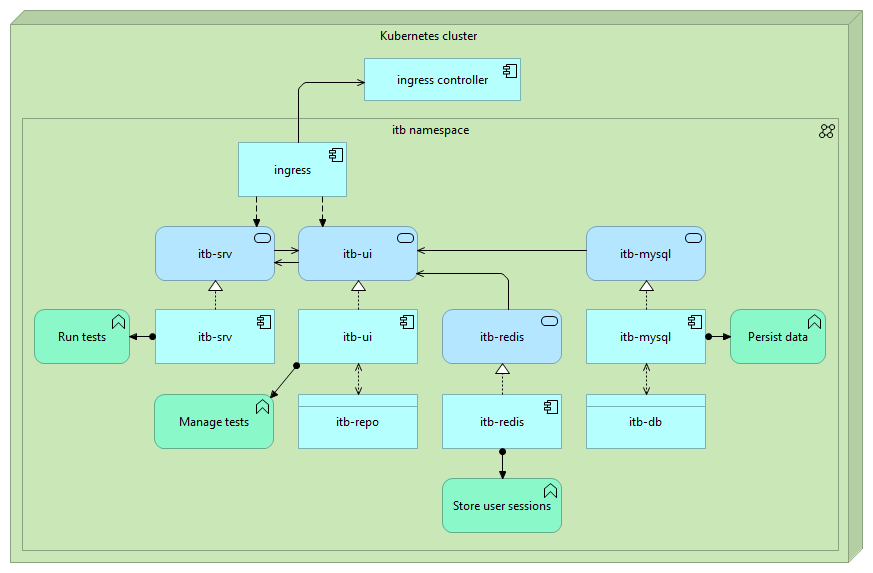
The setup, in terms of containers and volumes, resulting from this configuration is as follows:

Kubernetes installation
The first step is to add the Test Bed’s chart repository to Helm. To do this issue:
helm repo add itb https://www.itb.ec.europa.eu/helm
In case you have already added the repository to Helm, update its charts using:
helm repo update itb
Before proceeding with the installation you will need to replace key configuration properties for your new instance. As a basis for these you can review the default values from the packaged chart, which include detailed comments on the available settings. To do this issue:
helm show values itb/itb
Doing so will output the chart’s packaged value file that can act as the basis for your configuration:
> helm show values itb/itb

# Default configuration values for the Interoperability Test Bed on Kubernetes.
#
# To override values define your own value file to use when installing/upgrading
# or provide select values via command line. Available properties include settings
# used directly in manifests (e.g. ports and labels) but also environment variables
# that are used to adapt the behavior of the ITB instance.
#
# Note: This is a YAML-formatted file.
...
To provide your own configuration you can start by saving the default values in file override.yaml. After removing
comments and properties you don’t typically need to use or override, you will have a file such as follows:
#
# Configuration properties for the itb-mysql component.
# This is the database used for data persistence (besides stored files).
#
mysql:
  env:
    # The password for the root user of the Test Bed's MySQL database. This is used for the initial database setup
    # and subsequent health checks. This must be changed for a production instance.
    MYSQL_ROOT_PASSWORD: CHANGE_ME
    # The password for the DB user (named gitb) that the Test Bed uses to connect to its database.
    # This must be changed for a production instance.
    MYSQL_PASSWORD: CHANGE_ME

#
# Configuration properties for the itb-srv component.
# This is the test engine used to execute test sessions.
#
srv:
  env:
    # The root URL at which callbacks are made from custom test services or when receiving calls using
    # built-in messaging handlers. If you don't use built-in messaging handlers and all custom test
    # services are internal, you can adapt this URL to also be internal.
    CALLBACK_ROOT_URL: https://www.my.org/itbsrv
    # A key used to authenticate and verify calls between the itb-ui and itb-srv components. The value set here must
    # match the value configured for HMAC_KEY in the itb-ui component. This must be changed for a production instance.
    HMAC_KEY: CHANGE_ME

#
# Configuration properties for the itb-ui component.
# This is used to realise all management operations and serve the Test Bed's UI and APIs.
#
ui:
  env:
    # Used to load the European Commission built-in theme by default. Skip this for a generic theme.
    THEME: ec
    # When set to "production" the Test Bed will ensure that all secrets are appropriately configured. Failure to do so
    # will prevent the Test Bed from starting up. While not in production mode, the Test Bed will include a warning that
    # it is configured for development purposes.
    TESTBED_MODE: production
    # The value set here depends on how the Test Bed is publicly exposed to users and should match your proxy setup.
    TESTBED_HOME_LINK: https://www.my.org/itb
    # This corresponds to the path at which session cookies are bound. The value here is typically the path segment
    # following the host name as configured in TESTBED_HOME_LINK.
    AUTHENTICATION_COOKIE_PATH: /itb
    # The password used to access the Test Bed's database, which must be set to match the value provided for the MYSQL_PASSWORD
    # variable of the gitb-mysql component. This must be changed for a production instance.
    DB_DEFAULT_PASSWORD: CHANGE_ME
    # A key used to authenticate and verify calls between the gitb-ui and gitb-srv components. The value set here must
    # match the value configured for HMAC_KEY in the gitb-srv component. This must be changed for a production instance.
    HMAC_KEY: CHANGE_ME
    # This is used to encrypt and verify user session tokens and must be set to a random string of at least 32 characters' length.
    # This must be changed for a production instance.
    APPLICATION_SECRET: CHANGE_ME
    # This is used to encrypt sensitive values recorded in the Test Bed's database (e.g. custom organisation properties marked as "secrets").
    # This must be changed for a production instance.
    MASTER_PASSWORD: CHANGE_ME

#
# Ingress definition to provide access to ITB components from outside the cluster.
#
ingress:
  ## ingress.class is the name of the ingress controller class. You can view your cluster's available ingress
  ## classes (and the names used to refer to them) by issuing "kubectl get ingressclass". You may also omit
  ## this if you have a default ingress class configured.
  ## The default class considered is "nginx" (see https://kubernetes.github.io/ingress-nginx/) but this
  ## can be replaced for different ingress implementations.
  class: nginx
  #
  # Configuration specific to TLS settings.
  #
  tls:
    #
    ## ingress.tls.host is the complete host name to use by the ingress when generating a server certificate for TLS.
    host: localhost
    #
    ## ingress.tls.secretName is the name of the secret corresponding to the server certificate to use for TLS.
    secretName: itb-tls-secret

#
# Configuration of volumes used to persist data.
#
volume:
  database:
    # volume.database.storage is the capacity to foresee for storing database data.
    # The default setting below is sufficient for a development or experimentation instance, but when deploying
    # for production use ensure this is adapted accordingly and that you can extend if/when needed.
    storage: 10Gi
  repository:
    # volume.repository.storage is the capacity to foresee for storing files.
    # The default setting below is sufficient for a development or experimentation instance, but when deploying
    # for production use ensure this is adapted accordingly and that you can extend if/when needed.
    storage: 10Gi
All values marked as CHANGE_ME
refer to secrets that will need to be set. Other values you
will need to review and adapt according to how you expose your service.
Make sure to also review the allocated storage limits for your persistent volumes. The example above foresees 10 GBs for
the Test Bed’s database and file system repository which is as a safe default for a production system to avoid early resizing.
Finally, take note of the ingress definition as this will surely need to be adapted for your setup. The configuration depends on several factors such as the class of your cluster’s ingress controller, whether you expose it via TLS, its host name, certificate details etc. The default ingress configuration assumes an nginx ingress, and exposes access over TLS with a localhost server and dummy certificate. The chart is however flexible, allowing you to specify as configuration values the ingress class, settings and annotations. As an example, the following configuration disables TLS and prevents nginx from making a forced redirect from HTTP to HTTPS:
ingress:
  # No TLS configuration
  tls: null
  # Annotations specific to the ingress implementation.
  annotations:
    nginx.ingress.kubernetes.io/ssl-redirect: "false"
The setup, in terms of deployments, services, persistent volume claims and ingress, resulting from this configuration is as follows:
Step 4: Configure secrets
Regardless of whether you use Docker or Kubernetes for your installation, you will need to configure certain secrets before starting
the Test Bed in production mode. These are the properties that were previously highlighted with a CHANGE_ME value and are summarised
in the following table:
Component |
Property |
Description |
|---|---|---|
|
|
The password for the DB user (named |
|
|
The password for the root user of the Test Bed’s MySQL database. This is used for the initial database setup. |
|
|
A key used to secure internal API calls between |
|
|
This is the key used by the Test Bed to encrypt and verify user session tokens. Set this to a random string of at least 32 characters’ length. |
|
|
The password used to access the Test Bed’s database. This must be set to match the value provided for the |
|
|
You must set this with the value you defined for the |
|
|
A key used to encrypt any sensitive values recorded in the Test Bed’s database (e.g. custom organisation properties marked as “secrets”). |
To proceed with your installation, ensure you have reviewed these secrets and replaced their values in docker-compose.yml (for an installation using Docker),
or override.yaml (for an installation on Kubernetes).
Warning
When running in production mode if any of the above properties are not correctly set, the Test Bed will fail to start up and will print a
warning message in the itb-ui log.
Managing secrets separately
The simplest way to configure secrets is to set them directly in docker-compose.yml (for an installation using Docker),
or override.yaml (for an installation on Kubernetes), resulting in their definition as environment variables. It is possible
to provide these secrets differently so that they are not managed alongside all other basic configuration values. You may want to do
this for example, if you use Docker and commit your docker-compose.yml to your versioning system, in which case you would typically
want to exclude sensitive information.
You can decouple secret values using one - or a combination - of the following approaches, depending on your installation type:
For Docker, using container-specific environment files, a global environment file, or Docker secrets.
For Kubernetes, using Kubernetes secrets.
These options are further discussed in the following sections.
(Docker) Container environment files
A simple approach to decouple secrets from the docker-compose.yml file is to use separate environment files
for the service’s containers. This is achieved through the env_file attribute, whereby any environment variables (at least the secrets) are defined in
a separate file per container. You could in fact move all environment variables to such files, or use also environment attributes to keep non-sensitive
values within the docker-compose.yml file.
To illustrate this approach, create folder config containing .env files per container as follows:
/opt/testbed
├── config
│   ├── gitb-mysql.env
│   ├── gitb-srv.env
│   └── gitb-ui.env
└── docker-compose.yml
These files will include the variables for secrets values. Specifically, file gitb-mysql.env includes …
MYSQL_ROOT_PASSWORD=CHANGE_ME
MYSQL_PASSWORD=CHANGE_ME
… gitb-srv.env includes …
HMAC_KEY=CHANGE_ME
… and gitb-ui.env includes …
HMAC_KEY=CHANGE_ME
DB_DEFAULT_PASSWORD=CHANGE_ME
APPLICATION_SECRET=CHANGE_ME
MASTER_PASSWORD=CHANGE_ME
With these files in place our docker-compose.yml file becomes:
services:
  ...
  gitb-mysql:
    ...
    env_file: ./config/gitb-mysql.env
    ...
  gitb-srv:
    ...
    env_file: ./config/gitb-srv.env
    ...
  gitb-ui:
    ...
    env_file: ./config/gitb-ui.env
    ...
The complete docker-compose.yml file based on this approach is as follows:
volumes:
   gitb-repo:
   gitb-dbdata:

services:
   gitb-redis:
      image: isaitb/gitb-redis
      container_name: itb-redis
      restart: unless-stopped
   gitb-mysql:
      image: isaitb/gitb-mysql
      container_name: itb-mysql
      restart: unless-stopped
      env_file: ./config/gitb-mysql.env
      volumes:
       - gitb-dbdata:/var/lib/mysql
      healthcheck:
       test: "/usr/bin/mysql --user=root --password=$$MYSQL_ROOT_PASSWORD --execute \"SHOW DATABASES;\""
       interval: 3s
       retries: 50
   gitb-srv:
      image: isaitb/gitb-srv
      container_name: itb-srv
      restart: unless-stopped
      env_file: ./config/gitb-srv.env
      environment:
       # The root URL at which callbacks are made from custom test services or when receiving calls using
       # built-in messaging handlers. If you don't use built-in messaging handlers and all custom test
       # services are internal, you can adapt this URL to also be internal.
       - CALLBACK_ROOT_URL=https://www.my.org/itbsrv
      ports:
       - "8080:8080"
   gitb-ui:
      image: isaitb/gitb-ui
      container_name: itb-ui
      restart: unless-stopped
      ports:
       - "9000:9000"
      env_file: ./config/gitb-ui.env
      environment:
       # Load the European Commission built-in theme by default. Skip this for a generic theme.
       - THEME=ec
       - TESTBED_MODE=production
       - TESTBED_HOME_LINK=https://www.my.org/itb
       - AUTHENTICATION_COOKIE_PATH=/itb
      volumes:
       - gitb-repo:/gitb-repository
      depends_on:
       gitb-redis:
         condition: service_started
       gitb-mysql:
         condition: service_healthy
       gitb-srv:
         condition: service_started
(Docker) Global environment file
An alternative approach for decoupling secrets that is similar to using environment files per container
is to define a single environment file. The variables declared therein can then be used in your docker-compose.yml file via
variable interpolation.
Using this approach you define all secrets (and any other variables you want) in a file named .env alongside your docker-compose.yml file:
/opt/testbed
├── .env
└── docker-compose.yml
The contents of the .env file are as follows:
MYSQL_ROOT_PASSWORD=CHANGE_ME
MYSQL_PASSWORD=CHANGE_ME
HMAC_KEY=CHANGE_ME
APPLICATION_SECRET=CHANGE_ME
MASTER_PASSWORD=CHANGE_ME
You can then use these values through interpolation to set the variables directly in your docker-compose.yml file:
services:
  ...
  gitb-mysql:
    ...
    environment:
     - MYSQL_ROOT_PASSWORD=${MYSQL_ROOT_PASSWORD}
     - MYSQL_PASSWORD=${MYSQL_PASSWORD}
    ...
  gitb-srv:
    ...
    environment:
     - HMAC_KEY=${HMAC_KEY}
    ...
  gitb-ui:
    ...
    environment:
     - DB_DEFAULT_PASSWORD=${MYSQL_PASSWORD}
     - HMAC_KEY=${HMAC_KEY}
     - APPLICATION_SECRET=${APPLICATION_SECRET}
     - MASTER_PASSWORD=${MASTER_PASSWORD}
    ...
The complete docker-compose.yml file based on this approach is as follows:
volumes:
   gitb-repo:
   gitb-dbdata:

services:
   gitb-redis:
      image: isaitb/gitb-redis
      container_name: itb-redis
      restart: unless-stopped
   gitb-mysql:
      image: isaitb/gitb-mysql
      container_name: itb-mysql
      restart: unless-stopped
      environment:
       - MYSQL_ROOT_PASSWORD=${MYSQL_ROOT_PASSWORD}
       - MYSQL_PASSWORD=${MYSQL_PASSWORD}
      volumes:
       - gitb-dbdata:/var/lib/mysql
      healthcheck:
       test: "/usr/bin/mysql --user=root --password=$$MYSQL_ROOT_PASSWORD --execute \"SHOW DATABASES;\""
       interval: 3s
       retries: 50
   gitb-srv:
      image: isaitb/gitb-srv
      container_name: itb-srv
      restart: unless-stopped
      environment:
       # The root URL at which callbacks are made from custom test services or when receiving calls using
       # built-in messaging handlers. If you don't use built-in messaging handlers and all custom test
       # services are internal, you can adapt this URL to also be internal.
       - CALLBACK_ROOT_URL=https://www.my.org/itbsrv
       - HMAC_KEY=${HMAC_KEY}
      ports:
       - "8080:8080"
   gitb-ui:
      image: isaitb/gitb-ui
      container_name: itb-ui
      restart: unless-stopped
      ports:
       - "9000:9000"
      environment:
       # Load the European Commission built-in theme by default. Skip this for a generic theme.
       - THEME=ec
       - TESTBED_MODE=production
       - TESTBED_HOME_LINK=https://www.my.org/itb
       - AUTHENTICATION_COOKIE_PATH=/itb
       - DB_DEFAULT_PASSWORD=${MYSQL_PASSWORD}
       - HMAC_KEY=${HMAC_KEY}
       - APPLICATION_SECRET=${APPLICATION_SECRET}
       - MASTER_PASSWORD=${MASTER_PASSWORD}
      volumes:
       - gitb-repo:/gitb-repository
      depends_on:
       gitb-redis:
         condition: service_started
       gitb-mysql:
         condition: service_healthy
       gitb-srv:
         condition: service_started
(Docker) Docker secrets
Defining secrets via environment variables has the drawback of keeping such values available in the containers’ environment. If you would prefer to avoid this, a more robust approach is to use Docker secrets, that allows you to define secrets through the file system.
Note that secrets can be defined in various ways, which result in the underlying containers reading secret values from files.
To keep things simple for our installation we will create each secret as a file on the host, and define it as a secret in the docker-compose.yml file.
The secrets we will handle in this way are per container:
For
itb-mysql, theMYSQL_ROOT_PASSWORDandMYSQL_PASSWORD.For
itb-srv, theHMAC_KEY.For
itb-ui, theDB_DEFAULT_PASSWORD,HMAC_KEY,APPLICATION_SECRETandMASTER_PASSWORD.
Create alongside the docker-compose.yml file a folder named config with the following text files:
/opt/testbed
├── config
│   ├── applicationSecret.txt
│   ├── dbPassword.txt
│   ├── dbRootPassword.txt
│   ├── hmacKey.txt
│   └── masterPassword.txt
└── docker-compose.yml
For the content of these files, set it per case to the value of the secret (e.g. CHANGE_ME). With these files in place you then need to adapt
your docker-compose.yml file to:
Declare the secrets.
Expose secrets to containers.
Define environment variables with the values of the secret files’ path.
Adapt the database health-check definition.
Each secret is made available to a container under the path /run/secrets/SECRET_NAME. Regarding the environment variables set, these are named by appending
a _FILE to the base variable’s name. For example, where you would use HMAC_KEY to pass the value as-is, you define HMAC_KEY_FILE to pass the path
to the file containing the value.
These adaptations are reflected in the docker-compose.yml file by the following definitions:
services:
  ...
  gitb-mysql:
    ...
    environment:
     - MYSQL_ROOT_PASSWORD_FILE=/run/secrets/dbRootPassword
     - MYSQL_PASSWORD_FILE=/run/secrets/dbPassword
    secrets:
     - dbRootPassword
     - dbPassword
    healthcheck:
     test: "/usr/bin/mysql --user=root --password=$$(cat $$MYSQL_ROOT_PASSWORD_FILE) --execute \"SHOW DATABASES;\""
    ...
  gitb-srv:
    ...
    environment:
     - HMAC_KEY_FILE=/run/secrets/hmacKey
    secrets:
     - hmacKey
    ...
  gitb-ui:
    ...
    environment:
     - DB_DEFAULT_PASSWORD_FILE=/run/secrets/dbPassword
     - HMAC_KEY_FILE=/run/secrets/hmacKey
     - APPLICATION_SECRET_FILE=/run/secrets/applicationSecret
     - MASTER_PASSWORD_FILE=/run/secrets/masterPassword
    secrets:
     - dbPassword
     - hmacKey
     - applicationSecret
     - masterPassword
    ...

secrets:
  dbRootPassword:
    file: ./config/dbRootPassword.txt
  dbPassword:
    file: ./config/dbPassword.txt
  hmacKey:
    file: ./config/hmacKey.txt
  applicationSecret:
    file: ./config/applicationSecret.txt
  masterPassword:
    file: ./config/masterPassword.txt
The complete docker-compose.yml file based on this approach is as follows:
volumes:
   gitb-repo:
   gitb-dbdata:

services:
   gitb-redis:
      image: isaitb/gitb-redis
      container_name: itb-redis
      restart: unless-stopped
   gitb-mysql:
      image: isaitb/gitb-mysql
      container_name: itb-mysql
      restart: unless-stopped
      environment:
       - MYSQL_ROOT_PASSWORD_FILE=/run/secrets/dbRootPassword
       - MYSQL_PASSWORD_FILE=/run/secrets/dbPassword
      secrets:
       - dbRootPassword
       - dbPassword
      volumes:
       - gitb-dbdata:/var/lib/mysql
      healthcheck:
       test: "/usr/bin/mysql --user=root --password=$$(cat $$MYSQL_ROOT_PASSWORD_FILE) --execute \"SHOW DATABASES;\""
       interval: 3s
       retries: 20
   gitb-srv:
      image: isaitb/gitb-srv
      container_name: itb-srv
      restart: unless-stopped
      environment:
       # The root URL at which callbacks are made from custom test services or when receiving calls using
       # built-in messaging handlers. If you don't use built-in messaging handlers and all custom test
       # services are internal, you can adapt this URL to also be internal.
       - CALLBACK_ROOT_URL=https://www.my.org/itbsrv
       - HMAC_KEY_FILE=/run/secrets/hmacKey
      secrets:
       - hmacKey
      ports:
       - "8080:8080"
   gitb-ui:
      image: isaitb/gitb-ui
      container_name: itb-ui
      restart: unless-stopped
      ports:
       - "9000:9000"
      environment:
       # Load the European Commission built-in theme by default. Skip this for a generic theme.
       - THEME=ec
       - TESTBED_MODE=production
       - TESTBED_HOME_LINK=https://www.my.org/itb
       - AUTHENTICATION_COOKIE_PATH=/itb
       - DB_DEFAULT_PASSWORD_FILE=/run/secrets/dbPassword
       - HMAC_KEY_FILE=/run/secrets/hmacKey
       - APPLICATION_SECRET_FILE=/run/secrets/applicationSecret
       - MASTER_PASSWORD_FILE=/run/secrets/masterPassword
      secrets:
       - dbPassword
       - hmacKey
       - applicationSecret
       - masterPassword
      volumes:
       - gitb-repo:/gitb-repository
      depends_on:
       gitb-redis:
         condition: service_started
       gitb-mysql:
         condition: service_healthy
       gitb-srv:
         condition: service_started

secrets:
  dbRootPassword:
    file: ./config/dbRootPassword.txt
  dbPassword:
    file: ./config/dbPassword.txt
  hmacKey:
    file: ./config/hmacKey.txt
  applicationSecret:
    file: ./config/applicationSecret.txt
  masterPassword:
    file: ./config/masterPassword.txt
For completeness, the secrets per-container that can be managed in this way are listed in the following table:
Container |
Property |
Description |
|---|---|---|
|
|
The password for the DB user (named |
|
|
The password for the root user of the Test Bed’s MySQL database. This is used for the initial database setup. |
|
|
A key used to secure internal API calls between |
|
|
This is the key used by the Test Bed to encrypt and verify user session tokens. Set this to a random string of at least 32 characters’ length. |
|
|
The OIDC client secret to use in case the Test Bed uses an external identity provider through OIDC. |
|
|
The LDAP account password to use in case the Test Bed uses an an LDAP server for user authentication. |
|
|
An optional REST API key to set as the master API key for administrative tasks. This only applies upon initialisation to set its initial value instead of generating a new API key. |
|
|
The key to decrypt the data archive(s) provided as part of a Test Bed sandbox instance. |
|
|
The password used to access the Test Bed’s database. This must be set to match the value provided for the |
|
|
The password used to connect to the configured SMTP server if emails are enabled. |
|
|
You must set this with the value you defined for the |
|
|
A key used to encrypt any sensitive values recorded in the Test Bed’s database (e.g. custom organisation properties marked as “secrets”). |
|
|
The proxy password used if a proxy is needed to connect to a remote TSA server (for time-stamped PDF certificates). |
(Kubernetes) Kubernetes secrets
Kubernetes offers several means of configuring secrets that are out of scope for this installation guide. As a general guideline however, the most appropriate approach would be to have Kubernetes share secrets to pods as files that are accessible from their filesystem.
This approach is conceptually the same as the case of Docker secrets
for a Docker-based installation. You still use environment variables to define the secrets, but instead of specifying the
secret value itself you specify the path to a file that holds the secret. This is done by defining secrets’ environment
variables using their _FILE variant. For the name of these variables, their meaning, and mapping to each component, please
refer to the table at the end of the previous section.
Besides exposing the secrets to each pod as a file, you will also need to adapt the health check operations for the itb-mysql
component. The default operations can be replaced through the override.yaml file as follows to use file-based secrets:
mysql:
    livenessProbeCommand: "/usr/bin/mysqladmin -uroot -p$$(cat $$MYSQL_ROOT_PASSWORD_FILE) ping &> /dev/null"
    readinessProbeCommand: "/usr/bin/mysql --user=root --password=$$(cat $$MYSQL_ROOT_PASSWORD_FILE) --execute \"SHOW DATABASES;\""
Note
Helm chart limitations: When configuring Kubernetes secrets, as well as for other advanced configuration options, you may find that the published Helm chart does not address all possible configuration options. In this case the advised approach is to use the Test Bed’s manifest files directly, and consider the existing Helm chart as a starting point for your own setup.
Updating secrets post-installation
All configuration properties can be adapted at any point in the Test Bed’s operation by updating their values and redeploying the updated containers. Moreover, several common properties can also be managed by the Test Bed administrator through the user interface with immediate application even without a restart.
Care is needed however when updating properties referring to secrets. The different scenarios to consider are described in the following sections, including their impact and update approach.
Updating the application secret and HMAC key
The values for APPLICATION_SECRET and HMAC_KEY can be updated at any time without side-effects. Keep in mind only that APPLICATION_SECRET must
be sufficiently long and that HMAC_KEY must be set to the same value in both itb-srv and itb-ui.
Updating database passwords
To change the database root password connect to the itb-mysql container and update the password to the desired value. Once you have done this ensure
to update the MYSQL_ROOT_PASSWORD value to match. No container restart is needed given that this is only used for the database’s initial health check.
To change the Test Bed’s database user password you need to first stop the itb-ui container. Once this is done connect to itb-mysql and update
the password, remembering to reflect the new value in the MYSQL_PASSWORD property of itb-mysql and the DB_DEFAULT_PASSWORD property of itb-ui.
The itb-ui container will then need to be restarted.
Updating the master password
Changing the MASTER_PASSWORD foresees a process to ensure that any existing encrypted values do not become unusable. If after the initial setup
the MASTER_PASSWORD is changed the Test Bed will, as a precaution, fail to start up notifying you in the logs of itb-ui of the reason. When you
want to change its value you need to restart the Test Bed with configuration properties based on one of the following options:
Option 1 (forced change): If you don’t know the existing
MASTER_PASSWORDor you want to force its update (rendering any existing encrypted values unusable) you provide the new password asMASTER_PASSWORDand setMASTER_PASSWORD_FORCEtotrue.Option 2 (graceful change): To gracefully make the update you need to provide the existing and new passwords to allow encrypted values to be re-encrypted. To do so provide the new password as
MASTER_PASSWORDand the previously applicable one asMASTER_PASSWORD_TO_REPLACE. Note that ifMASTER_PASSWORD_TO_REPLACEis not correct the Test Bed will fail to start which you can override by settingMASTER_PASSWORD_FORCEtotrue.
Note
Updating the master password: Changing the MASTER_PASSWORD is the only case that can be non-recoverable. This is why the Test Bed fails to start
whenever it detects that it is not provided correctly (whether in regular operation or when explicitly attempting to change it). Control ultimately lies
with you nonetheless as you can always force the update. In addition, if configuration properties linked to updating the password are present when an update
is not being attempted (i.e. the provided MASTER_PASSWORD matches the one currently in force) the Test Bed will start but will log relevant warnings.
Step 5: Enable optional features
The following sections cover optional features supported by the Test Bed that you may want to configure at installation time. Follow each section’s instructions to enable the relevant feature for your instance.
Note
Certain of the features discussed below, as well as several others, can also be managed by the Test Bed administrator through the Test Bed’s user interface.
Antivirus scanning
When using the Test Bed you and your users will typically be making several file uploads. These could range from community administrators uploading test suites, to users uploading data to be used in test sessions. The Test Bed supports the use of an antivirus service to scan all user-provided files ensuring that they are virus-free before being stored and used. Enabling antivirus checking is strongly advised for any non-development Test Bed instance although not strictly mandatory. If you choose to not set up such a service ensure that this is an informed decision.
To enable antivirus scanning the Test Bed supports the configuration of a ClamAV server, a robust, popular and free antivirus solution. You can either reuse an
existing ClamAV server for this purpose or set one up as a container within your overall Test Bed service. The configuration properties
that are needed to enable this are defined in itb-ui as described in the following table:
Property |
Description |
Default value |
|---|---|---|
|
Set to |
|
|
The ClamAV server’s hostname. |
|
|
The TCP port the ClamAV server is listening on for scan requests. |
As an example for a Docker-based installation, you can reuse an existing ClamAV service by adapting docker-compose.yml as follows:
...
services:
  ...
  gitb-ui:
    ...
    environment:
     - ANTIVIRUS_SERVER_ENABLED=true
     - ANTIVIRUS_SERVER_HOST=10.0.0.5
     - ANTIVIRUS_SERVER_PORT=3310
  ...
This configuration enables antivirus checking making use of a server on host 10.0.0.5 listening on port 3310 (you can change these values to match your setup).
In case you don’t have an existing antivirus server one can be easily included as a container in the Test Bed’s service. The best approach for this is to use the
official ClamAV image that also supports the automated refresh for its virus definitions. As an example for a Docker-based installation, you
can include this by adapting docker-compose.yml as follows:
...
services:
  ...
  gitb-ui:
    ...
    environment:
     - ANTIVIRUS_SERVER_ENABLED=true
     - ANTIVIRUS_SERVER_HOST=gitb-antivirus
     - ANTIVIRUS_SERVER_PORT=3310
  ...
  gitb-antivirus:
      image: clamav/clamav:stable
      container_name: itb-antivirus
      restart: unless-stopped
Email notifications and support
Note
Email settings can also be configured by the Test Bed administrator through the Test Bed’s user interface.
You can configure the Test Bed with an SMTP service to enable the sending of emails. Emails are sent by the Test Bed in the following cases:
When users select to contact support, in which case their request is sent to a configured default mailbox and/or a community’s support mailbox.
To send self-registration notifications to a community’s support mailbox.
To notify administrators when test sessions are pending administrator input.
The Test Bed foresees several environment variables to define how emails are to be sent. These are listed in the following table:
Property |
Description |
Default value |
|---|---|---|
|
The maximum number of attachments allowed to include in contact form submissions. Setting this to 0 or negative disables contact form attachments. |
|
|
The maximum total size (in MBs) for attachments. |
|
|
A comma-separated list of MIME types corresponding to the types of files that are allowed as attachments in contact form submissions. |
|
|
Set to |
|
|
The “FROM” address for support emails (e.g. |
|
|
The number of minutes between pending test session email reminders sent to the relevant community mailbox. |
|
|
Set to |
|
|
The username to use when authenticating against the SMTP server. |
|
|
The password to use when authenticating against the SMTP server. |
|
|
The SMTP server’s host. |
|
|
The SMTP server’s port. |
|
|
Whether the connection to the SMTP server should use an SSL channel. |
|
|
In case SSL is enabled, the protocols to use for the SMTP connection. |
|
|
Whether the connection to the SMTP server should use the STARTTLS option (initial connection in cleartext and then upgrade to SSL). |
|
|
The support team’s email address. |
|
As an example for a Docker-based installation, email support can be enabled by adapting docker-compose.yml as follows:
...
services:
  ...
  gitb-ui:
    ...
    environment:
     - EMAIL_ENABLED=true
     - EMAIL_SMTP_HOST=mail.my.org
     - EMAIL_SMTP_PORT=25
     - EMAIL_SMTP_AUTH_ENABLED=true
     - EMAIL_SMTP_AUTH_USERNAME=a_username
     - EMAIL_SMTP_AUTH_PASSWORD=a_password
     - EMAIL_FROM=contact@my.org
     - EMAIL_TO=support@my.org
  ...
Self-registration
Note
Self-registration support can also be configured by the Test Bed administrator through the Test Bed’s user interface.
The Test Bed by default allows users to register themselves for any community that is configured as being publicly accessible. In case your community (or communities) are only planned to be private, i.e. with community administrators managing organisations and users, you can disable user self-registration to remove relevant options and controls from the user interface. Such features include the self-registration link on the Test Bed’s welcome page but also relevant configuration options in the community management screens.
Enabling self-registration is managed through property REGISTRATION_ENABLED. Taking a Docker-based installation as an example,
self-registration can be disabled by adapting docker-compose.yml as follows:
...
services:
  ...
  gitb-ui:
    ...
    environment:
     - REGISTRATION_ENABLED=false
  ...
Demo test cases
Note
Demos can also be configured by the Test Bed administrator through the Test Bed’s user interface.
The Test Bed can be configured with a set of publicly available demos that illustrate how you expect users to use your Test Bed instance. This is something that you would do after the Test Bed’s initial installation as it requires you to first use it to setup the demos.
Once you have made your initial Test Bed installation, follow these steps to configure your demos:
Create an organisation that will be used as your “demo” organisation.
For this organisation create the conformance statements that you want to share as demos.
Create a basic user for the organisation (not an administrator) that will be used as the demo account to connect with.
The important thing to retain is the internal identifier for the created user, as this will be used in the subsequent configuration. If you select to view the user’s details, this identifier (an integer) is the last path element you would see in the address bar.
The configuration properties linked to the demo account are listed in the following table:
Property |
Description |
Default value |
|---|---|---|
|
The database user ID of a specific Test Bed user to be used as a demo user. |
|
|
Set to |
|
As an example for a Docker-based installation, you can enable demos by adapting docker-compose.yml as follows (assuming 10 as an example of the demo user’s identifier):
...
services:
  ...
  gitb-ui:
    ...
    environment:
     - DEMOS_ENABLED=true
     - DEMOS_ACCOUNT=10
  ...
Once this is configured, users will see a link on the Test Bed’s welcome page to try out your demos. Doing so will connect them using the configured demo account with which they can execute and review tests but not make modifications.
Conformance certificate timestamps
Community administrators can issue conformance certificates to their members once they have successfully completing their testing. These are PDF documents that can be configured as part of a community’s settings, and can be signed by a provided digital certificate. The configuration of such digital certificates is managed through the Test Bed interface, however it is possible at the level of the overall Test Bed installation to enable trusted timestamps as part of these signatures. Trusted timestamps are provided by TSA (Time Stamp Authority) servers.
The configuration properties related to trusted timestamps are listed in the following table:
Property |
Description |
Default value |
|---|---|---|
|
Set to |
|
|
The URL of the TSA server for signature timestamp generation. |
|
As an example for a Docker-based installation, timestamps can be enabled by adapting docker-compose.yml as follows:
...
services:
  ...
  gitb-ui:
    ...
    environment:
     - TSA_SERVER_ENABLED=true
  ...
Furthermore, to replace the default Free Time Stamp Authority (freeTSA) you can use property TSA_SERVER_URL as follows:
...
services:
  ...
  gitb-ui:
    ...
    environment:
     - TSA_SERVER_ENABLED=true
     - TSA_SERVER_URL=https://my.timestamp.authority.org/api
  ...
Use an external identity provider
By default the Test Bed comes with simple username and password based accounts for user authentication. Although this approach can be used in production, the norm is to use an external identity provider service to separately manage user accounts. If enabled, such a service handles user authentication while the Test Bed manages role assignments and authorisation.
The Test Bed supports the following identity provider integrations:
Integration with EU Login using the CAS protocol for European Commission services.
Integration with an identity provider using the OIDC protocol.
Integration with an identity provider using the LDAP protocol.
These approaches are covered in the following sections.
Note
It is possible to start using the Test Bed without an identity provider and switch to one later on.
Use EU Login
Commission-hosted Test Bed instances are eligible for integration with EU Login, the European Commission’s central authentication service.
To integrate with EU Login you first need to register your Test Bed instance with the EU Login service. To do this you start by creating an internal support ticket and eventually completing a registration form. From the Test Bed’s perspective, the important points from this registration are:
To provide the public address of your Test Bed instance.
To require EU Login to return the user’s email address upon authentication.
To signal that you will be using the Central Authentication Service (CAS) protocol.
The registration form can be further customised to e.g. restrict usage only to specific user domains.
Once you have been onboarded to the EU Login service you need to configure your Test Bed instance to use it. This is achieved by means of the following configuration properties:
Property |
Required |
Description |
Default value |
|---|---|---|---|
|
No |
The authentication level to enforce when integrated with EU Login. Supported values are |
|
|
Yes |
The complete URL of the Test Bed instance to redirect back to. This should be set to the Test Bed’s full address postfixed with |
|
|
Yes |
Whether or not the Test Bed will use EU Login as an SSO solution. |
|
|
No |
Whether or not features relevant to migrating from a non-SSO to an SSO-enabled environment should be activated. |
|
|
Yes |
The complete URL of the EU Login service to redirect to for authentication. |
|
|
No |
The type of identity provider to use. Omitting this, or setting is explicitly to |
|
As an example for a Docker-based installation, you can enable EU Login for authentication by adapting docker-compose.yml as follows:
...
services:
  ...
  gitb-ui:
    ...
    environment:
     - AUTHENTICATION_SSO_ENABLED=true
     - AUTHENTICATION_SSO_LOGIN_URL=https://ecas.ec.europa.eu/cas/login
     - AUTHENTICATION_SSO_CALLBACK_URL=https://www.my.org/itb/callback
  ...
It is important to note here that the AUTHENTICATION_SSO_CALLBACK_URL is based on the public address you select for the Test Bed (see Step 2: Determine the access URL). In short, you need to set this
property to match the full address of your Test Bed instance, followed by a /callback postfix.
By default when integrating with EU Login, no specific requirements will be made on the level of authentication assurance. This means that users will be able to
authenticate through any means they choose, as supported by EU Login. You can override this behavior to require a specific level of assurance though
the AUTHENTICATION_SSO_AUTHENTICATION_LEVEL environment variable. The values this supports are as follows:
BASIC(the default), meaning that any authentication means will be accepted.MEDIUM, to require multi-factor authentication by means of password and an additional token (provided e.g. via the EU Login mobile app, SMS, or a hardware token).HIGH, to require multi-factor authentication by means of password and a hardware token.
Although not enforced by default, the proposed minimum authentication level is MEDIUM to ensure that your Test Bed instance uses
multi-factor authentication. To apply this for a Docker-based installation, adapt your docker-compose.yml as follows:
...
services:
  ...
  gitb-ui:
    ...
    environment:
     - AUTHENTICATION_SSO_ENABLED=true
     - AUTHENTICATION_SSO_LOGIN_URL=https://ecas.ec.europa.eu/cas/login
     - AUTHENTICATION_SSO_CALLBACK_URL=https://www.my.org/itb/callback
     - AUTHENTICATION_SSO_AUTHENTICATION_LEVEL=MEDIUM
  ...
Use OpenID Connect (OIDC)
The Test Bed can integrate with any identity provider service supporting the OpenID Connect (OIDC) protocol. OIDC is a widely used authentication protocol acting as an identity layer on top of the OAuth 2.0 authorisation framework.
With your OIDC identity provider available you can configure your Test Bed instance to use it by means of the following configuration properties:
Property |
Required |
Description |
Default value |
|---|---|---|---|
|
Yes |
The OIDC client ID corresponding to the Test Bed (defined in the provider’s configuration). |
|
|
Yes |
The secret configured for the OIDC client ID (defined in the provider’s configuration). |
|
|
Yes |
The identity provider’s discovery URI (defined in the provider’s configuration). |
|
|
Yes |
Whether or not the Test Bed uses your identity provider for authentication. |
|
|
No |
Whether or not features relevant to migrating from a non-SSO to an SSO-enabled environment should be activated. |
|
|
No |
The preferred JWS algorithm to use (to avoid checking all supported algorithms each time). |
|
|
No |
The OIDC response mode to consider. This can be empty or set to |
|
|
No |
The OIDC response type to consider. This can be |
|
|
Yes |
The type of identity provider to use. Setting this explicitly to |
|
Although not strictly required, it is advised to set the AUTHENTICATION_SSO_PREFERRED_JWS_ALGORITHM property. If not set,
the Test Bed will go over all algorithms supported by the identity provider until an appropriate one is found. If this happens
you will see warnings listed in the itb-ui logs similar to the following:
02/07/2025 16:03:17 WARN o.p.o.profile.creator.TokenValidator - Preferred JWS algorithm: null not available. Using all metadata algorithms: [PS384, RS384, EdDSA, ES384, HS256, HS512, ES256, RS256, HS384, ES512, PS256, PS512, RS512]
Considering the above properties and a Docker-based installation, you can enable use of OIDC by adapting docker-compose.yml as follows:
...
services:
  ...
  gitb-ui:
    ...
    environment:
     - AUTHENTICATION_SSO_ENABLED=true
     - AUTHENTICATION_SSO_TYPE=oidc
     - AUTHENTICATION_SSO_CLIENT_ID=itb-client
     - AUTHENTICATION_SSO_CLIENT_SECRET=MY_CLIENT_SECRET
     - AUTHENTICATION_SSO_DISCOVERY_URI=https://www.my.org/realms/itb/.well-known/openid-configuration
     - AUTHENTICATION_SSO_PREFERRED_JWS_ALGORITHM=RS256
     - AUTHENTICATION_SSO_CALLBACK_URL=https://www.my.org/itb/callback
  ...
It is important to note here that the AUTHENTICATION_SSO_CALLBACK_URL is based on the public address you select for the Test Bed (see Step 2: Determine the access URL). In short, you need to set this
property to match the full address of your Test Bed instance, followed by a /callback postfix.
Note
The AUTHENTICATION_SSO_CLIENT_SECRET property can be also provided as a secret value.
Use the Lightweight Directory Access Protocol (LDAP)
The Test Bed can integrate with a server implementing the LDAP protocol for accessing and querying directory services.
Your Test Bed instance can be integrated with an LDAP server for user authentication by means of the following configuration properties:
Property |
Required |
Description |
Default value |
|---|---|---|---|
|
No |
The users’ email property. |
|
|
No |
The users’ first name property. |
|
|
No |
The users’ last name property. |
|
|
No |
The users’ user ID property. |
|
|
Yes |
The distinguished name (DN) for the account to connect to the LDAP server. |
|
|
Yes |
The password for the account to connect to the LDAP server. |
|
|
Yes |
The URL to access the LDAP server. |
|
|
Yes |
The type of identity provider to use. Setting this explicitly to |
|
|
Yes |
The distinguished name (DN) for the group containing the Test Bed’s user accounts. |
Considering the above properties and a Docker-based installation, you can enable use of LDAP by adapting docker-compose.yml as follows:
...
services:
  ...
  gitb-ui:
    ...
    environment:
     - AUTHENTICATION_SSO_ENABLED=true
     - AUTHENTICATION_SSO_TYPE=ldap
     - AUTHENTICATION_SSO_CONNECTION_DN=cn=admin,dc=example,dc=com
     - AUTHENTICATION_SSO_CONNECTION_PASSWORD=...
     - AUTHENTICATION_SSO_USER_DN=cn=users,dc=example,dc=com
  ...
Note
The AUTHENTICATION_SSO_CONNECTION_PASSWORD property can be also provided as a secret value.
Switching to use an external identity provider
It is possible to start using the Test Bed without an external identity provider and switch to it later on. To have a Test Bed instance use its own username and password
accounts, it suffices to leave AUTHENTICATION_SSO_ENABLED as false or simply omit it (false is the default). Once you are ready to switch to your identity provider
you can then enable this property to make the switch, ensuring you have also included the protocol-specific properties described in earlier sections.
When switching an existing Test Bed instance to use an external identity provider, you would most probably want any existing users to still be able to
have access. This is possible by setting a Test Bed instance in migration mode, whereby users are given the option to link their provider’s account with
one or more existing Test Bed accounts. For a Docker-based installation, placing your Test Bed instance in migration mode is done by adapting docker-compose.yml
as follows:
...
services:
  ...
  gitb-ui:
    ...
    environment:
     - AUTHENTICATION_SSO_IN_MIGRATION_PERIOD=true
  ...
When in migration mode, users are presented in the welcome page with an option to migrate their existing account(s), and with a link to a step-by-step migration tutorial.
Note
If you are using a fresh Test Bed installation integrated with an external identity provider, it will be forced into migration mode until the initial administrator account is linked to an account from your identity provider.
Step 6: Set up supporting services
To support your Test Bed instance you may require custom service extensions to implement the specific messaging, validation or processing needs of your test cases. In addition, further components may be needed to complete your setup such as databases or messaging gateways.
You are free to set up such components in any way you see fit, the only requirement being that the services needed to be reachable by the Test Bed are indeed accessible. In view of simplifying operation and management, you would likely want to include such components as part of the Test Bed’s overall service. This is something that you would likely do at least for your custom messaging, validation and processing services, given that they act as capability extensions for your Test Bed instance. Such services are built for containerisation and can be easily included.
As an example for a Docker-based Test Bed installation to which you are adding a custom messaging service and validator, the only thing that would be needed apart from
defining their Docker images is to adapt docker-compose.yml as follows:
...
services:
  ...
  gitb-srv:
    ...
  gitb-ui:
    ...
  my-messaging-service:
    image: myorg/my-messaging-service
    restart: unless-stopped
  my-validation-service:
    image: myorg/my-validation-service
    restart: unless-stopped
When itb-srv calls these services during tests, it will do so using regular Docker networking, by using the service name as the host name (e.g. my-messaging-service).
You could also further adapt your configuration to expose certain services (e.g. a validator) to your end users by mapping their internal ports to your host:
...
services:
  ...
  my-validation-service:
    image: myorg/my-validation-service
    restart: unless-stopped
    ports:
     - "9999:8080"
With your service’s port mapped to your host you would then need to configure your reverse proxy accordingly to allow external access.
In the case of a Kubernetes-based Test Bed installation, the approach to follow would be very similar. To summarise you would:
Define Kubernetes deployments and services for each custom service.
Configure their endpoints for use from
itb-srvusing their service address.Expose the services needed by end users through further ingress rules
Step 7: Configure reverse proxy
As discussed in Step 2: Determine the access URL, use of a reverse proxy for a production installation is strongly advised. A proxy allows you to decouple your internal configuration from the outside world, and acts as a central point to manage access and apply server certificates.
For the purposes of this section we consider a Docker-based installation and the use of nginx as a proxy server although similar configuration could be applied to other servers. In order to illustrate the expected configuration we will assume the following sample settings and values:
The internal address of the host running the Test Bed is
10.0.0.4.The public address of your proxy is
https://www.my.organd the Test Bed’s components will be mapped to paths/itband/itbsrv.Your Test Bed containers are listening on the default ports (
8080foritb-srvand9000foritb-ui).
Taking into account the above points, adapt your server’s nginx.conf file to add the following location mappings:
http {
  ...
  # This is your HTTPS server.
  server {
    listen 443 ssl;
    ...
    location /itb/ {
      proxy_pass http://10.0.0.4:9000/;
      proxy_http_version 1.1;
      proxy_set_header Upgrade $http_upgrade;
      proxy_set_header Connection "Upgrade";
      add_header ITB-PATH /itb;
      add_header Strict-Transport-Security 'max-age=31536000; includeSubDomains';
    }
    # The following location block is needed only if:
    #   (a) You are receiving callbacks from test services, and
    #   (b) These test services are remote and cannot use the Test Bed's local address.
    # and/or
    #   (c) You define test cases in which you receive calls using built-in messaging handlers
    #      (specifically HttpMessagingV2 or SoapMessagingV2).
    location /itbsrv/ {
      proxy_pass http://10.0.0.4:8080/itbsrv/;
    }
  }
}
The above configuration covers the Test Bed platform. If you want to expose additional services to your users (e.g. a validator), you would need further configuration such as the following:
http {
  ...
  # This is your HTTPS server.
  server {
    listen 443 ssl;
    ...
    location /validator/ {
      proxy_pass http://10.0.0.4:9999/;
    }
  }
}
Using a custom context root for itb-ui
Depending on your reverse proxy implementation you might find it difficult to map the public path of the itb-ui component (/itb)
to the backend application, if the latter is configured with a different context root (/). To address this issue you may configure the
itb-ui component with a different context root so that it matches your desired public mapping. In doing so however, you need
to also adapt the configuration of the itb-srv component. Specifically you need to:
Set the
WEB_CONTEXT_ROOTproperty foritb-uiwith the context root to use.Set the
REPOSITORY_ROOT_URLproperty foritb-srvto reflect the context root ofitb-ui.
Using a Docker-based installation as an example, the following configuration defines a /itb context root for the itb-ui component,
adapting also accordingly the configuration of itb-srv:
  services:
     ...
     gitb-srv:
        ...
        environment:
         ...
         - REPOSITORY_ROOT_URL=http://gitb-ui:9000/itb
     gitb-ui:
        ...
        environment:
         ...
         - TESTBED_HOME_LINK=https://www.my.org/itb
         - AUTHENTICATION_COOKIE_PATH=/itb
         - WEB_CONTEXT_ROOT=/itb
With this context root in place, our reverse proxy configuration becomes as follows:
http {
  ...
  # This is your HTTPS server.
  server {
    listen 443 ssl;
    ...
    location /itb/ {
      proxy_pass http://10.0.0.4:9000/itb/;
      proxy_http_version 1.1;
      proxy_set_header Upgrade $http_upgrade;
      proxy_set_header Connection "Upgrade";
      add_header ITB-PATH /itb;
      add_header Strict-Transport-Security 'max-age=31536000; includeSubDomains';
    }
    # The following location block is needed only if:
    #   (a) You are receiving callbacks from test services, and
    #   (b) These test services are remote and cannot use the Test Bed's local address.
    # and/or
    #   (c) You define test cases in which you receive calls using built-in messaging handlers
    #      (specifically HttpMessagingV2 or SoapMessagingV2).
    location /itbsrv/ {
      proxy_pass http://10.0.0.4:8080/itbsrv/;
    }
  }
}
Note
Web context root for Kubernetes ingress configuration: When using Kubernetes and configuring your ingress, it is cumbersome to define
a path mapping different to an application’s context root. This is why the Test Bed’s Helm chart
and manifests by default specify WEB_CONTEXT_ROOT as /itb
in the itb-ui deployment.
Step 8: Firewall configuration
Adapting your organisation’s firewall is the final step to consider in your installation. Regarding the Test Bed, you need to consider the following points:
Access to the Test Bed should already be possible given that it is done via your reverse proxy (i.e. the firewall allows port 443).
You must not block web socket communications.
The above points are the minimum considerations to take into account for your firewall setup.
Step 9: Install the Test Bed
With your configuration prepared you can now proceed with the installation (using Docker or Kubernetes depending on your case).
Docker installation
Open a command prompt to the /opt/testbed folder (i.e. where you have your docker-compose.yml file). In this, issue the docker compose up -d command
from which you should eventually see the following output:
docker compose up -d
...
Creating itb-srv ...
Creating itb-redis ...
Creating itb-mysql ...
Creating itb-srv
Creating itb-redis
Creating itb-srv ... done
Creating itb-ui ...
Creating itb-ui ... done
What this does is to first download all required Test Bed images (as well as the images they build upon) and then start up all services. The names
you see (e.g. itb-srv) can be used to refer to individual containers (e.g. to inspect logs).
To ensure the Test Bed has completed its initialisation you should check the logs of itb-srv and itb-ui. For itb-srv issue docker logs -f itb-srv
for which you should see output completing as follows:
> docker logs -f itb-srv

...
19/06/2026 15:36:51 INFO  c.g.t.c.TestbedServiceContextListener - [] Started ITB test engine (itb-srv) - release 1.29.5
 _____ _______ ____                       _
|_   _|__   __|  _ \                     | |
  | |    | |  | |_) |  _ __ ___  __ _  __| |_   _
  | |    | |  |  _ <  | '__/ _ \/ _` |/ _` | | | |
 _| |_   | |  | |_) | | | |  __/ (_| | (_| | |_| |
|_____|  |_|  |____/  |_|  \___|\__,_|\__,_|\__, |
                                             __/ |
                                            |___/
You can exit the log display by issuing a CTRL-C. To check itb-ui issue docker logs -f itb-ui for which the output should complete as follows:
> docker logs -f itb-ui

...
19/06/2026 15:36:52 INFO  hooks.PostStartHook - Started ITB frontend (itb-ui) in production mode - release 1.29.5 (2026-06-19 09:35:19)
 _____ _______ ____                       _
|_   _|__   __|  _ \                     | |
  | |    | |  | |_) |  _ __ ___  __ _  __| |_   _
  | |    | |  |  _ <  | '__/ _ \/ _` |/ _` | | | |
 _| |_   | |  | |_) | | | |  __/ (_| | (_| | |_| |
|_____|  |_|  |____/  |_|  \___|\__,_|\__,_|\__, |
                                             __/ |
                                            |___/
Once again exit the log display by issuing a CTRL-C. You should now have a fully functioning Test Bed installation.
Kubernetes installation
Open a command prompt to the folder where you have defined your override.yaml file. From this folder you can run the installation
by issuing:
helm upgrade itb itb/itb -f override.yaml -n itb --install --create-namespace
This command uses the values you provided in override.yaml to extend and override the chart’s default values. All Kubernetes
resources (e.g. pods, services and deployments) will be created in a itb namespace and the release will be recorded in Helm as itb.
Note
Using helm upgrade --install as opposed to helm install is useful as it can also be used to upgrade your instance from a new chart version.
Optionally, as part of your installation, you may also choose to check the provenance and integrity of the chart by verifying its signature. A failed signature verification will prevent the installation from proceeding. To do so:
Add to your PGP keyring the Test Bed’s
public PGP key.Add to your
helm upgradecommand the--verifyflag, adding also--keyring <path_to_keyring>if your keyring is not at the default location.
Once your installation completes successfully you will see the Test Bed’s post-installation notes. These highlight how to access your instance and provide documentation pointers for next steps:
> helm upgrade itb itb/itb -f override.yaml -n itb --install --create-namespace

Release "itb" has been upgraded. Happy Helming!
NAME: itb
LAST DEPLOYED: Thu Nov 28 10:32:46 2024
NAMESPACE: itb
STATUS: deployed
REVISION: 4
TEST SUITE: None
NOTES:
----------------------------------------------------------------------------
  ___  _____  ____                   _     ___
 |_ _||_   _|| __ )    ___   _ __   | | __( _ )  ___
  | |   | |  |  _ \   / _ \ | '_ \  | |/ // _ \ / __|
  | |   | |  | |_) | | (_) || | | | |   <| (_) |\__ \
 |___|  |_|  |____/   \___/ |_| |_| |_|\_\\___/ |___/


The Interoperability Test Bed (ITB) is now deployed on your cluster (release "1.24.4").

...
To ensure the Test Bed has completed its initialisation you should check the logs of itb-srv and itb-ui. For itb-srv issue kubectl logs -f deployment/itb-srv -n itb
for which you should see output completing as follows:
> kubectl logs -f deployment/itb-srv -n itb

...
19/06/2026 15:36:51 INFO  c.g.t.c.TestbedServiceContextListener - [] Started ITB test engine (itb-srv) - release 1.29.5
 _____ _______ ____                       _
|_   _|__   __|  _ \                     | |
  | |    | |  | |_) |  _ __ ___  __ _  __| |_   _
  | |    | |  |  _ <  | '__/ _ \/ _` |/ _` | | | |
 _| |_   | |  | |_) | | | |  __/ (_| | (_| | |_| |
|_____|  |_|  |____/  |_|  \___|\__,_|\__,_|\__, |
                                             __/ |
                                            |___/
You can exit the log display by issuing a CTRL-C. To check itb-ui issue kubectl logs -f deployment/itb-ui -n itb for which the output should complete as follows:
> kubectl logs -f deployment/itb-ui -n itb

...
19/06/2026 15:36:52 INFO  hooks.PostStartHook - Started ITB frontend (itb-ui) in production mode - release 1.29.5 (2026-06-19 09:35:19)
 _____ _______ ____                       _
|_   _|__   __|  _ \                     | |
  | |    | |  | |_) |  _ __ ___  __ _  __| |_   _
  | |    | |  |  _ <  | '__/ _ \/ _` |/ _` | | | |
 _| |_   | |  | |_) | | | |  __/ (_| | (_| | |_| |
|_____|  |_|  |____/  |_|  \___|\__,_|\__,_|\__, |
                                             __/ |
                                            |___/
Once again exit the log display by issuing a CTRL-C. You should now have a fully functioning Test Bed installation.
Note
For a new installation you may notice itb-ui restarting due to database connection failures. This is is normal, and will
automatically resolve once itb-mysql is ready to receive connections.
Having completed the installation you have set up all Test Bed components on your Kubernetes cluster. Remember that to enable access to this from outside the cluster you will also need to have an ingress controller configured. A good option for such a controller is the nginx ingress controller, which is also considered by default in the Test Bed’s chart.
Step 10: Test your installation
To test your installation you can log into the Test Bed’s user interface using the default administrator account. Open a browser window and navigate
to https://www.my.org/itb. If the installation was successful you should see the Test Bed’s welcome page:
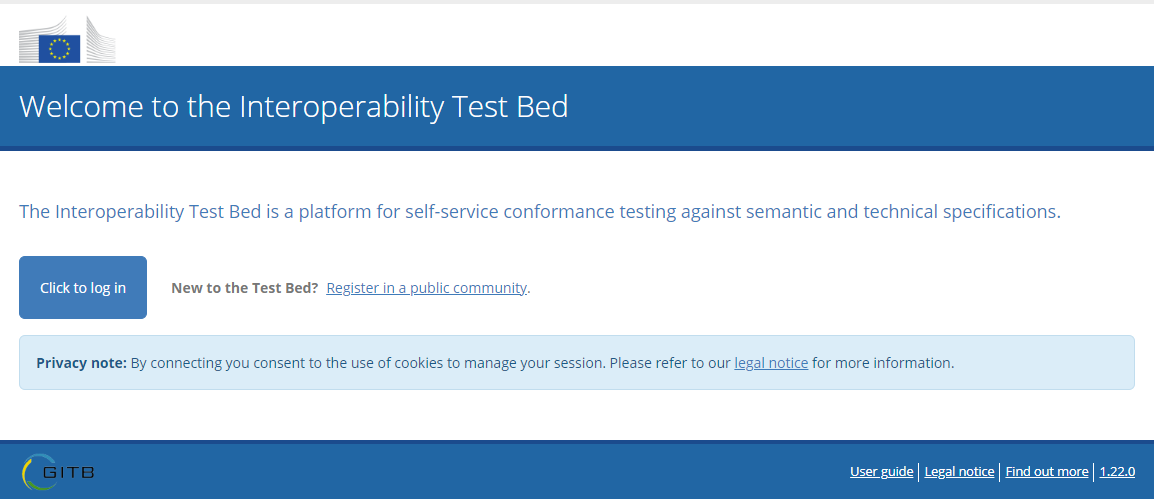
To log in click on the Click to log in button at which point you should see the Test Bed’s login page:
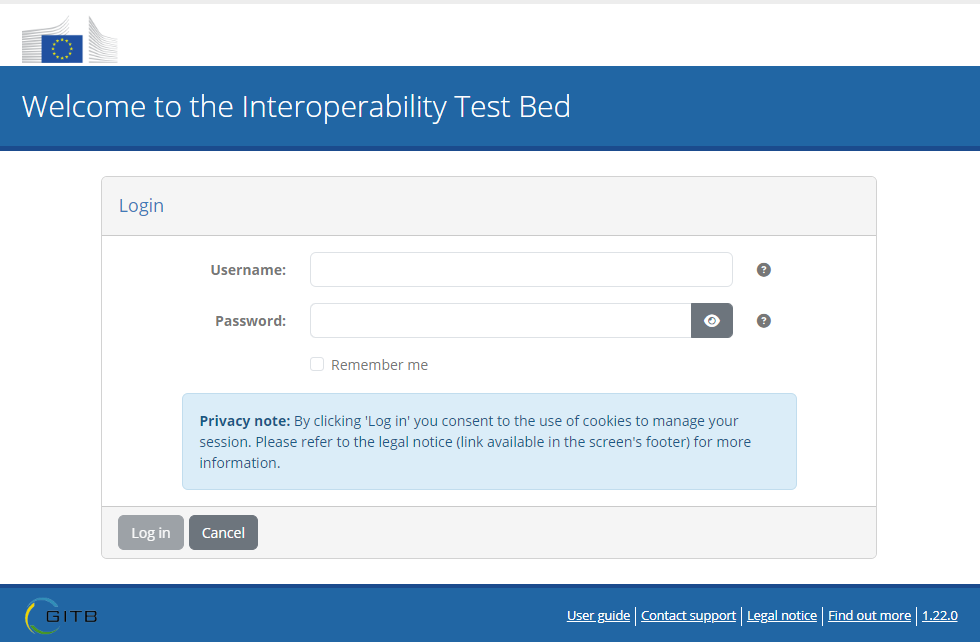
The default administrator’s username is admin@itb which is set with an automatically generated password at startup. The password’s value is printed
in the itb-ui logs that can be inspected using:
docker logs -f itb-uifor a Docker-based installation.kubectl logs -f deployment/itb-ui -n itbfor a Kubernetes-based installation.
Within the log output you will find a block as follows:
...
###############################################################################

The one-time password for the default administrator account [admin@itb] is:

b1afbc39-8ad7-49f4-a9d9-0bcec942aef4

###############################################################################
...
Providing the listed password in the login form will prompt you to replace it, following which you should be greeted with the Test Bed’s home page and the startup configuration wizard:

This wizard will walk you through a series of steps to help you get started with the Test Bed. These include enabling an automated software version check that is strongly advised for production instances, as it will inform you when new releases are available or in case your current software has known security vulnerabilities.

Note
Feedback survey: At the end of the configuration wizard you will also be invited to complete a brief feedback survey. Although not mandatory, we would greatly appreciate if you could take 2 minutes to complete this. Doing so helps us get a better idea of our users and supports the Test Bed’s continued development.
Once you complete the wizard you will see the Test Bed’s currently empty home page. You can eventually replace this by specifying default and community-specific landing pages.
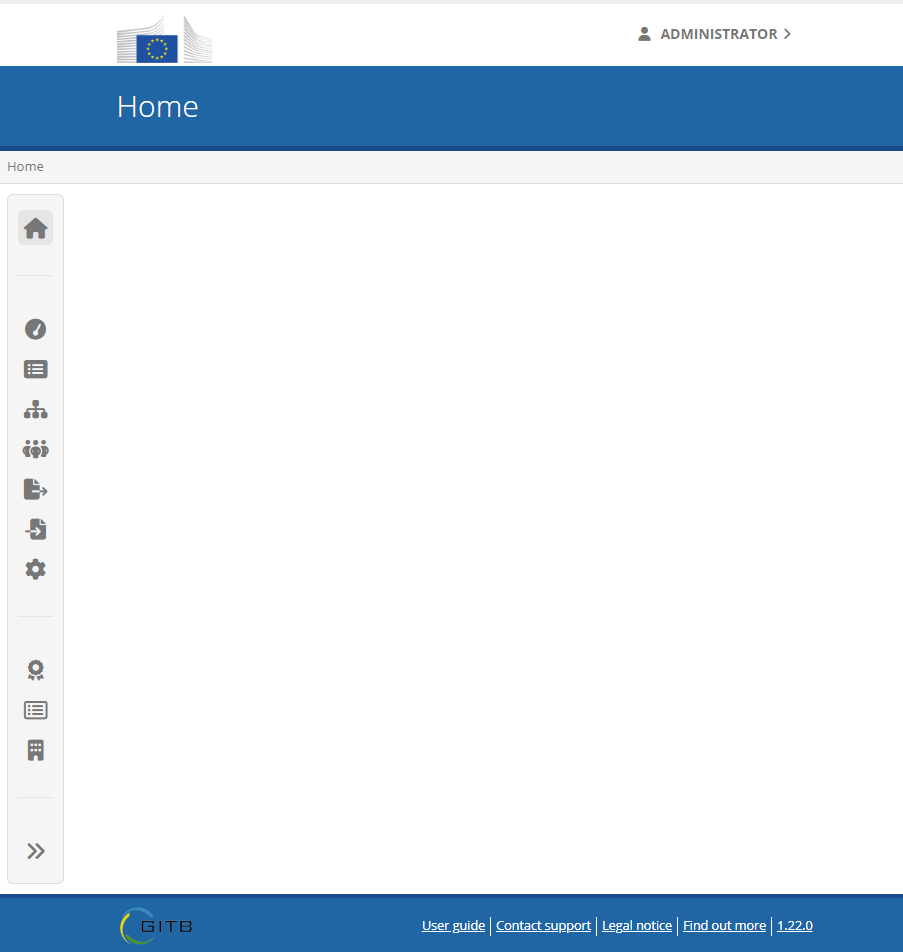
As a final step in your installation, you should check that all Test Bed components are functioning as expected. Already having logged in and arrived at the home page, you know that most core components are working well. To ensure that all services that are not immediately obvious are also functioning as expected, visit the service health dashboard by following the relevant menu entry.
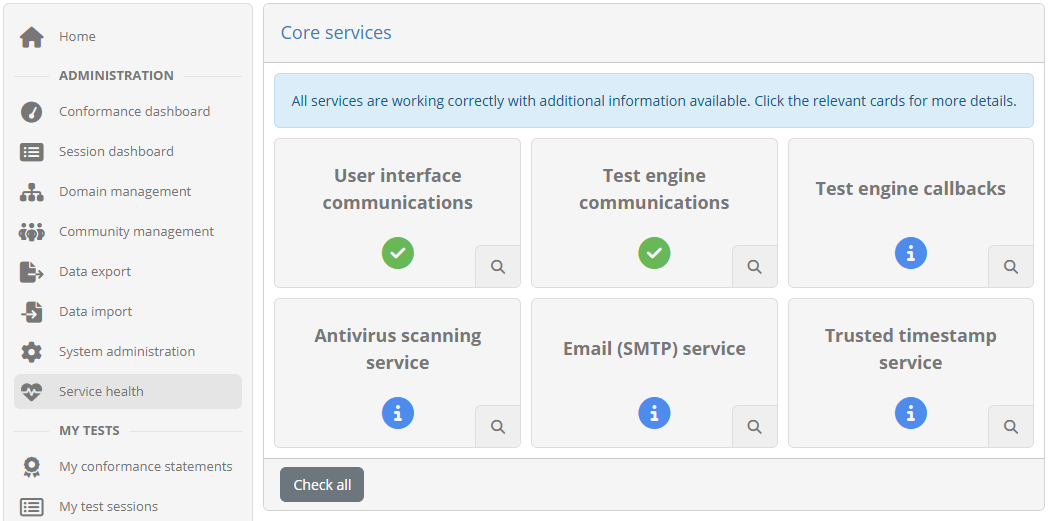
If all status cards displayed here appear as successful or only with information messages, you know that all components are working correctly. From this point on you are free to use the Test Bed as you please. You may now also add a new Test Bed administrator and, once you have logged in with the new account, delete the default one.
Note
First access with SSO enabled: In case you have configured an external identity provider you will need to link your account with the default Test Bed administrator account. To do this:
Access the Test Bed’s welcome page.
Select to migrate an existing account.
Authenticate against your identity provider and then provide the credentials of the default administrator account.
Step 11: Manage the Test Bed
The commands in this section provide a useful cheatsheet for managing your Test Bed instance (using Docker or Kubernetes depending on your case).
Docker installation
The following table lists Docker Compose commands for managing your Test Bed instance. These should be executed from the folder
containing your docker-compose.yml file.
Action |
Command |
|---|---|
View a component’s log file (e.g. |
|
Stop the Test Bed |
|
Start the Test Bed |
|
Update component configurations |
|
Delete the Test Bed (keeping all data) |
|
Delete the Test Bed (removing all data) |
|
Download the latest Test Bed version |
|
If you have a running Test Bed and want to update it to the latest release you would use a combination of the above commands as follows:
docker compose pullto get any latest versions but not make any changes.docker compose downto remove the previous containers but keeping your data.docker compose up -dto create new containers based on the latest downloaded versions (reusing your previous data).
A detailed description on updating a Test Bed instance to the latest release is provided in Guide: Updating the Test Bed.
Kubernetes installation
The following table lists helm and kubectl commands for managing your Test Bed instance. In case you are updating components,
it is assumed you are running commands from the folder containing your override.yaml file.
Action |
Command |
|---|---|
View a component’s log file (e.g. |
|
Stop the Test Bed |
|
Start the Test Bed |
|
Update component configurations |
|
Delete the Test Bed (keeping all data) |
|
Delete the Test Bed (removing all data) |
|
Download the latest Test Bed version |
|
If you have a running Test Bed and want to update it to the latest release you would use a combination of the above commands as follows:
helm repo update itbto download the latest chart definition.helm upgrade itb itb/itb -f override.yaml -n itbto upgrade your installation.
A detailed description on updating a Test Bed instance to the latest release is provided in Guide: Updating the Test Bed.
Summary
Congratulations! You have now prepared and set up a production Test Bed installation. In doing so you installed the tools needed for your installation, configured your instance for its core and optional features, and set up your supporting services.
See also
With a running Test Bed you are now free to start using it to configure your testing strategy and execute tests. Concerning the Test Bed’s use make sure to check out the user guide (for Test Bed administrators). This contains detailed information on how to create your domain, specifications and test suites, as well as register the organisations and users that will be using them to test.
Given that this is a production Test Bed instance, it is likely that you have already configured your domain and community on a development instance. If this is the case keep in mind that you can export your full setup from your development instance and then import it to production. Details on how to do this are provided in the administrator user guide. In the unlikely case you don’t have such a development instance it is strongly advised to use one when building up your test configuration.
For more information on the Docker and Docker Compose tools, commands and properties used in this guide, check out the Docker online documentation. Further information on Helm and Kubernetes can similarly be found in their respective documentation.
Finally, in terms of further guides that would be of interest you should consider:
Guide: Installing the Test Bed for development use for step-by-step instructions on how to install a development Test Bed instance.
Guide: Updating the Test Bed for step-by-step instructions on how to update your Test Bed instance when new releases become available.
Guide: Defining your test configuration for step-by-step instructions on how to setup your test configuration in the Test Bed. Alternatively you can always refer to the Manage test configuration section from the Test Bed’s user guide.
Guide: Installing a validator for production use in case you are planning to install one or more validators alongside your Test Bed instance.
References
This section contains additional references linked to this guide.
Configuration properties
All configuration properties listed in this section are pertinent to the itb-ui component and are defined as environment variables in docker-compose.yml
(when using Docker), or override.yaml (when using Kubernetes). The following table summarises all properties, their purpose, supported values and defaults.
Property |
Category |
Description |
Default |
|---|---|---|---|
|
Antivirus |
Set to |
|
|
Antivirus |
The ClamAV server’s hostname. |
|
|
Antivirus |
The TCP port the ClamAV server is listening on for scan requests. |
|
|
Antivirus |
The timeout (in milliseconds) after which to fail if the antivirus server fails to respond. This is disabled by using |
|
|
Encryption |
The key to use to encrypt user’s session tokens. |
|
|
Authentication |
The cookie path to set for generated session cookies (should be adapted to accommodate reverse proxy mappings). |
|
|
Authentication |
The maximum time (in seconds) that a session will be kept alive if there is no activity. |
|
|
Authentication |
The maximum overall time (in seconds) that a session is allowed to exist without re-authentication. A value of |
|
|
Authentication |
The users’ email property (applicable when LDAP is used for identity management). |
|
|
Authentication |
The users’ first name property (applicable when LDAP is used for identity management). |
|
|
Authentication |
The users’ last name property (applicable when LDAP is used for identity management). |
|
|
Authentication |
The users’ user ID property (applicable when LDAP is used for identity management). |
|
|
Authentication |
The authentication level to enforce when integrated with EU Login. Supported values are |
|
|
Authentication |
The complete URL of the Test Bed instance to redirect back to. This should be set to the Test Bed’s full address postfixed with |
|
|
Authentication |
The OIDC client ID corresponding to the Test Bed (when using an external identity provider via OIDC). |
|
|
Authentication |
The secret configured for the OIDC client ID (when using an external identity provider via OIDC). |
|
|
Authentication |
The distinguished name (DN) for the account to connect to the LDAP server (applicable when LDAP is used for identity management). |
|
|
Authentication |
The password for the account to connect to the LDAP server (applicable when LDAP is used for identity management). |
|
|
Authentication |
The identity provider’s discovery URI (when using an external identity provider via OIDC). |
|
|
Authentication |
Whether or not the Test Bed will use an external identity provider as an SSO solution. |
|
|
Authentication |
Whether or not features relevant to migrating from a non-SSO to an SSO-enabled environment should be activated. |
|
|
Authentication |
The complete URL of the EU Login service (when integrated with EU Login) to redirect to for authentication. |
|
|
Authentication |
The preferred JWS algorithm to use (when using an external identity provider via OIDC). |
|
|
Authentication |
The OIDC response mode to consider (when using an external identity provider via OIDC). This can be empty or set to |
|
|
Authentication |
The OIDC response type to consider (when using an external identity provider via OIDC). This can be |
|
|
Authentication |
The URL to access the LDAP server (applicable when LDAP is used for identity management). |
|
|
Authentication |
The type of identity provider to use when SSO is enabled. This can be |
|
|
Authentication |
The distinguished name (DN) for the group containing the Test Bed’s user accounts (applicable when LDAP is used for identity management). |
|
|
General |
Set to |
|
|
General |
A predefined Master API key for the Test Bed’s REST API to be used upon initial startup instead of generating a random value. |
|
|
General |
The maximum number of test cases for which generating a conformance statement report with test results is allowed. |
|
|
Sandbox setup |
The password with which to open the data archive used to initialise the Test Bed’s configuration (used if setting up a Test Bed instance as a sandbox). |
|
|
Sandbox setup |
A boolean flag that instructs the Test Bed to prompt the user for a manual upload of a data archive at first connection to initialise its configuration (used if setting up a Test Bed instance as a sandbox). |
|
|
Database |
A custom password for the DB user account that is used to connect to the database. This needs to match the database’s |
|
|
Database |
A custom name for the DB schema. |
|
|
Database |
A custom username for the DB user account that is used to connect to the database. This needs to match the database’s |
|
|
Demos |
The database user ID of a specific Test Bed user to be used as a demo user. |
|
|
Demos |
Whether links to demo scenarios should be displayed. |
|
|
The maximum number of attachments allowed to include in contact form submissions. Setting this to 0 or negative disables contact form attachments. |
|
|
|
The maximum total size (in MBs) for attachments. |
|
|
|
A comma-separated list of MIME types corresponding to the types of files that are allowed as attachments in contact form submissions. |
|
|
|
Set to |
|
|
|
Set to |
|
|
|
Set to |
|
|
|
The “FROM” address for support emails (e.g. |
|
|
|
The number of minutes between pending test session email reminders sent to the relevant community mailbox. |
|
|
|
Set to |
|
|
|
The password to use when authenticating against the SMTP server. |
||
|
The username to use when authenticating against the SMTP server. |
||
|
The SMTP server’s host. |
||
|
The SMTP server’s port. |
||
|
Whether the connection to the SMTP server should use an SSL channel. |
|
|
|
In case SSL is enabled, the protocols to use for the SMTP connection. |
|
|
|
Whether the connection to the SMTP server should use the STARTTLS option (initial connection in cleartext and then upgrade to SSL). |
|
|
|
The support team’s email address. |
|
|
|
Guides |
The full address for the guide on how to migrate to EU Login. |
|
|
Guides |
The full address for the guide on how to use EU Login. |
|
|
Authentication |
The name of the HTTP header used to hold the authentication cookie’s path. This can be replaced in case components such as a WAF causes issues with certain header names. |
|
|
Authentication |
The name of the HTTP header used to hold the REST API key authentication token. This can be replaced in case components such as a WAF causes issues with certain header names. Note that if unspecified, the |
|
|
Encryption |
The key to use to sign request digests sent between the itb-ui and itb-srv components. |
|
|
Encryption |
The maximum window (in milliseconds) in which to accept exchanged requests sent between itb-ui and itb-srv. |
|
|
Encryption |
The master password to use to encrypt sensitive values in the Test Bed’s database. |
|
|
Encryption |
Set to |
|
|
Encryption |
When setting the |
|
|
Documentation |
The address to open when the user clicks the “Find out more” link from the footer (if enabled). |
|
|
Documentation |
Set to |
|
|
Proxy |
Set to |
|
|
Proxy |
The proxy server’s host. |
|
|
Proxy |
The proxy server’s port. |
|
|
Proxy |
Set to |
|
|
Proxy |
The password to use when authenticating against the proxy server. |
|
|
Proxy |
The username to use when authenticating against the proxy server. |
|
|
Proxy |
A list of pipe-delimited host names (with wildcards accepted) for which the proxy should be skipped (known internal ITB hostnames are added by default). |
|
|
General |
Whether or not self-registration for public communities is allowed for this Test Bed instance. |
|
|
Documentation |
The address to open when the user clicks on the displayed release number from the footer. |
|
|
Documentation |
Set to |
|
|
General |
The maximum size (in KBs) for uploaded files that are to be persisted in the Test Bed’s database (not email attachments). |
|
|
General |
The maximum time in seconds allowed for web requests before considering them invalid. |
|
|
General |
Whether checking for software version updates and security alerts is enabled. |
|
|
General |
The URL from which software version updates are retrieved. |
|
|
General |
The URL from which the JSON Web Key Set (JWKS), used to validate the update data’s signature, is retrieved. |
|
|
General |
Set to |
|
|
Satisfaction survey |
The address of the Test Bed’s satisfaction survey. |
|
|
Satisfaction survey |
Set to |
|
|
General |
The full link to use to return back to the welcome page if an error occurs (may need to be adapted to accommodate reverse proxy settings). |
|
|
General |
Whether or not the Test Bed is running in |
|
|
General |
The number of days for which test session data will be maintained without being archived. |
|
|
General |
The key of a built-in or custom theme to adapt the Test Bed’s look and feel. The built-in themes are |
|
|
Conformance certificates |
Set to |
|
|
Conformance certificates |
The URL of the TSA server for signature timestamp generation. |
|
|
User guide |
The address of the user guide for community administrators. |
|
|
User guide |
The address of the user guide for organisation administrators. |
|
|
User guide |
The address of the user guide for organisation users. |
|
|
User guide |
The address of the user guide for Test Bed administrators. |
|
|
General |
The web context root for the itb-ui application. |
|