Guide: Defining your test configuration
Track |
|---|
This guide walks you through the process of defining your project’s test configuration.
What you will achieve
At the end of this guide you will have a Test Bed instance with a fully configured setup to allow users to start testing. As part of this guide you will create:
A domain, representing your overall project.
A specification, identifying what your users will be testing against.
A test suite, containing the executable test cases your users can use.
A community, to manage your project’s users.
An organisation, as part of the community to execute tests.
What you will need
About 15 minutes.
A web browser.
A Test Bed instance that you can access via your browser.
The Test Bed user guide (to optionally lookup additional information on each of the described steps).
How to complete this guide
This guide will lead you step-by-step through the interface of a freshly installed Test Bed to define your test configuration. In terms of defining your testing needs and strategy, we will be using the fictional context described in Guide: Creating a test suite. In short, you will be assumed to be part of a cross-border project that is defining a specification for the content of purchase orders that are to be exchanged between EU retailers.
In terms of a test suite to address your project’s testing needs you can follow Guide: Creating a test suite to create it or simply download the resulting test suite from here. This test suite contains a single test case that allows the developers of retailer systems to validate purchase orders via direct upload. Note that if you want to use a more complex test suite you may also use the one resulting from Guide: Basic test case messaging (available here). The overall steps followed by this guide would not differ apart from the test suite archive to be used.
Finally, keep in mind that all the steps you will be following are documented at length in the Test Bed user guide. The current guide provides a guided and condensed version of the documentation considering your specific fictional scenario.
Steps
Carry out the following steps to complete this guide.
Step 1: Log in
The first step is to log into the Test Bed. To do this first access the Test Bed’s welcome page:
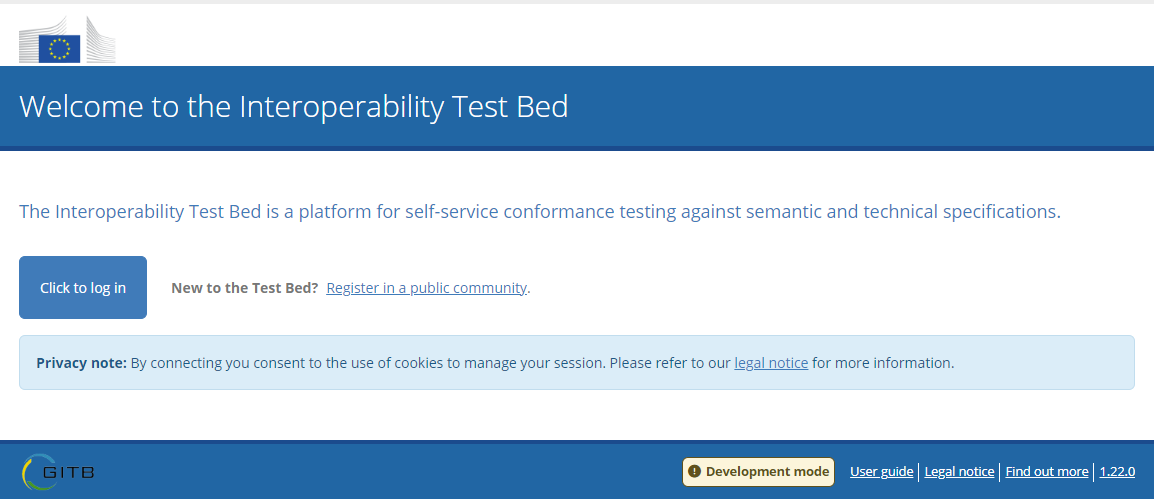
From here click the Click to log in button to be transferred to the login page and enter the default administrator’s credentials.
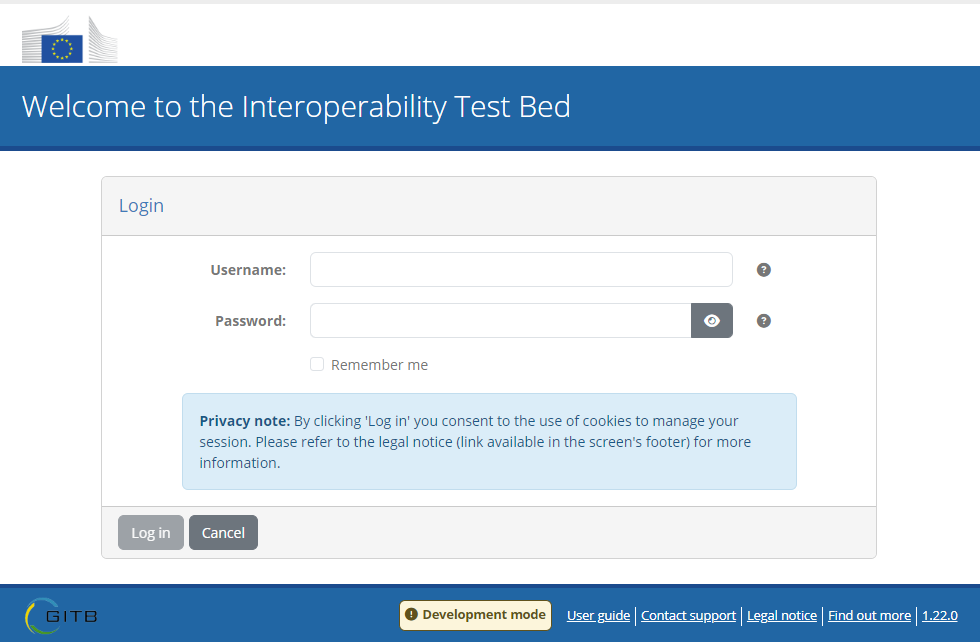
The default administrator’s account is admin@itb which is set with an automatically generated password at startup. The value for this password is printed
in the itb-ui container’s logs that can be inspected using command docker logs -f itb-ui:
...
###############################################################################

The one-time password for the default administrator account [admin@itb] is:

b1afbc39-8ad7-49f4-a9d9-0bcec942aef4

###############################################################################
...
Providing the listed password in the login form will prompt you to replace it, following which you should be greeted with the Test Bed’s empty home page:
Note
Administrator password: If you have already replaced the default administrator’s password use the new password you selected. Otherwise, if this is your first login, you will be prompted to replace it.
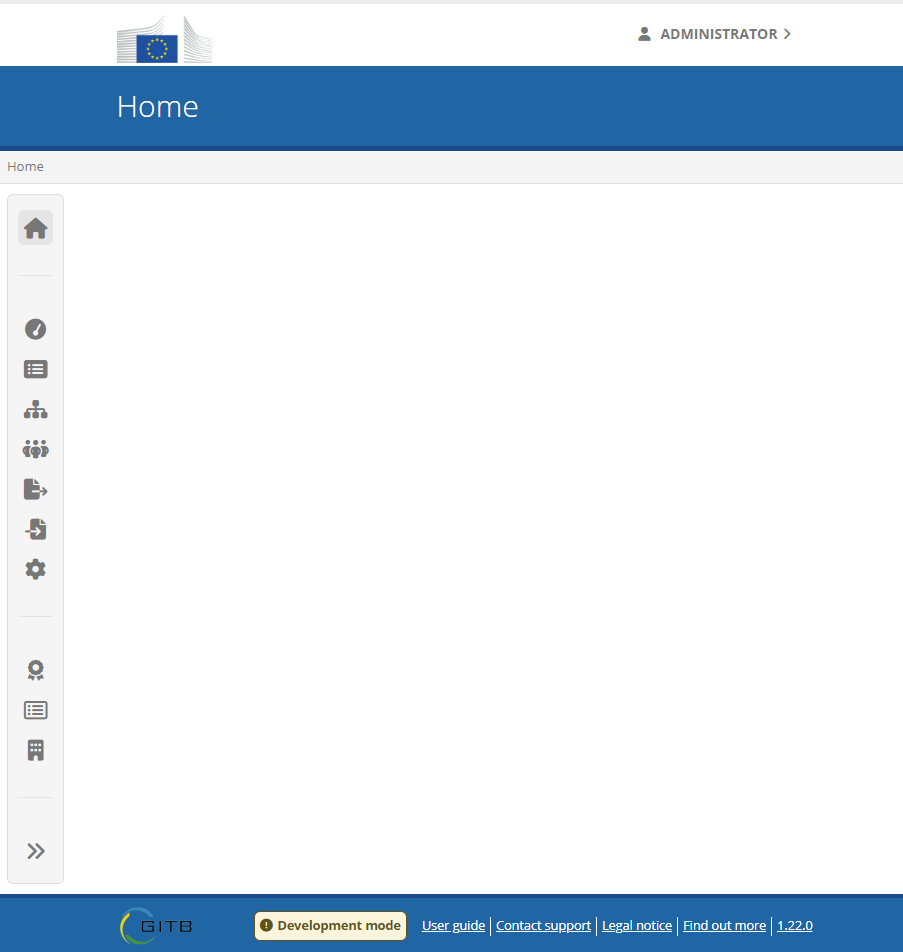
Once logged in you will be greeted with the Test Bed’s landing page (empty for a new installation):
Note
Further info: The Test Bed’s landing page is where you and your users can access all the Test Bed’s features. It also serves as the place to include custom welcome information that can differ per user community or even per organisation.
Check the user guide’s Log in section for more details.
Step 2: Create a domain
From the menu on the left click Domain management (you can also expand the menu entries clicking on the last menu entry). In doing so you have now accessed the (currently empty) list of configured domains.

This is where, as Test Bed administrator, you can view the different domains that are defined. Each of these typically relates to a single project as it serves to group together related specifications. Click on the Create domain button to create one for your project.
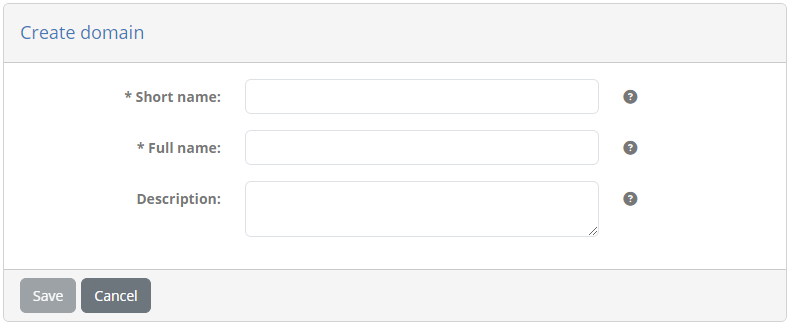
In the resulting form provide the details for your project, specifically:
Short name: EU Purchase Order Project
Full name: EU Purchase Order Project
Description: A project to define the Purchase Order specifications for the electronic exchange of purchase orders between EU retailers
Once ready, click on Save to create your domain. You should now be back on the domain management dashboard where you can see the domain you just created for your project:
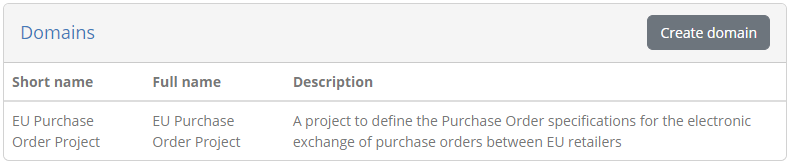
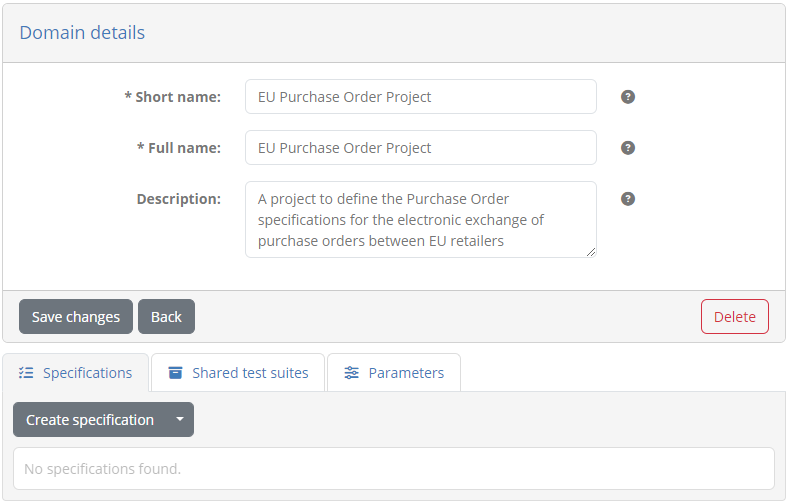
Click the newly created table row that corresponds to your domain. In doing so you will be presented with your domain’s details as follows:
Note
Further info: Domains serve to group related specifications and focus your user’s available options to what interests them. In addition, they represent the place where test suites can be parameterised to match your specific Test Bed instance.
Check the user guide’s Manage test configuration section for more details.
Step 3: Create a specification
Next up we will create an entry for the specification that our project is defining. Note that in this case we will define a single one but in you could also have multiple. It all depends on the different actual specifications your users are able to test conformance for.
Click the Create specification button, following which you will be presented with the form to complete its details:
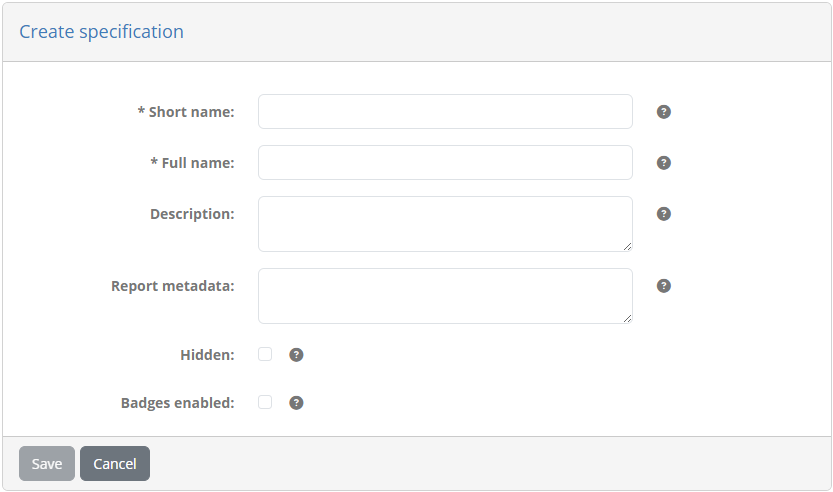
In this form enter the following information:
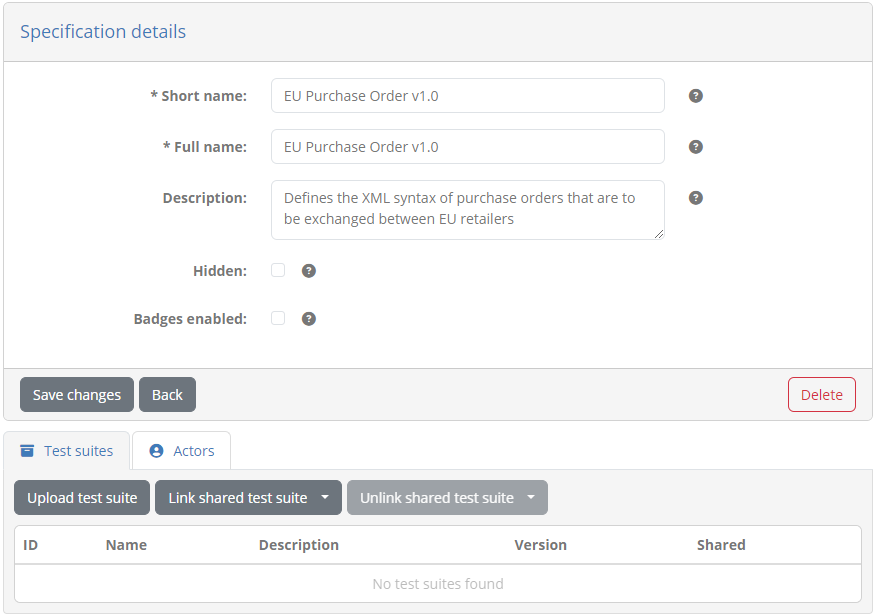
Short name: EU Purchase Order v1.0
Full name: EU Purchase Order v1.0
Description: Defines the XML syntax of purchase orders that are to be exchanged between EU retailers
Finish creating the specification by clicking on Save. You will return to the domain’s details that now also includes the specification you just created.

Click on the newly created table row that corresponds to your specification to view its details:
Note
Further info: A specification matches one-to-one the actual specifications your users will be testing for conformance. This may be a single overall specification or multiple depending on the conformance possibilities available to your users (e.g. you could define a specification per version if you want to support parallel versions). Specifications identify actors and the test suites that will be used.
Check the user guide’s Manage specification details section for more details.
Step 4: Upload a test suite
For the next step you will upload your first test suite. Click on the Upload test suite button and select the test suite ZIP archive you want to upload. For the purpose of this guide use the test suite from Guide: Creating a test suite available here. This test suite defines:
An actor named Retailer.
A single test case named testCase1_upload to allow the validation of purchase orders via direct upload.
Once the test suite is uploaded the specification’s details are updated to include the newly defined test suite:
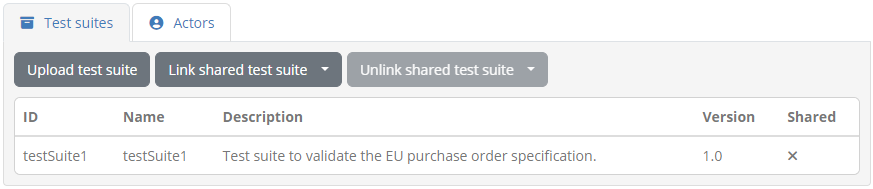
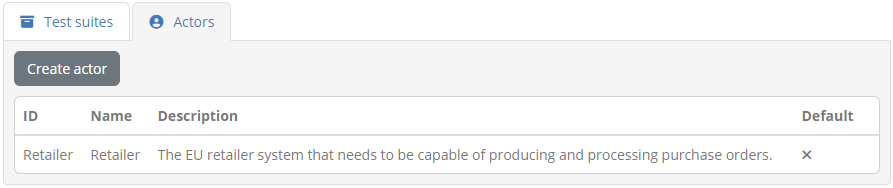
In addition, the test suite’s actor was also automatically created and is visible by clicking the Actors tab.
Note
Further info: At this point you have everything you need to start testing. A typical step from here would be that you first try out the new test suite using the administrator’s test system.
Check the user guide’s Validate your test setup section for detail on how to do this. For the purpose of this guide we will first proceed with the creation of your project’s community to complete the configuration part of your project.
Step 5: Create a community
With the testing setup complete, we will next define a community for our project’s users. First off click Community management from the left-hand menu. Doing so will take you to the (currently empty) listing of communities.

From this screen click the Create community button. This will present you with a form to introduce your community’s information:
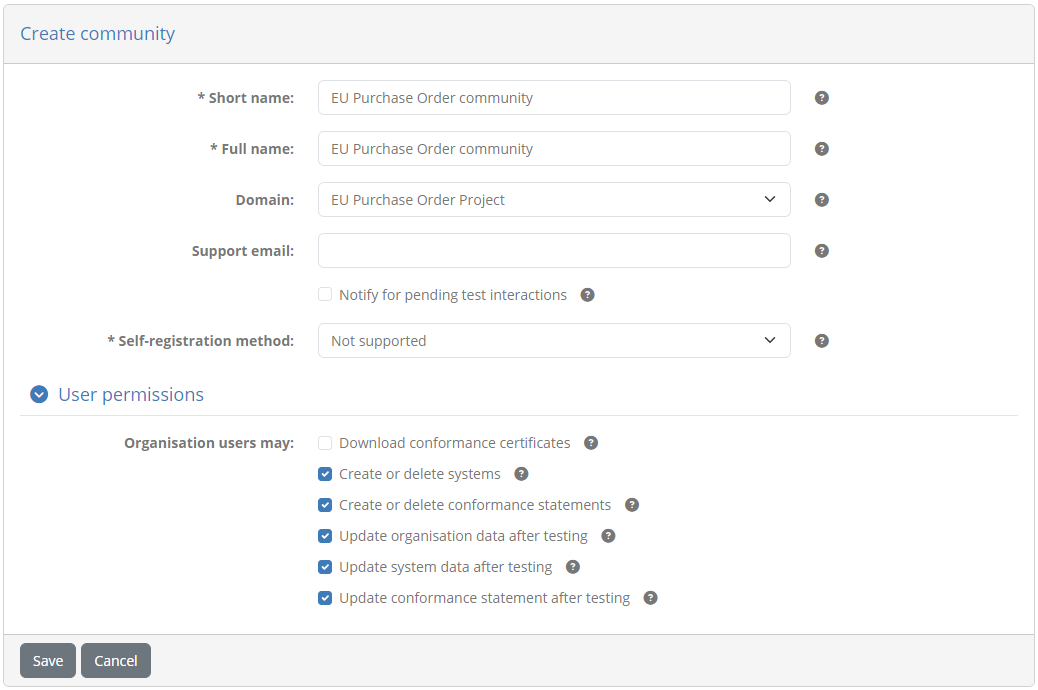
Enter the following information:
Short name: EU Purchase Order community
Full name: EU Purchase Order community
Domain: EU Purchase Order Project
Self-registration method: Not supported
User permissions: Use the default settings
To complete click Save. Doing so will take you back to the community listing where you should now see your new community:

From this table click the table row for your newly created community. Doing so will take you to your community’s detail page:
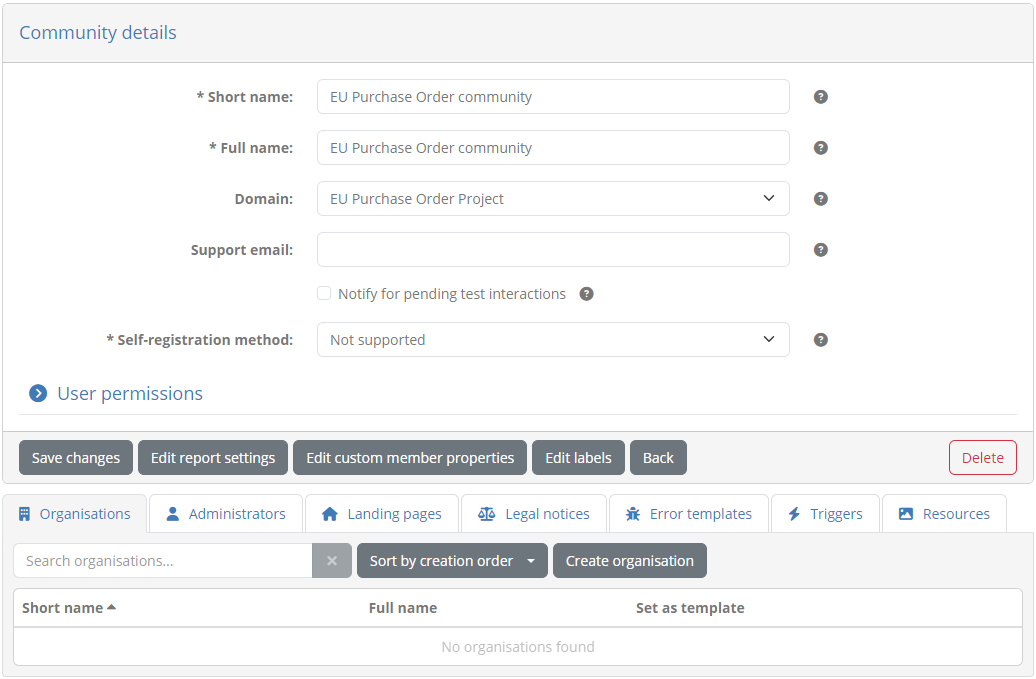
Next up create an administrator account for the new community. A community administrator is responsible for managing the community’s members and test setup. Click on the Administrators tab to view the (currently empty) list of administrators.

Click here the Create community administrator button to complete the administrator’s information.
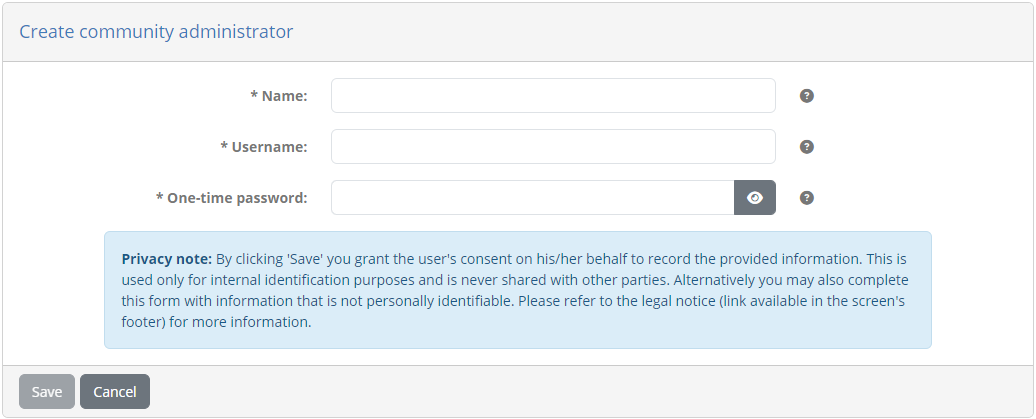
Complete the form as follows:
Name: Jane Doe
Username: admin@po
Role: Administrator
One-time password: admin
Note
Account credentials: The provided password is a one-time password that the user will be prompted to change upon first login.
To complete the creation of the administrator click on Save. You will then be returned to the Administrators tab where you will see the new administrator added to the community:

Note
Community vs Test Bed administrator: You may wonder why we created a community administrator account when we are already connected as a Test Bed administrator. Its true that everything a community administrator can do can also be achieved by a Test Bed administrator. However, a community administrator is part of the specific community and has in several cases easier access to community-specific features. Moreover, if your eventual test setup will be on a Test Bed instance with multiple communities (i.e. a multi-tenant instance) you will likely not have Test Bed administrator privileges. For simplicity in the current guide we will continue as a Test Bed administrator, but it is a good practice for your test development to only use this account to create the domain, community and community administrator account.
As a final setup point for the new community we will add a community-specific landing page that will greet your users. To create this first select the Landing pages tab to view the (currently empty) list of landing pages.

From here click the Create landing page button to complete the landing page’s information:

Provide here the following information:
Name: EU Purchase Order landing page
Default: Checked (i.e. true).
For the content use the editor to add a message such as the following:
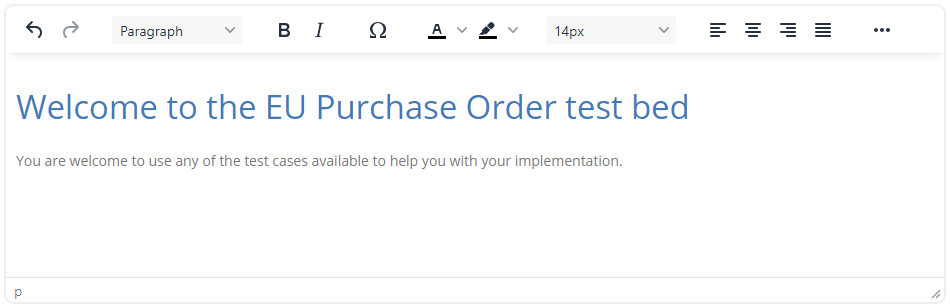
Click on Save to complete. In the confirmation box that appears click Change to confirm that you want to set a new default landing page. Doing so will ensure that all organisations of this community will see the same landing page when using the Test Bed.
Note
Further info: The community detail page provides a single point from which all user management aspects linked to its members can be handled. From here community administrators can be defined as well as community’s member organisations and users. In addition, from here customised information such as landing pages (which we saw) and legal notices can be managed that will serve to personalise the Test Bed for the community’s users.
Check the user guide’s Manage community details section for details on the available options.
Step 6: Create an organisation
As a final step in the initial configuration that we will do, we will create a first organisation for our community. Recall that organisations are the entities that will be testing for conformance that further define their own users and administrators.
From the community’s detail page and specifically the Organisations tab, click the Create organisation button.

Doing so presents you with the form to fill in the organisation’s details:
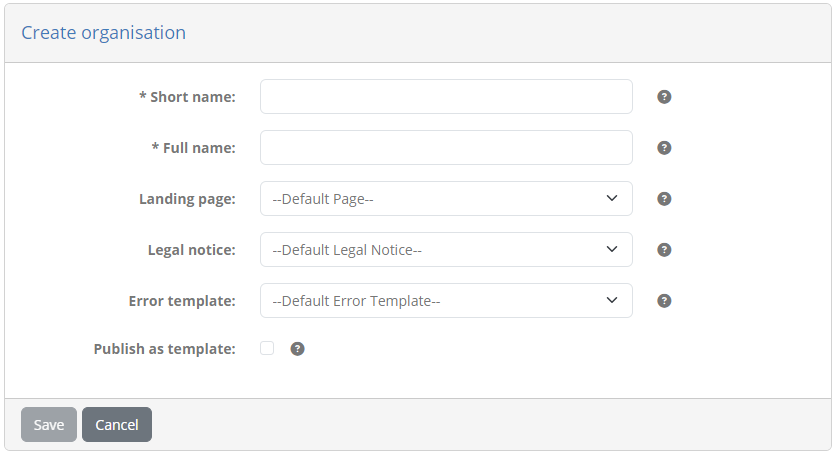
As a first organisation we will introduce a fictional retailer called ACME retailing. Complete its information as follows:
Short name: ACME Retailing
Full name: ACME Retailing
When ready click on Save to create the organisation. Doing so will return you to the community’s detail page where you should see ACME Retailing included in the list of community organisations:

To complete let’s proceed with creating an administrator for this organisation. Click its row from the Organisations table to access its details:
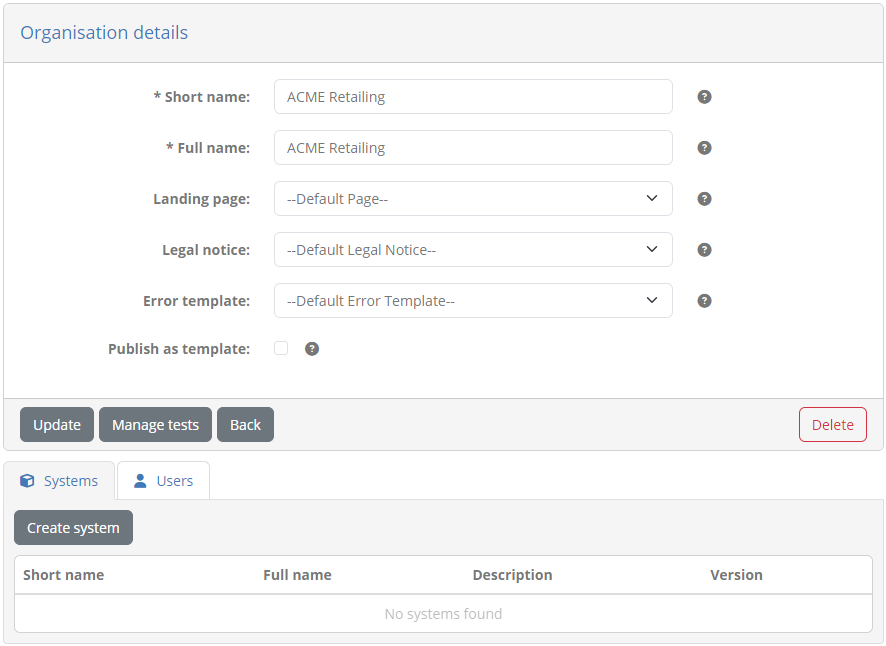
Next click on the Users tab and then on the Create user button. This will take you to a screen to enter the new user’s information:
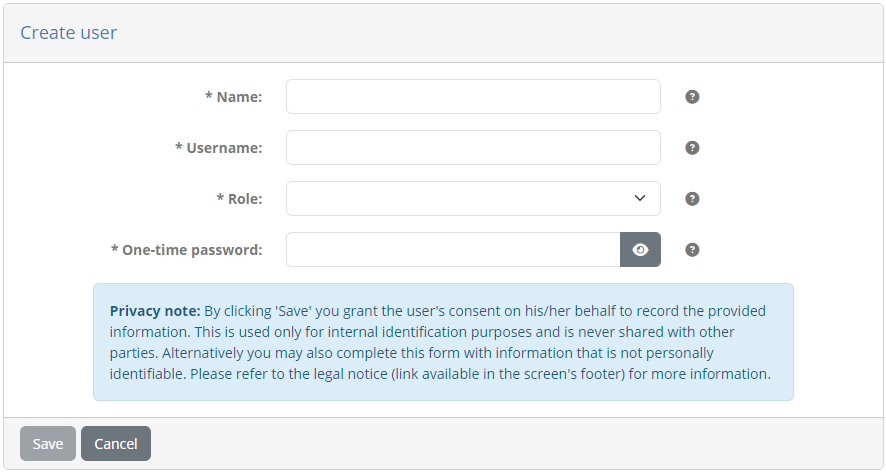
Complete the form as follows:
Name: John Doe
Username: user@acme
Role: Administrator
One-time password: admin
Note
Account credentials: The provided password is a one-time password that the user will be prompted to change upon first login.
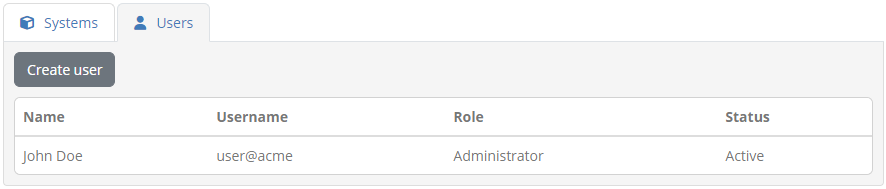
To complete the creation of the user click on Save. You will then be returned to the organisation’s detail page where you will see your new user added to its list of users:
With the creation of the first organisation’s user your initial setup can be considered complete.
Note
Further info: The Test Bed allows you to perform additional actions for organisations such as customising their experience through landing pages or configuring their tests on their behalf. In terms of user roles, organisations may have administrators, to define what they will be testing for, and users to execute and follow-up on tests.
Check the user guide’s Manage organisation details section for details on the possibilities regarding organisations.
Summary
Congratulations! You have just completed the basic setup on the Test Bed to start testing. In doing so you defined details relevant to your project in terms of domain, specification and test suites, as well as a community for the management of your project’s members.
See also
Be sure to check out the Test Bed user guide for further information on the steps you completed as well as the Test Bed’s additional features. A good next step for you from this point would be to try executing some first tests. Check out Guide: Executing a test case that will use the setup you completed here to run a first test session.
When expanding your currently limited test setup you would typically want to create additional test cases to express further testing scenarios and potentially extend the Test Bed’s capabilities to cover domain-specific needs. The following resources offer information to help with this:
Guide: Creating a test suite to create a simple test suite (the one used in this guide).
Guide: Basic test case messaging to create additional test cases involving messaging.
The GITB TDL documentation as the reference to create new test cases.
The GITB test services documentation as the reference on creating Test Bed extensions.