Guide: Deploying preconfigured Test Bed instances
Track |
|---|
This guide walks you through the process of deploying preconfigured Test Bed instances as ready-to-use services. This is achieved through the Test Bed’s sandbox feature, whereby configuration is loaded at startup based on data prepared beforehand by a project’s developers.
Test Bed sandboxes are complete setups including the necessary test configuration and supporting services, with the goal of supporting users’ development and local conformance testing. They can be used as a staging environment before engaging in formal testing on a shared environment, or even to put in place a fully decentralised conformance testing process.
What you will achieve
At the end of this guide you will have defined the setup of a sandbox instance that is ready to be shared with your community’s users. As part of this guide you will:
Create a domain for the sandbox’s test setup.
Create a community with the preconfigured users to be used.
Export your sandbox configuration.
Explore the available setup options for your users.
Note
Using a development instance: Defining a sandbox is best done using a local development Test Bed instance as this gives you full flexibility to define your configuration. In addition, predefining user accounts to be used by your community’s users can only be done in an environment that is not integrated with EU Login (i.e. not the shared DIGIT Test Bed instance).
What you will need
About 45 minutes.
A web browser.
A local Test Bed instance that you can access via your browser. If you don’t have one follow the installation guide to install one.
The Test Bed user guide (to optionally lookup additional information on each of the described steps).
A basic familiarity with Docker to understand the characteristics of the available sandbox installation options.
How to complete this guide
This guide will lead you step-by-step through the Test Bed’s interface to define the configuration for a sandbox. In terms of defining your testing needs and strategy, we will be using the fictional context described in Guide: Creating a test suite. In short, you will be assumed to be part of a cross-border project that is defining a specification for the content of purchase orders that are to be exchanged between EU retailers.
The data configured in a sandbox instance is essentially a community and its linked domain. The definition of the domain in particular can be time consuming and its details fall outside the scope of this guide. If you don’t have an existing domain to work with you can follow Guide: Defining your test configuration and in particular the steps to create the domain, a specification and a test suite. This guide assumes the domain from this guide to be in place however you could easily substitute it with another one.
Steps
Carry out the following steps to complete this guide.
Step 1: Define the sandbox domain
The domain for the sandbox setup defines the specifications that will be made available to your users and the specifications’ test suites that will drive testing.
One additional configuration element that may prove important for the sandbox are domain parameters that represent configuration that applies throughout your specifications and test suites. A good example of such parameters are the endpoint addresses used for services that drive messaging, processing or validation. These should be configured with the values to be used as part of the sandbox, pointing either to external, public services or services that will be made available through the same Dockerised service. It is important to keep in mind that a sandbox instance is an on-premise Dockerised service that contains the core Test Bed components but also any other services that may be needed; the internal addresses of these services (in which container names are typically used as host names) would need to be set up as domain parameters (see Including additional services for further details).
Keep in mind that a sandbox domain configuration doesn’t have to match your normal conformance testing setup. It can define any kind of tests and supporting services (e.g. validators) that may be useful to your users. It could thus be interesting for you to consider defining a separate domain that is specifically used for the sandbox, but of course the final choice is up to you. As mentioned earlier, the steps in defining a domain are considered out of scope here; for a step-by-step guide to do this follow Guide: Defining your test configuration. For the purpose of the next steps we will consider that the domain for the sandbox is named EU Purchase Order Project.
Step 2: Define the sandbox community
Having defined the domain for the sandbox, the next step is to define its community. A community’s normal purpose is to group together the organisations linked to your project, their users, and any additional elements to customise their experience. As this is a sandbox we are configuring we don’t need to foresee multiple organisations but rather a single one that we will preconfigure to allow testing to start immediately.
To begin you will create an empty community linked to your domain. Start by clicking Community management from the left-side menu.

From here click the Create community button to complete the community’s information:
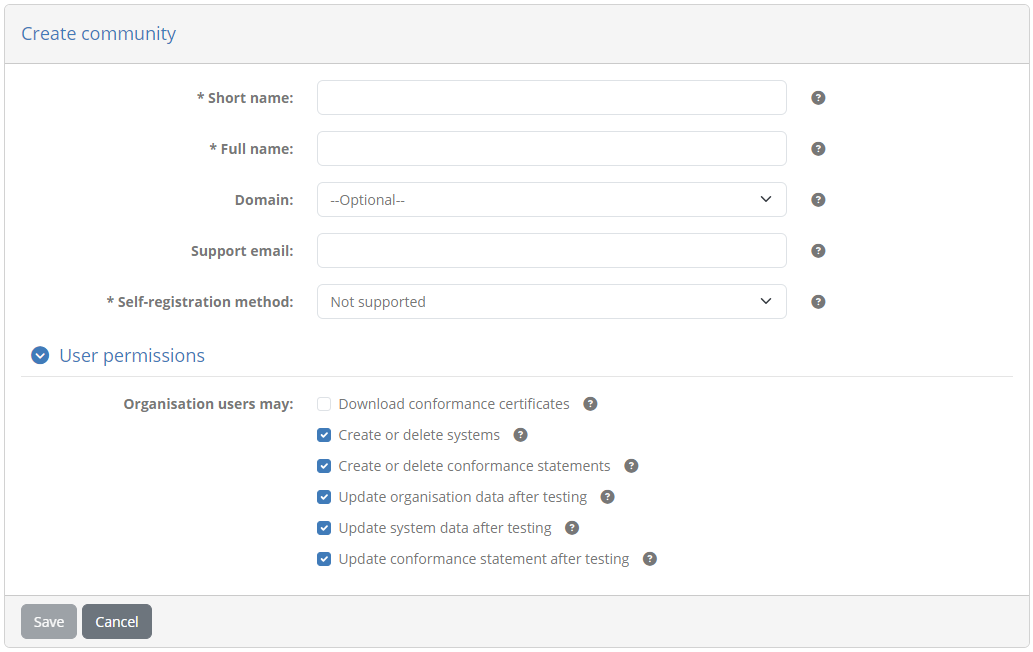
Enter the following information:
Short name: EU Purchase Order sandbox community
Full name: EU Purchase Order sandbox community
Domain: EU Purchase Order project
Self-registration method: Not enabled
User permissions: Use the default settings
Default user preferences: Use the default settings
To complete click Save. Doing so will take you back to the user management dashboard where you should now see your new community:

From this table click the row for your newly created community. Doing so will take you to your community’s detail page:
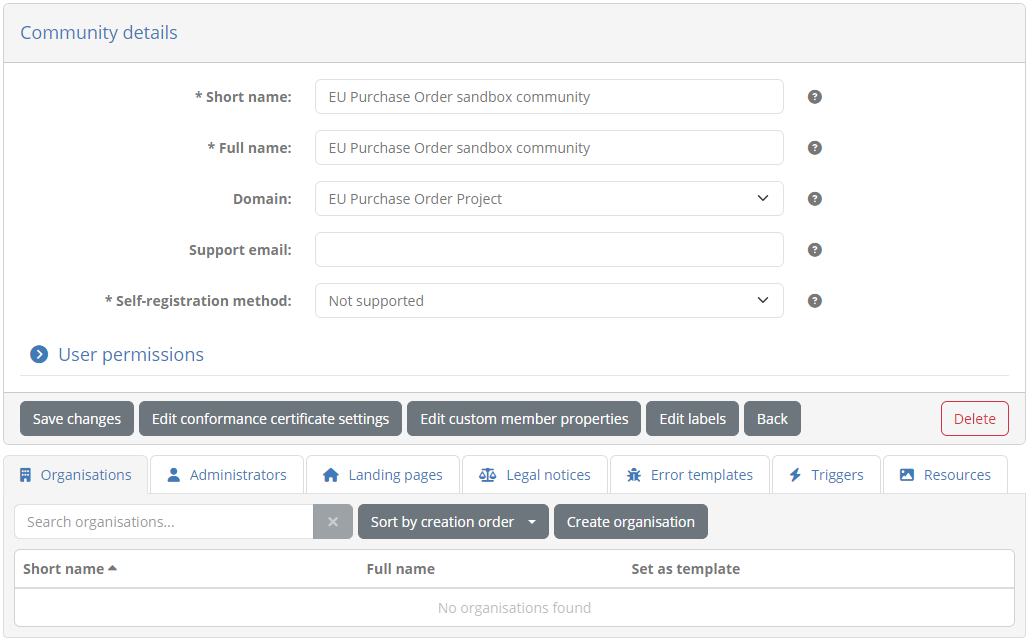
Here we will proceed to add an organisation that your users will use to connect with. Remember that each user will be using their own sandbox instance so only one such organisation is needed. To proceed click the Create organisation button to view the organisation creation form:
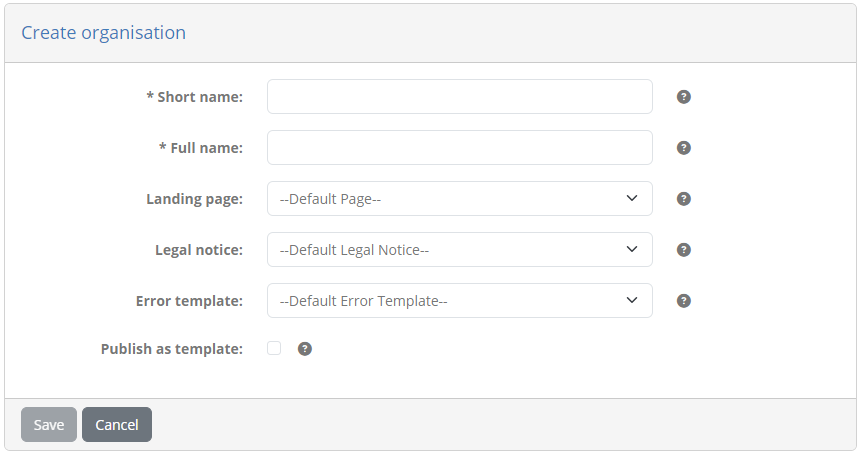
Enter the following information (leaving other information empty):
Short name: Test organisation
Full name: Test organisation
Click Save to finish and return to the list of organisations. This will now include your new organisation.

We will now edit the organisation we just created as we want to preconfigure it for use in the sandbox. The first step will be to link it to the test suites of our domain by creating the necessary conformance statement. Start by clicking the organisation’s row from the table to display its detail page.
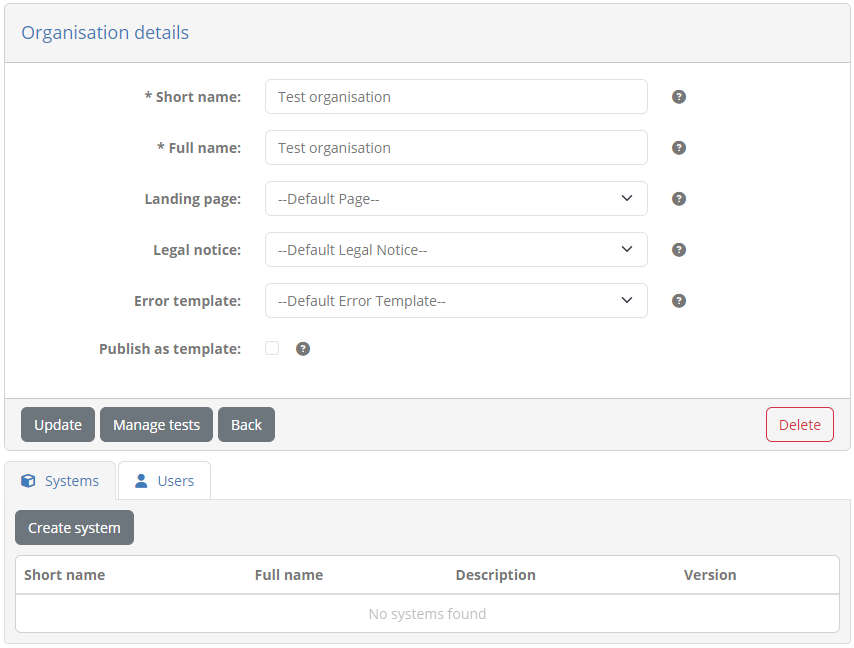
From here click Create system to define a system for the organisation that will be used to link it to conformance statements.
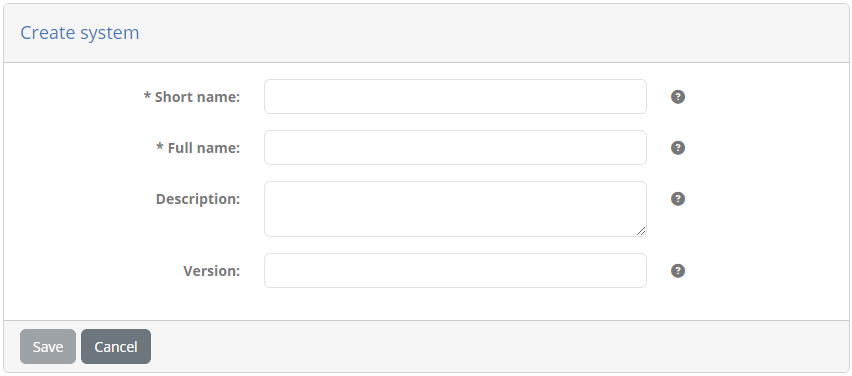
Complete this as follows:
Short name: Test system
Full name: Test system
Description: A system to preconfigure sandbox conformance statements.
Version: 1.0
Click on Save will to finish and display the new system.
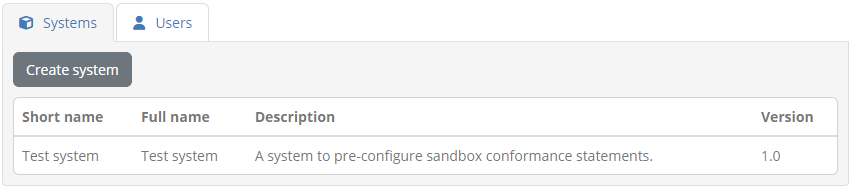
To define the conformance statement click on Manage tests from the organisation details screen. The screen that follows presents the (currently empty) list of conformance statements that define the system’s testing targets.
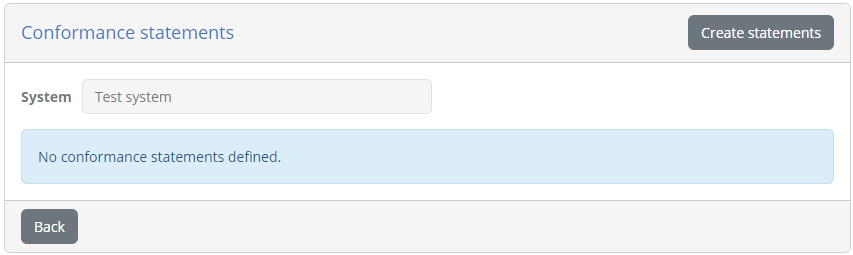
Click on Create statements to create the statement, at which point you will be presented with a confirmation screen to approve it.
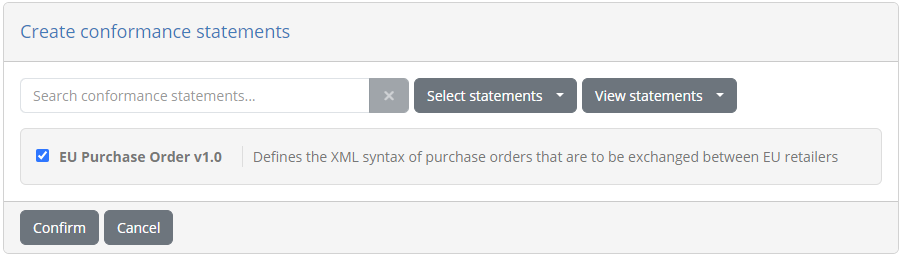
Note that the conformance statement listed here is preselected as your domain defines only a single specification and actor. Click on Confirm to create it and return to the statement listing.
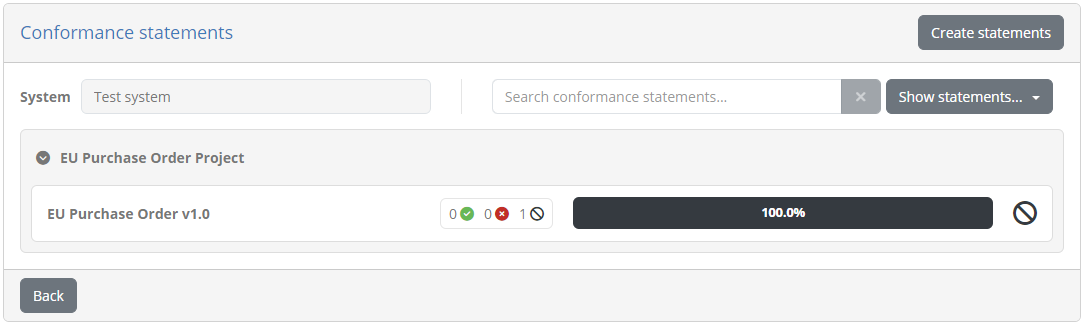
At this point we have finished the test setup and can return back to the management of the organisation by clicking Back. The result of the previous steps was to allow the organisation we previously created to use the test cases configured for our target specification. What remains now is to define a functional user account for the organisation that can be used to log in with.
Switch to the Users tab and click on Create user to view the relevant form:
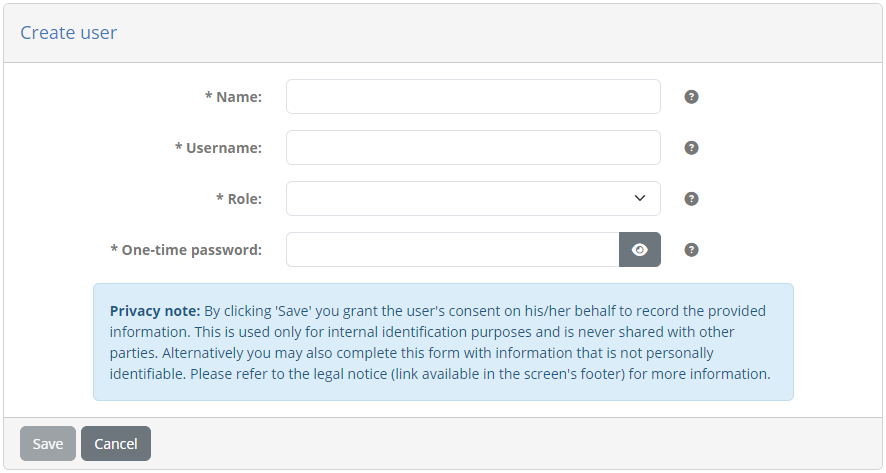
Complete this as follows:
Name: Sandbox user
Username: user@sandbox
Role: User
One-time password: sandbox
Finally, click on Save to complete and return back to list of users.
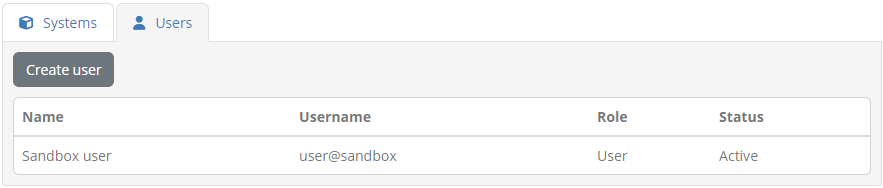
The user you just created is aimed to be a functional account that will be used for all connections once a sandbox instance has been set up. You could of course create additional users with potentially different roles but the steps we followed represent a minimal setup that is sufficient as you have already defined the conformance statement for the organisation (a task otherwise done by an organisation’s administrator). Keep in mind also that the password you provided is a one-time password, meaning that it will need to be changed upon first login. This is reasonable to keep for the sandbox setup to allow each instance to define its own credentials. If however you choose to set a single fixed password to be used you could always log out from your current session and log in using the account you just created, setting the password to the value you want.
As a final step for the sandbox setup we will create a landing page to provide some extra context to your users. To do so go back to the community detail page by clicking Back, and then click the Landing pages tab. This presents the (currently empty) list of landing pages.

From here click Create landing page to complete its information:
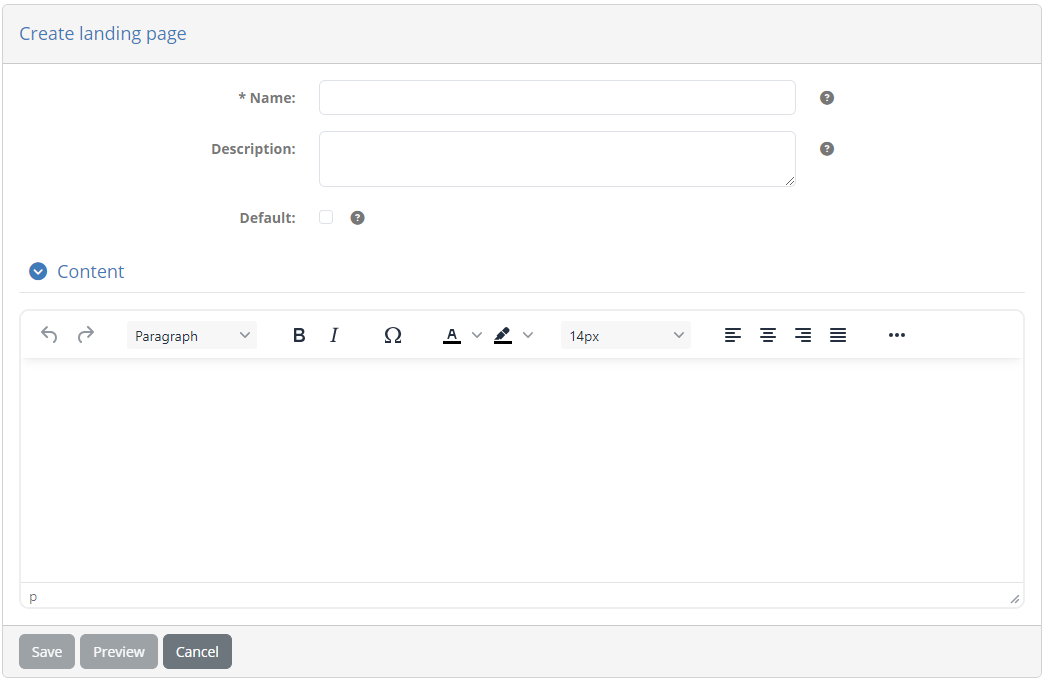
Provide here the following information:
Name: Sandbox landing page
Default: Checked (i.e. true).
For the content use the editor to add a message such as the following:
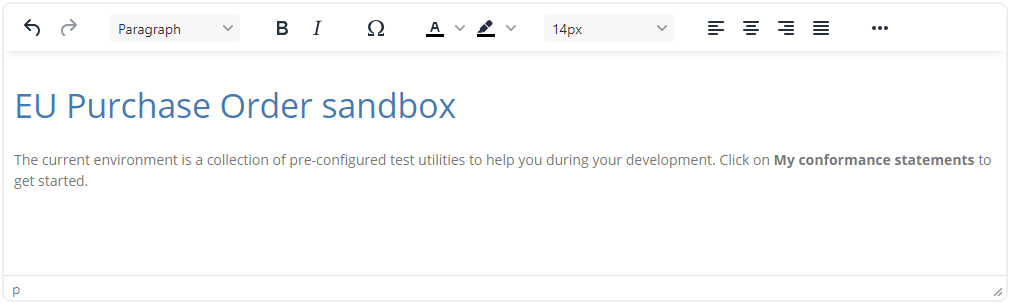
Click on Save to complete and confirm the prompt to set the default landing page for the community.
Well done! You have now completed the test setup for your sandbox environment. Specifically:
You defined a domain containing the tests you want to make available.
You defined a community with a single organisation and user account to allow your users to connect.
You preconfigured the sandbox organisation with a conformance statement so that your users can immediately start testing.
The next step now is to make a snapshot of this data to be used in your sandbox setup scripts.
Note
Extended sandbox configuration: The steps we followed up to this point define a functional account preconfigured to immediately start testing. You are not obliged to follow this approach but can define any combination of domain information, organisations, users and configuration properties. Always keep in mind that the sandbox is simply a Test Bed instance that you deliver to each user that contains a specific set of data. Its up to you to determine how rich the setup is as well as how streamlined the user’s experience in using it will be.
Step 3: Export the full sandbox data
The snapshot’s data is produced by using the Test Bed’s data export feature. Start by clicking on Data management from the left-side menu and selecting Data export.
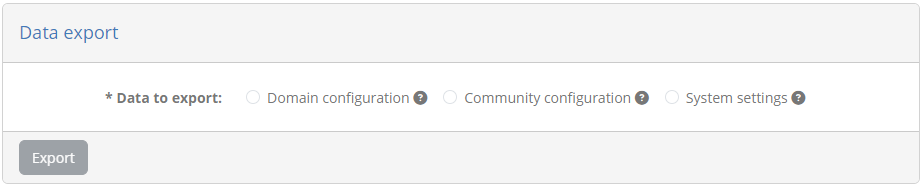
Next up, select the Community configuration option as the type of data to export. A community export is a superset of a domain export and will contain both the data of the community and that of its linked domain. Once the option is checked the screen will expand to provide the additional information needed:
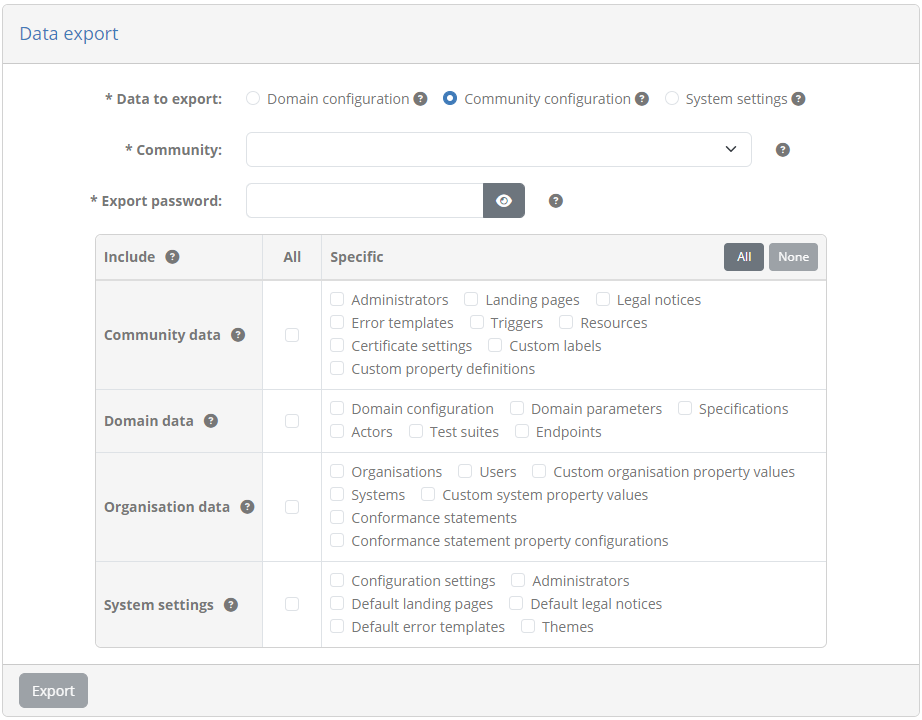
Complete this form as follows:
Community: Select the “EU Purchase Order sandbox community”. This is the community we prepared in the previous step that contains all the data for the sandbox.
Export password: Provide “sandbox” as the password for the archive. This password is used to encrypt the data and will be needed as part of the installation setup.
From the table of data to include select to include all community and domain data.
To finish click on Export. Once ready the data will be provided in a ZIP archive named export.zip that includes the complete
sandbox configuration (you can download a copy of this here).
Note
Test your data archive: The ZIP archive you just exported is the cornerstone of your sandbox setup. Ensure that this is prepared as expected by opening and inspecting it using the password you provided previously.
Step 4: Prepare the sandbox installation
Up to this point you have prepared your sandbox’s configuration and exported it in a data archive. The next step now will be to decide the approach you want to follow to share the sandbox with your users.
Before going into details it is good to remember that a sandbox is essentially a Test Bed instance that comes pre-loaded with a set of data. The Test Bed is installed and operated as a set of Docker containers:
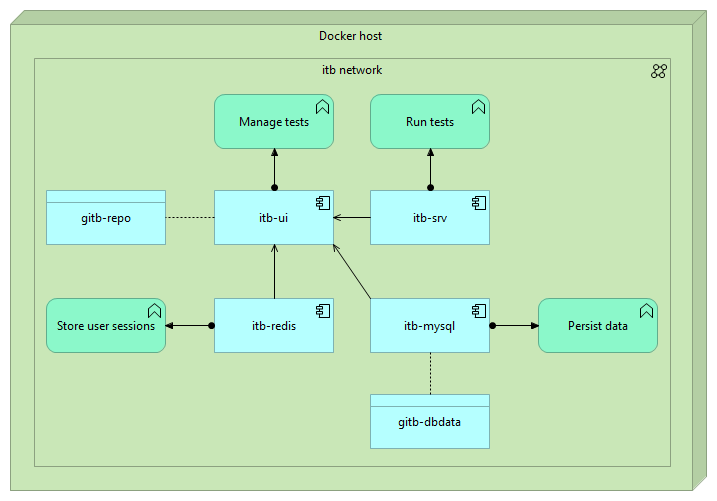
You don’t need to understand the details of each of these containers. The only important point to highlight here is that it is the
gitb-ui container that powers the main Test Bed application and is responsible for managing its data. The options
you have to define how sandbox instances are installed depend on if you want to extend the image for the gitb-ui container and
the approach to load the sandbox data you defined in the previous steps. Three options are available:
The sections that follow highlight when you should consider each approach, and conclude with a comparison to help you select the one that is best for you.
Approach 1: Base Docker image with manual data import
Note
At a glance: This approach does not require any custom Docker images. Setting up the snapshot data requires an initial manual step by the user but works regardless of the user’s operating system.
Following this approach a user will proceed to install the sandbox as a regular Test Bed instance. The difference here is that the Test Bed will prompt the user on first connection to provide the data archive with which to initialise the sandbox’s setup.
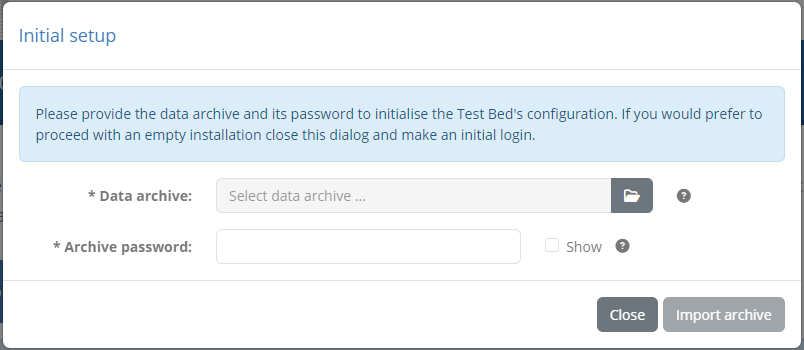
In this dialog the user will need to provide:
The data archive containing the domain and community setup for the sandbox.
The password to decrypt the archive.
Once the import is complete the user can log in using the account you defined for her and is free to start testing.
To set this approach up you will need to adapt the docker-compose.yml script that drives the Test Bed’s installation (see
Guide: Installing the Test Bed for development use). You can download a sample of a basic installation script here.
The adaptation you need to make in this case is to configure the gitb-ui service to expect a data archive upon first connection.
This is achieved by setting the DATA_WEB_INIT_ENABLED environment variable to true:
services:
    ...
    gitb-ui:
        ...
        environment:
            ...
            - DATA_WEB_INIT_ENABLED=true
A full docker-compose.yml example including this is provided here. When you distribute
the sandbox setup to your users you will need to:
Share the modified docker-compose.yml (to enable the discussed environment variable).
Share the data archive to use at first login and communicate its password.
Approach 2: Base Docker image with automatic data import
Note
At a glance: This approach does not require any custom Docker images. Setting up the snapshot data is automated but assumes that the sandbox environment is being set up on an operating system with native Docker support.
This approach is very similar to Approach 1: Base Docker image with manual data import but carries out the initial data import automatically.
The constraint in this case is that to do so the Test Bed, and in particular its gitb-ui container, needs to be able to read the
sandbox’s data archive from the host file system and be aware of its password. Reading files from Docker containers assumes that these
run natively on the host operating system (e.g. Linux) and not via a virtual machine (e.g. non-professional Microsoft Windows versions).
To set this approach up you will need to adapt the docker-compose.yml script that drives the Test Bed’s installation (see
Guide: Installing the Test Bed for development use). You can download a sample of a basic installation script here.
The adaptation you need to make in this case is to load the data archive in the gitb-ui service and provide its password:
services:
    ...
    gitb-ui:
        ...
        environment:
            ...
            - DATA_ARCHIVE_KEY=sandbox
        volumes:
            ...
            - ./data/:/gitb-repository/data/in/:rw
Loading the data archive is done by means of the added volume that mounts the data folder from the current directory to path
/gitb-repository/data/in/ with read/write permissions. This data folder will contain the export.zip archive we defined in the previous
step. The password for the archive is provided by means of the DATA_ARCHIVE_KEY environment variable. A full docker-compose.yml example including
these additions is provided here.
To bundle everything together create a folder named sandbox with contents as follows:
sandbox
├── data
│   └── export.zip
└── docker-compose.yml
From this point, the simplest approach is to ZIP the full sandbox folder and provide it to your users (as e.g. sandbox.zip). A user installing a sandbox instance would thus need to:
Download the sandbox.zip archive and extract it.
Open a command prompt to the sandbox folder (i.e. the folder containing file docker-compose.yml).
Launch the installation by issuing
docker compose pull && docker compose up -d.
Doing so will first download the Docker images for the Test Bed including any additional custom ones you have defined (e.g. validation services). The containers will then be created and, once the Test Bed has been initialised, the sandbox data will be automatically loaded from the data folder. When the user connects she can immediately proceed to log in with the functional account you have defined and start testing.
Approach 3: Custom Docker image
Note
At a glance: This approach is based on you creating a custom Docker image for your users. Setting up the sandbox data is automatic and works on any operating system.
The previously discussed approaches use the base Test Bed Docker images, differing on how the data archive is loaded (manual vs automatic).
A third approach exists that allows for a fully automated installation regardless of a user’s operating system. This is achieved by
extending the Test Bed’s gitb-ui image so that the data archive setup is completed as part of the image’s definition.
The first step is to prepare your custom image. Create a folder (named e.g. gitb-ui-sandbox) to contain your resources as follows:
gitb-ui-sandbox
├── export.zip
└── Dockerfile
File export.zip is the data archive you have previously prepared. The Dockerfile defines how the custom image is built and should contain the following:
FROM isaitb/gitb-ui:latest

COPY export.zip /gitb-repository/data/in/export.zip
ENV DATA_ARCHIVE_KEY sandbox
What we are defining here is rather simple. We are starting from the base Test Bed image isaitb/gitb-ui:latest and extend it in two ways:
The export.zip archive is copied into the image at the needed location.
The archive’s password (“sandbox”) is set as the value of the
DATA_ARCHIVE_KEYenvironment variable.
Once this is in place build the custom image from the gitb-ui-sandbox folder by issuing docker build -t myproject/gitb-ui-sandbox:latest.
Finally, this new image will need to be pushed to an appropriate Docker registry that will be accessible to your users. For example,
pushing to the public Docker Hub, and assuming the myproject organisation already exists and you are already logged in, would be done
using docker push myproject/gitb-ui-sandbox:latest.
With this custom image available what remains is to refer to it from the Test Bed’s installation script (see Guide: Installing the Test Bed for development use).
You can download a sample of a basic docker-compose.yml here. The adaptation
you need to make in this case is to base the gitb-ui service on your custom image (myproject/gitb-ui-sandbox:latest) in place of the
base one (isaitb/gitb-ui:latest).
services:
    ...
    gitb-ui:
        image: myproject/gitb-ui-sandbox:latest
    ...
All that is needed to complete is to share this docker-compose.yml file with your users. To install a sandbox instance a user would need to:
Download the docker-compose.yml file and place it in a folder (named e.g. sandbox).
Open a command prompt to the sandbox folder (i.e. the folder containing file docker-compose.yml).
Launch the installation by issuing
docker compose pull && docker compose up -d.
Doing so will first download the required base and custom Docker images. The containers will then be created and, upon initialisation, the sandbox data will be automatically imported. When the user connects she can immediately proceed to log in with the functional account you have defined and start testing.
Note
Updating your custom image: To apply new Test Bed releases to installed sandboxes you would need to rebuild and push your custom image. When users pull updates and recreate their sandbox containers there will be no unwanted double processing of the configured sandbox archive given that the volume on which this was initially stored will not be further modified.
Which approach is best for you?
As you see from the previous sections there are different sandbox setup approaches that need to be judged against a project’s needs. In doing so it is important to consider the pros and cons of each approach to determine which one would be the best fit for you.
Approach 1: Base Docker image with manual data import can be applied regardless of target operating systems but requires your users to make an additional manual step before using the sandbox. A characteristic of this approach which may be important for you, is that the installation process doesn’t foresee the configuration in setup scripts of the data archive’s password, nor is the password retained as an environment variable. This could be a positive point if you expect to work with a limited number of trusted users to whom you securely communicate the password. If however you plan to share the sandbox to numerous users the fact that you need to communicate the password could even become a negative point if you resort to sharing it insecurely (e.g. via email or wiki post).
Approach 2: Base Docker image with automatic data import offers an improvement over a manual import of the sandbox data as it enables an automated installation process. The negative points to consider in this case however are the fact that the automation does not work for all target environments and that the password for the data archive is provided in the docker-compose.yml file.
Approach 3: Custom Docker image figures as an improvement over both other approaches given that
it enables an automated installation regardless of target environments. In addition, it improves the management of the
archive’s password given that it is not directly exposed to users (either to be provided manually or recorded in the docker-compose.yml file).
One potential drawback of this approach however is that it requires the community’s administrators to publish the
custom gitb-ui image and rebuild it for new Test Bed releases. Having said this however, the flexibility gained by
managing potentially numerous sandbox setups as tagged Docker images could be important and outweigh any
minor maintenance overheads.
So which setup approach is best?
Typically the best approach for providing a sandbox setup is by means of a custom Docker image (i.e. approach 3). This way the setup process is fully automated, data import details are hidden, and you can manage in a more powerful way multiple different sandbox versions. The overhead drawback of creating and publishing the custom image would likely be negligible given that you most likely would anyway need to share additional services such as validators and messaging services. Consider the other approaches if you rely only on the base Test Bed images, choosing the approach (manual or automatic) that best matches your requirements and users’ environments.
Including additional services
Regardless of the approach selected to make available the sandbox to users, a common concern is the sharing of any additional services that are needed. Such services could include:
Custom validation, messaging or processing services that are used to realise test case steps.
Simulators or reference implementations, generally any software built by you that plays a part in testing.
Third party software such as message brokers and databases.
What is needed in your sandbox setup, if anything, depends completely on your needs. In addition, how such additional services are made available and/or installed by users can vary significantly. As an example consider that you may need to include:
Services that are publicly available and accessible without any setup.
Services that should be ran as Docker containers and can be included in the sandbox’s docker-compose.yml definition.
Services whose installation is fully independent but that are made accessible to the sandbox.
Regardless of the nature and installation of these services you should keep in mind that your sandbox should ideally come preconfigured with everything needed to start using them. In other words, once a user installs a sandbox instance, she should be able to immediately log in and start testing without being concerned of administration screens and additional configuration.
As an example consider the possibility of your test cases relying on a custom validation service to validate content. Your test cases
would include verify steps of which the handler attributes would point to the service’s endpoint address. Following
good practices you would define this address as a domain parameter named serviceAddress, used in your verify steps
as handler="$DOMAIN{serviceAddress}".
To ensure sandbox instances are ready to use upon installation, the value of the serviceAddress parameter would need to be
preconfigured and set accordingly. If the validator is defined within the docker-compose.yml script as a service named
my-validator, the value of the domain parameter should already be set as e.g. http://my-validator/api/validation?wsdl. This value
would be configured as part of the domain setup (see Step 1: Define the sandbox domain) and then exported as part of the
sandbox’s data (see Step 3: Export the full sandbox data).
Note
Test your sandbox setup: Needless to say you should always test your sandbox setup before sharing it with your users. Run the installation process as a user would and make new iterations whenever you find a point that can be further streamlined.
Summary
Congratulations! You have just configured your first sandbox setup that you can now share with your users. In doing so you defined the data of the sandbox in terms of its domain and community, including a functional account for your users to log in with. You then exported the sandbox data and used it to prepare the installation process, choosing the approach that best fits your needs and users’ environments.
See also
Be sure to check out the Test Bed user guide for further information on the steps you completed as well as the Test Bed’s additional features. For further information on setting up the sandbox data you can check Guide: Defining your test configuration, whereas Guide: Executing a test case guides you through the steps of executing the configured test cases (as your users will do when using their sandbox). If you want more information on how test cases are created check Guide: Creating a test suite for the basics and Guide: Basic test case messaging for more advanced features.
This guide also talked in Step 4: Prepare the sandbox installation about the installation process for sandbox instances. If you want further details on the base Test Bed installation check Guide: Installing the Test Bed for development use, with Guide: Updating the Test Bed explaining how to apply updates.
Finally, for in-depth technical information on the definition of test cases and supporting services you can always refer to the online reference documentation:
The GITB TDL documentation for test cases.
The GITB test services documentation for Test Bed service extensions.