Manage your community
The Community management screen is the place where you can manage your community’s organisations and users. It can be accessed by clicking the relevant link from the menu, which presents you the screen listing your community’s information.
The screen is split in two sections:
The Community details section presenting to you the information for your community.
Tabs listing additional data linked to the community.

The information grouped in the provided tabs include:
The Organisations section in which you can view and manage your organisations.
The Administrators section allowing you to view and manage your community administrators.
The Landing pages section listing the landing pages you can use for your organisations.
The Legal notices section listing the legal notices you can display for your organisations.
The Error templates section listing the error message templates used to display unexpected errors to your organisations.
The Triggers section listing the triggers used to automate processes upon specific events.
The Resources section listing the resources referenced in documentation and other rich content.
The Community details section allows you to view and edit your community’s basic information.
The information you can edit in this form is:
Your community’s short and full name (required). These are visible to the Test Bed administrator and in certain user reports.
Your community’s support email address (optional) to receive contact form submissions.
Your preference on allowing self-registration for your community.
The user permissions you foresee for the community’s members (initially collapsed).
Here you can also view the community’s REST API key that is used to identify the community when managing test suites via the Test Bed’s REST API (if enabled by the Test Bed administrator). This is an automatically generated key that can be copied to your clipboard using the provided copy control.
Regarding the support email, this is the address, typically a functional mailbox, where your community users’ feedback is sent via the Test Bed’s contact form (see Contact support). If you configure this email address, it will be used as the recipient of submissions, with the Test Bed default functional mailbox added in CC. If not configured, submissions will only be delivered to the Test Bed default functional mailbox. You can also check here the Notify for pending interactions option so that alerts are sent to the mailbox if test sessions are pending for administrator verification.
Note
When to configure a support email: If you have a large user community and expect to have frequent user interactions it is highly advised that you configure your own support email. This is important since most questions would typically relate to your community’s test cases and specifications rather than the Test Bed software itself. The Test Bed team will most likely not be able to answer domain-specific questions and your users would experience unnecessary delays. On the other hand you would leave this unconfigured if your testing activities are limited, to benefit from the Test Bed’s helpdesk without setting up your own.
Assuming you have defined a support email, the contact form submission messages are formatted in HTML such as the following sample.
Received messages include the following information:
The user’s name, identifier and preferred contact address.
The related organisation’s identifier and name, as well as your community’s identifier and name.
The type of the message and the message itself.
Any attachments that the user has included.
The self-registration method is another point that merits further details. This setting determines whether users can themselves register new organisations in your community through the Test Bed’s welcome page. The possible values for this are as follows:
Not supported: Disables self-registration. By selecting this only you as community administrator will be able to register organisations.
Select from public communities: This will allow self-registration to all, effectively making your community a public one.
Select from public communities and provide token: This will display your community as available for self-registration but will require the provision of an additional text token as a “community password”.
Selecting any value other than Not supported will expand the community details’ form to provide further configuration options under section Self-registration settings. These are:
Self-registration token: This is displayed if the third option is selected that requires a token being provided to complete the self-registration. The value you provide here is the “community password” that self-registration users will need to provide.
Token help text: In case token-based self-registration is selected you can also use this to specify a short help text that will be displayed to users next to the token input. This can include simple formatting and hyperlinks to allow you to reference an email address or link to an online resource.
Description: This is a descriptive text for the community that will accompany its display in the self-registration form as one of the available communities. The purpose of this is to provide a short summary of what this community offers to potential users. If the community is linked to a domain you have the option of replicating the description from the domain by checking the Same as domain checkbox. You may alternatively provide a different description if this is more suitable.
Self-registration notifications: This option is available if the Test Bed supports email notifications and if the community defines a support email. Checking this will send a notification email to the configured support mailbox whenever there is a new registration.
Self-registration restrictions: This allows you to select a means of restricting self-registration to ensure people and/or organisations enroll only once. The restrictions you can set are to not allow multiple registrations from the same user (based on her email address) or from the same email domain. Note that such restrictions are only supported if the Test Bed is integrated with EU Login that allows the Test Bed to be aware of users’ actual email addresses.
Require from users: These are requirements that you want to enforce to users completing the self-registration process. You have two options here, the first one being to force the selection of a configuration template and the second one to require the completion of custom properties marked as required (which are otherwise displayed as required but are not blocking).
Note
Organisation templates: If you choose to enable self-registration for your community you may also find interesting the possibility to define preconfigured templates for organisations.
Finally, the user permissions section allows you to customise the permissions available to the community’s members. To display (or collapse) this section click on the section’s header. Doing so will present the available permission options
The available permission options are as follows:
Download conformance certificates. If not allowed, only community administrators may generate such certificates from the conformance dashboard or a conformance statement detail page.
Create or delete systems. Note that if this is not allowed, editing a system and its custom properties (if defined) will remain possible for organisation administrators.
Create or delete conformance statements.
Update organisation data after testing. If not allowed, an organisation that has performed at least one test session will not be allowed to edit its organisation information or its custom properties (if defined).
Update system data after testing. If not allowed, a system for which a test has been performed will not be allowed to have its information or custom properties (if defined).
Update conformance statement after testing. If not allowed, it will not be possible to delete or change the parameters of a conformance statement for which tests have been made.
View community test history. If allowed, organisation users will be able to have a readonly view of all other community members’ completed test sessions and reports.
Manage test sessions via REST API. If allowed, the community’s organisations will be able to launch, stop and query the status of tests via the Test Bed’s REST API. This is option will be listed only if the Test Bed’s administrator has enabled use of its REST API.
In case you choose to set permissions linked to tests having been executed, you may find yourself in a position needing to allow changes due to misconfigurations. Instead of changing the permissions for the entire community a better approach is to delete the specific test sessions that should be ignored. This is possible for community and Test Bed administrators through the session dashboard.
Note
When to set user permissions: You would restrict user permissions in your community if you want to make sure that only you can manage systems and conformance statements or if you want to ensure that once testing starts no data is changed. This also works well when you have enabled self-registration and require the selection of a configuration template. This way you ensure only predefined and non-editable conformance testing setups for your users.
To persist any changes you have made in the community detail form click the Save changes button. Navigating away from this page will discard any pending changes. In terms of additional features available here:
The Edit report settings button is addressed in section Edit report settings.
The Edit custom member properties button is addressed in section Edit custom member properties.
The Edit labels button is addressed in section Edit labels.
Manage organisations
The Organisations tab presents to you the organisations that are defined as members of your community. These are displayed in a table with one row per organisation, displaying for each organisation its short and full name. The table is paged and sorted by default based on the organisation’s short name, however the sorting can be adapted by clicking on the desired column’s header for an ascending or descending sort. For each organisation you also see whether or not this is defined as configuration template for self-registration in which case the name of the template is presented.
The displayed organisations can be filtered using the search control provided above the table. To apply filtering click the control, enter a text and then click on the search icon. This filtering will be applied in a case-insensitive manner on the organisation’s details. To the right of this you have a dropdown list that allows you to sort based on creation order. Such sorting is by default not applied, but you can choose to sort the organisations in an earliest created first or latest created first manner to refresh the display. Note that while sorting by creation order, you will not be able to sort by clicking on the table’s headers. To enable this again you will need to first disable creation order sorting.
On the right end of the controls you are provided with the Create organisation button, allowing you to add a new organisation to the community. Finally, each organisation’s row can be clicked to proceed to view and edit its details.
Create an organisation
To create a new organisation click on the Create organisation button from the section’s header.
Doing so presents you with the screen to enter the new organisation’s details.
In this screen you are expected to enter the following information for the organisation:
Its short name (required), used in list displays.
Its full name (required), used in detail screens and reports.
Its landing page (optional), presented to its users upon login.
Its legal notice (optional), presented to its users when they click the Legal notice link from the screen footer.
Its error template (optional), used to format unexpected errors presented to its users.
Whether it should be published as a template (optional), as an option during self-registration if enabled for your community. Checking this will also prompt you for a template name to display to users.
Regarding the landing page, legal notice and error template, these are presented as a choice of the ones defined for your community (see Manage landing pages, Manage legal notices and Manage error templates respectively). If no selection is made then the default settings for the community are used, falling back to the Test Bed’s overall defaults if none are defined for the community. Defining these at the level of the organisation allows you to present customised messages and content per organisation and is left fully at your discretion as community administrator.
If your community includes other organisations you are also presented here with an option to copy the test setup from one of them as a source. Selecting one will replicate the selected organisation’s systems and conformance statements for the new organisation.
Once another organisation is selected to copy from, you are also presented with additional options to include:
Organisation properties: To also copy any additional organisation-level properties that the source organisation defines.
System properties: To also copy any additional system-level properties for replicated systems.
Conformance statement configurations: To also copy any of the source organisation’s configuration parameters set on its systems’ conformance statements.
If your community foresees additional organisation properties, and as long as you are not copying the properties from another organisation, you will also see an Additional properties section. Clicking this will expand it to allow you to manage the organisation’s properties.
Configured properties can be simple texts, secret values (e.g. passwords) or files for which, if supplied by you, you will also see a help tooltip to understand their meaning. Such properties can be edited as follows:
For texts through an editable text field or dropdown select (for preset values).
For files using the upload button. Once one is selected you can download or delete it.
For secrets a read-only text field indicates whether a value is currently set. Provide a new value by checking Update which makes the text field editable. While editing you can also toggle the display of typed characters.
Note
Required properties are marked with an asterisk. It is is not mandatory to fill these in when providing the organisation’s information but as long as required properties are missing it will not be able to launch tests.
To complete the creation of the new organisation click Save. Clicking on Cancel discards pending changes and returns you to the previous screen.
Note
Defining a template organisation: Using the Copy test setup option you could define a special purpose organisation that is configured in terms of its systems and conformance statements as you would expect all your organisations to be. This can be especially beneficial in cases where your organisations will be expected to define multiple systems (e.g. “Development”, “Integration”, “Acceptance”) or where you have numerous individual specifications. Using this approach enhances consistency and greatly reduces configuration effort.
In addition, such templates can also be made publicly available to users during self-registration through the Publish as template option.
Manage an organisation’s details
To manage an organisation’s details click its corresponding row from the Organisations table displayed in the Community management screen.
Doing so presents you with the organisation details page that is split in the following sections:
The Organisation details section, displaying the organisation’s information and allowing it to be edited.
The Systems tab, displaying the list of systems registered for the organisation (see Manage an organisation’s systems)
The Users tab, displaying the list of users for the organisation (see Manage the organisation’s users).
The REST API keys tab, visible if the Test Bed’s REST API is enabled by your Test Bed’s administrator, allowing you to view and manage the organisation’s API keys (see Manage the organisation’s REST API keys).
The Organisation details section displays the organisation’s information in an editable form in which you can modify its short name, full name, landing page, legal notice and error template. You can also adapt whether or not this organisation will be listed during self-registration as a published template.
If your community includes other organisations you are also presented here with an option to copy the test setup from one of them as a source. Selecting one will replicate the selected organisation’s systems and conformance statements for the new organisation. Note that in doing so the systems and conformance statements already defined will be removed.
Once another organisation is selected to copy from, you are also presented with additional options to include:
Organisation properties: To also copy any additional organisation-level properties that the source organisation defines.
System properties: To also copy any additional system-level properties for replicated systems.
Conformance statement configurations: To also copy any of the source organisation’s configuration parameters set on its systems’ conformance statements.
If your community foresees additional organisation properties, and as long as you are not copying the properties from another organisation, you will also see an Additional properties section. Clicking this expands the section allowing you to manage the organisation’s properties.
Configured properties can be simple texts, secret values (e.g. passwords) or files for which, if supplied by you, you will also see a help tooltip to understand their meaning. Such properties can be managed as follows:
For texts the current value is presented in an editable text field or dropdown select (in case of preset values).
For files the Upload button is used to select a new file, whereas if one is already set you can download it by clicking on its link, or delete it by clicking Remove.
For secrets a read-only text field indicates whether a value is currently set, whereas to provide a new value you check Update. When providing a new value you can also toggle the display of the typed characters.
Note
Required properties are marked with an asterisk. It is is not mandatory to fill these in when providing the organisation’s information but as long as required properties are missing it will not be able to launch tests.
To change the organisation’s information edit the displayed values and click the Update button. The organisation can also be deleted from here by clicking the Delete button. Doing so will, following confirmation, delete the organisation and its dependent information (e.g. users). The Back button will discard any pending changes and return you back to the community management screen. Finally, the Manage tests button allows you to manage the organisation’s test configuration (see Manage the organisation’s tests).
Manage the organisation’s tests
An interesting option available from the organisation’s detail screen is the Manage tests button. This allows you to configure the organisation’s test setup, including its systems (see Manage an organisation’s systems) and conformance statements (see Manage your conformance statements). You can even proceed to complete a system’s configuration parameters used in test cases (see Provide your system’s configuration) and also execute tests on behalf of the organisation (see Execute tests). When you click the Manage tests button you will be directly taken to the organisation’s conformance statements.
Through this screen you are effectively taking on the role of an administrator for the organisation. To highlight the fact that these are the statements of an organisation in your community, rather than your own admin organisation, the navigation breadcrumb highlights the organisation you have selected from within your community. In addition, the overall interface’s banner will still display as “Community management” rather than “My conformance statements”.
Note
Managing your organisations’ test setup on their behalf
Using the Manage Tests button allows you to fully complete an organisation’s test setup on their behalf. This is an alternative to your organisations’ administrators doing this themselves (see Manage your conformance statements). The selected approach depends on the needs of your community.
If you define multiple specifications and want your organisations to fully take charge over what they want to conform to then the best approach would be to avoid using the Manage tests feature and let your organisations’ administrators manage their own setup. On the other hand if you have more simple needs, it could be beneficial to define only non-administrator users for your organisations and configure on their behalf their system(s) and conformance statement(s).
Manage an organisation’s systems
Selecting the Systems tab presents the systems defined for the organisation. Systems are an important concept in the Test Bed as they represent the software components being tested. Before proceeding to test anything, an organisation will need to have one or more systems for which conformance statements will be defined.

The organisation’s systems are presented in a table that displays for each system:
Its short name, a brief name used to display in search results.
Its full name, the complete system name presented in reports and detail screens.
A description, providing additional context on the specific system.
A version number.
To view the details of a specific system you can click its row in the table. Clicking on the Create system button allows you to create a new system.
Create a new system
To create a new system click on the Create system button displayed above the listing of existing systems.

Doing so you will be presented with a screen to provide the new system’s information.
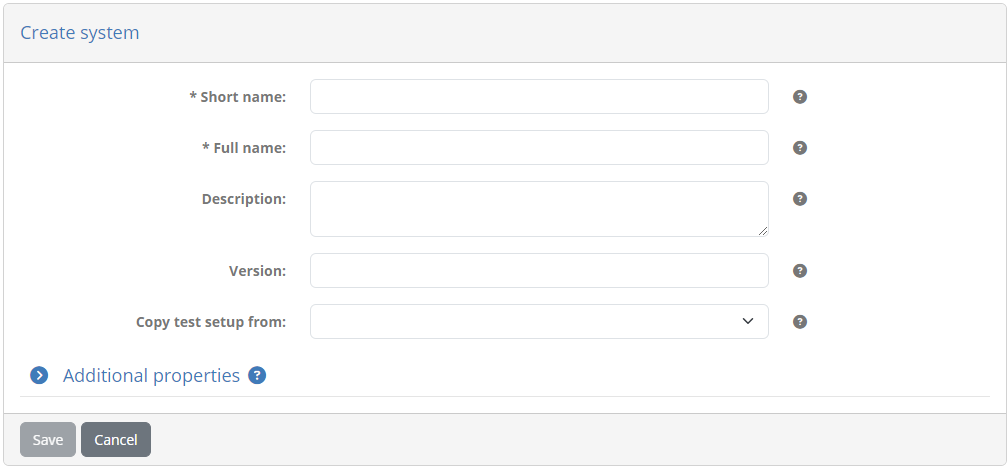
The inputs presented in the form are:
The system’s short name (required). This is used when the system is displayed in lists.
The system’s full name (required). This is included in reports that mention the system.
An optional description to provide more information about the system.
A version number. Although requested this is not currently used in the Test Bed apart from display purposes.
If the organisation includes other systems you are also presented here with an option to copy the test setup from one of them as a source. Selecting one will replicate the selected system’s conformance statements for the new system.
Once another system is selected to copy from, you are also presented with additional options to include:
System properties: To also copy any additional system-level properties that the source system defines.
Conformance statement configurations: To also copy any of the source system’s configuration parameters set on its conformance statements.
If the community foresees additional system properties, and as long as you are not copying the properties from another system, you will also see an Additional properties section. Clicking this expands the section so that you can manage the new system’s properties.
Configured properties can be simple texts, secret values (e.g. passwords) or files for which, if supplied by your community administrator, you will also see a help tooltip to understand their meaning. Such properties can be edited as follows:
For texts through an editable text field or by selecting a preset value from a dropdown list.
For files using the Upload button. Once one is selected you can download it by clicking on its link, or delete it by clicking Remove.
For secrets a read-only text field indicates whether a value is currently set. Provide a new value by checking Update which makes the text field editable. While editing you can also toggle the display of typed characters.
Note
Required properties are marked with an asterisk. It is is not mandatory to fill these in when providing the system’s information but as long as required properties are missing you will not be able to launch tests.
Once you have entered the system’s information click the Save button to record it. You can also click the Cancel button to return to the previous screen without making any changes.
Edit an existing system
To edit an existing system click its row from the listing of existing systems. Doing so results in a screen displaying the system’s information, presented in editable input fields.
You can proceed here to modify the short name, full name, description and version of the system. At the bottom you also see the unique API key for the system that can be clicked to copy it to the clipboard or refreshed to update it. This API key can be used in case the Test Bed’s REST API is enabled, or for messaging in test cases.
If the organisation defines other systems you can also select to copy the test setup from another system which will reset the system’s conformance statements to match the selected one (upon confirmation).
Once another system is selected to copy from, you are also presented with additional options to include:
System properties: To also copy any additional system-level properties that the source system defines.
Conformance statement configurations: To also copy any of the source system’s configuration parameters set on its conformance statements.
If the community foresees additional system properties, and as long as you are not copying the properties from another system, you will also see an Additional properties section. You can click this to expand and manage the system’s properties.
Configured properties can be simple texts, secret values (e.g. passwords) or files for which, if supplied by your community administrator, you will also see a help tooltip to understand their meaning. Such properties can be managed as follows:
For texts the current value is presented in an editable text field or dropdown menu (if the property has preset values).
For files the Upload button is used to select a new file, whereas if one is already set you can download it by clicking on its link, or delete it by clicking Remove.
For secrets a read-only text field indicates whether a value is currently set, whereas to provide a new value you check Update. When providing a new value you can also toggle the display of the typed characters.
Certain properties may actually be non-editable. Such properties can only be managed by your community administrator.
Note
Required properties are marked with an asterisk. It is is not mandatory to fill these in when providing the system’s information but as long as required properties are missing you will not be able to launch tests.
Once ready click the Update button to finish. You may also click here the Manage tests button to view the system’s conformance statements, or the Delete button which, following confirmation, will proceed to completely delete the system. In case you choose to delete the system, the tests realised for it will still be searchable but will be presented as obsolete (see Monitor test sessions). Finally, you can also click the Back button to return to the previous screen without making any changes.
Manage the organisation’s users
Management of the organisation’s users is done through the Users section of the organisation’s detail screen.
This section lists the currently defined users in a table, with one row per user, displaying for each one his/her name, email (or username if not integrated with EU Login), role and status.
Note
User status: A user’s status is meaningful when the Test Bed is integrated with EU Login. A value of Inactive indicates a user that has not yet confirmed a role assignment whereas a value of Not migrated indicates a legacy account that has not been migrated to EU Login. In all other cases the user will be displayed as Active.
To create a new user for the organisation click on the Create user button from the section’s header. Clicking on an existing row from the table allows you to edit the relevant user’s information.
The displayed screens and required information both when you edit or create a new user depends on whether or not the Test Bed is integrated with EU Login.
Case: EU Login
When creating a user you will be presented with a form to enter her information.
You are required to provide the email address and role of the user. The email address needs to be the one that the user has linked to her EU Login account. The role can either be “Administrator” or “User”. Recall that the “User” role can execute and follow up on tests, whereas the “Administrator” role can additionally manage the organisation’s configuration (e.g. properties, systems and conformance statements) and add other users.
Once you have created the user you will see that a new entry is added to the list of users but for which there is no displayed name and the displayed status is Inactive. The name and status will be updated once this user has confirmed this role assignment. To finish creating the user click Save, otherwise click Cancel to close the dialog.
Editing a user’s details displays her information as read-only.
The information presented here is the user’s name, email, role, status and organisation. From here you can change the user’s role and click on Update to save your change. Alternatively you can delete, upon confirmation, the user by clicking on Delete or click Back to cancel and return to the previous screen.
Case: No EU Login
When creating a user you will be presented with a form to enter the user’s information.
The resulting screen provides you with a form to enter the following information for the new user:
The user’s name (required), used when contacting the support team.
The username (required), used by the user to login.
The user’s role (required), either “Administrator” or “User”. Recall that the “User” role can execute and follow up on tests, whereas the “Administrator” role can additionally manage the organisation’s test configuration (e.g. systems and conformance statements) and add other users.
The user’s password. The entered password is considered a “one-time” password that the user will need to change upon his/her next login.
To complete the creation of the user click the Save button. Clicking on Cancel will discard pending changes and return to the previous screen.
When editing a user you see a similar screen, this time prefilled with the user’s information.
The information displayed is the user’s name, username, role, status and organisation, of which only the name and role can be edited. You may also check the Set one-time password option to provide a new password for your user (to be changed on his/her next login). Clicking on Update saves your changes whereas clicking on Back discards them and returns you to the previous screen. The Delete button will, following confirmation, delete the current user.
Manage the organisation’s REST API keys
Management of the organisation’s REST API keys is done through the REST API keys section of the organisation’s detail screen. This is visible if your Test Bed’s administrator has enabled the Test Bed’s REST API.
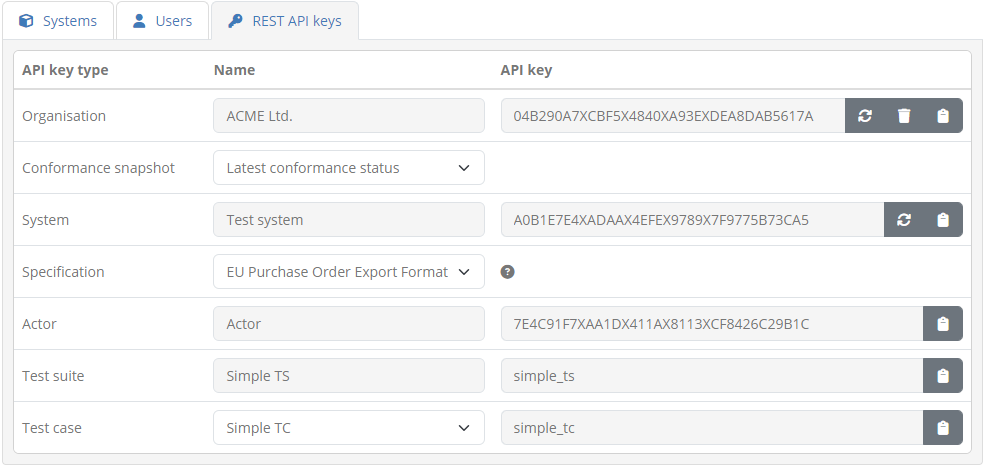
From this table you can view, manage and copy the keys needed to identify the organisation, the system to be tested and the target conformance statement and tests. These API keys are listed in a table presenting per case the key to consider. For each key you may click the provided copy control to copy it to your clipboard.
The keys listed include the following:
Organisation: The key to identify the organisation. The readonly name of the organisation is displayed alongside the key. You are also presented here with reset and delete controls to replace or remove the key.
Conformance snapshot: The conformance snapshots that include the organisation. Select one to update the other listed keys.
System: The key to identify a specific system. If the organisation defines multiple systems these are presented in a dropdown list and selecting one will display its API key. The displayed key also provides a reset control to replace it.
Specification: The target specification does not itself define an API key but you need to select one to view the API keys of its related information (actors, test suites and test cases). If the organisation has conformance statements for only a single specification this appears as preselected and readonly.
Actor: The key to identify the target specification’s actor. The actor, along with a given system essentially constitute a specific conformance statement. The selected specification’s actors are listed in a dropdown list unless there is a single one which would appear as a readonly preset selection. Selecting an actor from the list displays its related API key.
Test suite: The key to identify a specific test suite. Selecting a given test suite displays its relevant API key.
Test case: The key to identify a specific test case within the selected test suite. Selecting a given test case displays its relevant API key.
When removing or replacing the API key of the organisation or one of its systems, you will be prompted to confirm your action. If you proceed to do so any existing automation setups referring to the organisation would need to be updated accordingly given that the previous keys will no longer be valid.
Details on how these REST API keys are used to launch and manage test sessions are provided in the REST API documentation.
Note
The displayed specifications, actors, test suites and test cases are limited to those linked to the organisation’s conformance statements.
Manage administrators
The Community administrators section displays the users, including yourself, that are capable of managing your community.
Community administrators are listed in a table with one row per user displaying the user’s name, email address (or username if not integrated with EU Login) and status.
Note
User status: A user’s status is meaningful when the Test Bed is integrated with EU Login. A value of Inactive indicates a user that has not yet confirmed a role assignment whereas a value of Not migrated indicates a legacy account that has not been migrated to EU Login. In all other cases the user will be displayed as Active.
To create a new community administrator click on the Create community administrator button from the section’s header. Clicking on an existing row from the table allows you to edit the relevant user’s information.
The displayed screens and required information both when you edit or create a new administrator depends on whether or not the Test Bed is integrated with EU Login.
Case: EU Login
When creating an administrator you will be presented with a form to enter the user’s information.
You are required to provide the email address of the user. This address needs to be the one that the user has linked to her EU Login account. Once you have created the user you will see that a new entry is added to the list of community administrators but for which there is no displayed name and the displayed status is Inactive. The name and status will be updated once this user has confirmed this role assignment.
To finish creating the user click Save, otherwise click Cancel to close the dialog.
Editing an administrator’s details displays her information as read-only.
The information presented here is the user’s name, email, role, and status. From here you can delete the user by clicking on Delete unless she is the only administrator configured for the community. Finally, clicking Back will return you to the previous screen.
Case: No EU Login
When creating an administrator you will be presented with a form to enter the user’s information.
In this form you are expected to provide the following information:
The administrator’s name (required), used in your display and in feedback submissions to the Test Bed.
The username (required), used to login.
The user’s password. The entered password is a “one-time” password which will need to be changed by the user upon his/her next login.
To complete the creation of the new administrator click on Save. Clicking Cancel discards changes and returns you to the previous screen.
When editing a user you see a similar screen, this time prefilled with the user’s information.
The information presented here is the user’s name, username, role, and status, of which only the name is editable. To change the name edit the existing value and click on Update, whereas to delete the user click on Delete. Note that if this user is the only administrator configured for the community the Delete button is disabled. Finally, clicking Back will discard any pending changes and return you to the previous screen.
In this form you may also choose to reset the user’s password. You can do this by checking the Set one-time password option which will display for you an additional input field to provide the new password. The password you enter is considered a “one-time” password meaning that the user will be forced to change it at his/her next login.
Manage landing pages
A landing page is the home page displayed to your community’s users when they log into the Test Bed. Its purpose is to welcome users providing them context on the use of the Test Bed and potentially including a customised message. Moreover, this customised message can even be set at the level of specific organisations if you choose to do so (see Manage organisations).
The landing pages available for your community are listed in the Landing pages section. These are presented in a table with one row per landing page, displaying for each its name, description and indication on whether it is considered as the default.
The landing page marked as default is the one that applies to all organisations in your community that don’t have another, more specific one configured. If no landing page is defined then the one that applies to the Test Bed as a whole is automatically used. Note that you, as community administrator, also view your community’s default landing page upon login.
Adding a new landing page can be done in one of the following ways:
You can create a new landing page from scratch by clicking the Create landing page button.
You can copy the Test Bed’s default landing page by clicking the Copy Test Bed landing page button.
You can copy one of your community’s existing landing pages while editing its details.
Note
A specialised landing page may also be configured for your own “Admin organisation” (see Manage your organisation). If not configured, the default community landing page will apply.
Create landing page
When creating a new landing page you are presented with a form to enter its information.
If you are creating a landing page from scratch (i.e. you have clicked the Create landing page button), this form will be empty. Alternatively, if the landing page is being created as a copy of an existing one (either the Test Bed’s default landing page or another one defined for your community), the form will be prefilled. The information you are expected to complete for the landing page is:
Its name (required), used in the list of landing pages and when selecting one for an organisation.
Its description (optional), presented to community administrators.
Whether or not it should be the default landing page for the community (default is “false”).
The landing page content, provided through a rich text editor, allowing you to add styled text, lists, images and links.
Above the rich text editor you have a Copy resource reference control that allows you to search in-place your community’s resources, such as images to include or files to add download links for. Once you find the resource you’re looking for you can click it to copy its reference to the clipboard. You can then use this reference as e.g. the source of an image file or the target of a link.
While editing the content of the landing page you can use the Preview button to preview how the landing page will look like before you save it. The preview is presented in a popup that is styled and positioned exactly as the landing page would appear when the community users log in. This allows you to fine tune aspects such as positioning and spacing to make sure the result is exactly how you expect it to be.
When you have finished defining the landing page you can complete its creation by clicking Save. Note that if you have set this as the new default landing page for your community you will also be prompted for confirmation considering that this will be immediately visible to all your users. Clicking on the Cancel button will discard pending changes and return to the previous screen.
Edit landing page
To edit an existing landing page click its corresponding row from the Landing pages table.
Doing so will take you to a screen where the landing page’s information is displayed in editable form fields.
In this screen you can change the landing page’s name, description, default setting and content. Note that if the landing page is currently the default, this can’t be unset. To switch defaults you would need to edit or create another landing page and at that time set it as the new default. This is done to avoid misconfiguration where you could end up with no default landing page.
Above the rich text editor you have a Copy resource reference control that allows you to search in-place your community’s resources, such as images to include or files to add download links for. Once you find the resource you’re looking for you can click it to copy its reference to the clipboard. You can then use this reference as e.g. the source of an image file or the target of a link.
While editing the content of the landing page you can use the Preview button to preview how the landing page will look like before you save it. The preview is presented in a popup that is styled and positioned exactly as the landing page would appear when the community users log in. This allows you to fine tune aspects such as positioning and spacing to make sure the result is exactly how you expect it to be.

To persist any changes click on the Update button or discard them clicking on the Back button. The Delete button will, following confirmation, remove the landing page. Finally, the Copy button allows you to make a copy of this landing page, by taking you to the landing page creation screen prefilled with the current landing page’s information. This can be useful if you want to create minor variations of a default landing page for certain organisations.
Manage legal notices
A legal notice is an arbitrary text that you can present to your users when they click on the Legal notice link from the screen footer. The purpose of this is to define terms and conditions, notices and disclaimers that you want to make known to your community.

You may define a default legal notice that applies to your entire community or even specific legal notices for one or more organisations. The legal notices available for your community are listed in the Legal notices section. These are presented in a table with one row per notice, displaying for each its name, description and indication on whether it is considered as the default.
The legal notice marked as default is the one that applies to all organisations in your community that don’t have another, more specific one configured. If no legal notice is defined then the one that applies to the Test Bed as a whole is automatically used. Note that you, as community administrator, can also view your community’s default legal notice when you click the relevant link from the screen footer.
Adding a new legal notice can be done in one of the following ways:
You can create a new legal notice from scratch by clicking the Create legal notice button.
You can copy the Test Bed’s default legal notice by clicking the Copy Test Bed legal notice button.
You can copy one of your community’s existing legal notices while editing its details.
Create legal notice
When creating a new legal notice you are presented with a form to enter its information.
If you are creating a legal notice from scratch (i.e. you have clicked the Create legal notice button), this form will be empty. Alternatively, if the legal notice is being created as a copy of an existing one (either the Test Bed’s default legal notice or another one defined for your community), the form will be prefilled. The information you are expected to complete for the legal notice is:
Its name (required), used in the list of legal notices and when selecting one for an organisation.
Its description (optional), presented to community administrators.
Whether or not it should be the default legal notice for the community (default is “false”).
The legal notice content, provided through a rich text editor, allowing you to add styled text, lists, images and links.
Above the rich text editor you have a Copy resource reference control that allows you to search in-place your community’s resources, such as images to include or files to add download links for. Once you find the resource you’re looking for you can click it to copy its reference to the clipboard. You can then use this reference as e.g. the source of an image file or the target of a link.
While editing the content of the legal notice you can use the Preview button to preview how it will look like before you save it. This allows you to fine tune its presentation and content to make sure the result is exactly how you expect it to be.

When you have provided the required information you can complete the legal notice creation by clicking Save. Note that if you have set this as the new default legal notice for your community you will also be prompted for confirmation considering that this will be available to all your users. Clicking on the Cancel button will discard pending changes and return to the previous screen.
Edit legal notice
To edit an existing legal notice click its corresponding row from the Legal notices table.
Doing so will take you to a screen where the legal notice’s information is displayed in editable form fields.
In this screen you can change the legal notice’s name, description, default setting and content. Note that if the legal notice is currently the default, this can’t be unset. To switch defaults you would need to edit or create another legal notice and at that time set it as the new default. This is done to avoid misconfiguration where you could end up with no default legal notice.
Above the rich text editor you have a Copy resource reference control that allows you to search in-place your community’s resources, such as images to include or files to add download links for. Once you find the resource you’re looking for you can click it to copy its reference to the clipboard. You can then use this reference as e.g. the source of an image file or the target of a link.
While editing the content of the legal notice you can use the Preview button to preview how it will look like before you save it. This allows you to fine tune its presentation and content to make sure the result is exactly how you expect it to be.

To persist any changes click on the Update button or discard them clicking on the Back button. The Delete button will, following confirmation, remove the legal notice. Finally, the Copy button allows you to make a copy of this legal notice, by taking you to the legal notice creation screen prefilled with the current legal notice’s information. This can be useful if you want to create minor variations of a default legal notice for certain organisations.
Manage error templates
An error template is an template that is used to format and stylise information displayed to users due to unexpected errors. They can be used to provide specific guidelines to users or support information.
You may define a default error template that applies to your entire community or have specific ones for one or more organisations. The templates available for your community are listed in the Error templates section. These are presented in a table with one row per template, displaying for each its name, description and indication on whether it is considered as the default.
The template marked as default is the one that applies to all organisations in your community that don’t have another, more specific one configured. If no template is defined then the one that applies to the Test Bed as a whole is automatically used.
Adding a new error template can be done in one of the following ways:
You can create a new template from scratch by clicking the Create error template button.
You can copy the Test Bed’s default template by clicking the Copy Test Bed error template button.
You can copy one of your community’s existing templates while editing its details.
Create error template
When creating a new error template you are presented with a form to enter its information.
If you are creating an error template from scratch (i.e. you have clicked the Create error template button), this form will be empty. Alternatively, if the template is being created as a copy of an existing one (either the Test Bed’s default one or another one defined for your community), the form will be prefilled. The information you are expected to complete for the error template is:
Its name (required), used in the list of templates and when selecting one for an organisation.
Its description (optional), presented to community administrators.
Whether or not it should be the default template for the community (default is “false”).
The template’s content, provided through a rich text editor, allowing you to add styled text, lists, images and links.
When completing the content of the template you are also provided with two placeholders you can use that will be completed when an actual error is being treated:
$ERROR_DESCRIPTION: The error message text (a text value - may be empty).
$ERROR_ID: The error identifier (used to trace error in logs).
You can review and copy these placeholder values to your content using the Copy placeholder text button. In addition, you have a Copy resource reference control that allows you to search in-place your community’s resources, such as images to include or files to add download links for. Once you find the resource you’re looking for you can click it to copy its reference to the clipboard. You can then use this reference as e.g. the source of an image file or the target of a link.
While editing the template’s content you can see a preview of what it would look like when used. To do so click the Preview button that will open an error popup using a sample error and your current template:
When you have provided the required information you can complete the template’s creation by clicking Save. Note that if you have set this as the new default for your community you will also be prompted for confirmation. Clicking on the Cancel button will discard pending changes and return to the previous screen.
Edit error template
To edit an existing error template click its corresponding row from the Error templates table.
Doing so will take you to a screen where the template’s information is displayed in editable form fields.
In this screen you can change the template’s name, description, default setting and content. Note that if the template is currently the default, this can’t be unset. To switch defaults you would need to edit or create another one and at that time set it as the new default. This is done to avoid misconfiguration where you could end up with no default error template.
When completing the content of the template you are also provided with two placeholders you can use that will be completed when an actual error is being treated:
$ERROR_DESCRIPTION: The error message text (a text value - may be empty).
$ERROR_ID: The error identifier (used to trace error in logs).
You can review and copy these placeholder values to your content using the Copy placeholder text button. In addition, you have a Copy resource reference control that allows you to search in-place your community’s resources, such as images to include or files to add download links for. Once you find the resource you’re looking for you can click it to copy its reference to the clipboard. You can then use this reference as e.g. the source of an image file or the target of a link.
While editing the template’s content you can see a preview of what it would look like when used. To do so click the Preview button that will open an error popup using a sample error and your current template:
Once you are finished click on the Update button to persist your changes or discard them clicking on the Back button. The Delete button will, following confirmation, remove the template. Finally, the Copy button allows you to make a copy of this error template, by taking you to the creation screen prefilled with the current template’s information. This can be useful if you want to create minor variations of a default template for certain organisations.
Manage triggers
A trigger is a means of carrying out automated processing when a given event occurs. Triggers can receive various types of inputs depending on their configured event, and can be used both to receive notifications and to modify the current test setup. They represent a powerful means of extending the Test Bed’s processing in a decoupled way and can be used to complete advanced tasks that the Test Bed alone cannot handle (e.g. preparing configuration packages for new community members).
Trigger execution is always an asynchronous step, and a failed trigger call will never cause its root event to fail itself. Numerous triggers may be configured for the same event types which, assuming they are set as active, will all be processed. There is however no guarantee on the execution order or chaining of triggers, so you need to take this into account in your trigger design. Finally, note that triggers are not fired when bulk import operations take place (e.g. creating organisations through an import).
Configured triggers are displayed in the Triggers section. These are presented as a table with one row per trigger, displaying for each its name, description, event type, active status and latest result.
Adding a new trigger is done by clicking the Create trigger button.
Create trigger
When creating a new trigger you are presented with a form to enter its information.
The information requested from you in this form for the new trigger is:
Its name (required), used for display purposes in the list of triggers.
Its description (optional), presented to community administrators to provide additional context on the purpose of the trigger.
The event type (required) for the occurrences of which the trigger will be fired.
The active flag (optional) that determines whether this trigger is currently enabled (default is false).
The event types that are available for configuration are listed in the following table:
Event type |
Description |
|---|---|
Organisation created |
Creation of an organisation, either by a community administrator or via self-registration. |
Organisation updated |
Update of an organisation’s information (including custom organisation properties). |
System created |
Creation of a system, either manually or via self-registration based on a configuration template. |
System updated |
Update of a system’s information (including custom system properties). |
Conformance statement created |
Creation of a conformance statement, either manually or via self-registration based on a configuration template. |
Conformance statement updated |
Update of a conformance statement’s configuration (endpoint parameter values). |
Conformance statement succeeded |
Successful completion of a test session that leads to a conformance statement being considered as successfully passed. |
Test session started |
Launch of a test session. |
Test session succeeded |
Completion of a test session that resulted in a “successful” result. |
Test session failed |
Completion of a test session that resulted in a “failed” result. |
Once an event type is selected you will also be presented with an optional fire condition.

A fire condition is a specific rule that governs whether the trigger will be activated. This means that besides the trigger event itself (e.g. starting a test session), you can specific for which cases the trigger should fire (e.g. specific test cases). Clicking the Add condition clause button prompts you to add a clause to your condition (you can have any number of such clauses). Doing so opens a popup to define the clause’s parameters:
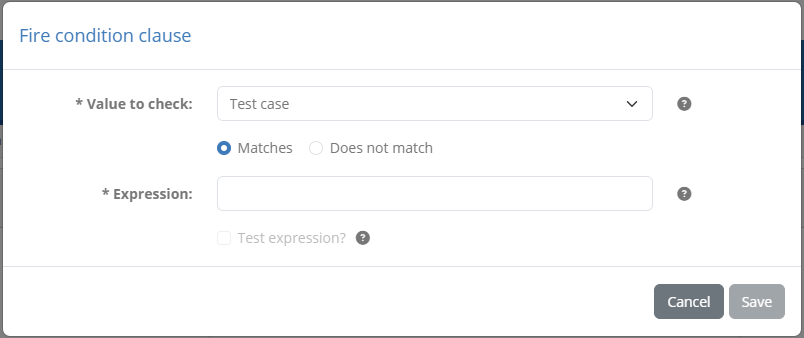
Clauses are based on checking values against regular expressions. In this popup you can select the value to check based on the trigger’s event type, provide the expression to use, as well as whether the expression should result in a match or not (the latter used to invert the check).
Once you have selected the value type and provided an expression, you can also test the expression by checking the relevant checkbox and using a sample value. For example, we can consider a trigger when test sessions start, that should apply only for specifications with “Export” in their name:
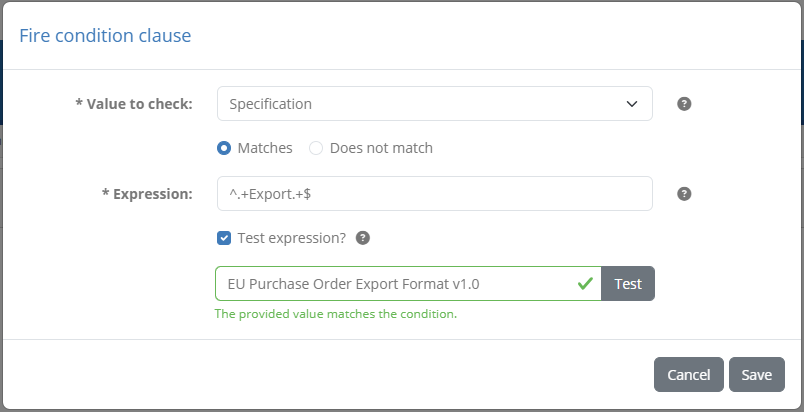
Once you have configured your fire condition with one or more clauses, you can manage it and also test it to make sure it works as you expect. To test it check the relevant checkbox, and try it out for a specific type of value:

Note
Defining fire conditions is optional - triggers without conditions will always fire.
The separate Web service details section includes the inputs concerning the trigger’s web service. Consider that the trigger itself is a set of metadata that determines what fires and with what data, however the actual processing linked to the trigger is handled by the configured web service. This service needs to be accessible by the Test Bed and must be either:
A SOAP service implementing the GITB processing service API, a simple API that expects an arbitrary set of inputs and can provide any number of outputs.
An HTTP service listening for
POSTrequests, receiving inputs and producing outputs in JSON.
The information required to configure this web service are:
Its endpoint URL (required). In case of a GITB processing service this is expected to be the full URL to reach the service’s WSDL file. If a JSON HTTP service is used instead, this is the URL at which the service is listening. In any case this URL needs to be provided as it should be used by the Test Bed, meaning that it could also be an internal address.
An operation (optional), to signal an operation name to the service. Such operations are foreseen by the GITB processing service API, although this can also be used for HTTP services as extra metadata to distinguish calls.
The input data (optional) to provide as part of service’s payload when the trigger fires.
The provided endpoint URL can be tested to ensure it is responding as expected. To do this click the Test button at the right end of the URL’s text field.
If your service is set as a GITB processing service this will call the service’s getModuleDefinition operation, otherwise in case of an HTTP service, it will make an HTTP POST
with an empty JSON payload ({}).

Once the call is made a popup will be displayed to present you the results. For example, a correctly working GITB processing service would result in its response displayed as follows:
If the test fails, the popup will display the collected error messages from the call attempt. If multiple nested errors are raised you are presented with the errors in sequence.
Regarding the trigger’s input data, this represents the context needed by the trigger’s web service to complete its processing. The available inputs depend on the trigger’s event type as follows:
Input data |
Event types |
Details |
|---|---|---|
Community |
All |
The ID, short and full name of the community. |
Organisation |
All |
The ID, short and full name of the organisation linked to the event. |
System |
System/statement created/updated/completed |
The ID, short and full name of the system linked to the event |
Specification |
Statement created/updated/completed |
The ID, short and full name of the specification linked to the event |
Actor |
Statement created/updated/completed |
The ID, short and full name of the actor linked to the event |
Test session |
Test session started/succeeded/failed |
The ID of the test session, and its related test case and test suite. |
Test report |
Test session succeeded/failed |
The XML report of the test session expressed in the GITB Test Reporting Language (GITB TRL). |
Domain properties |
All |
The identifier and value of one or more custom domain properties. |
Organisation properties |
All |
The name and value of one or more custom organisation properties. |
System properties |
System/statement created/updated/completed |
The name and value of one or more custom system properties. |
Conformance statement properties |
Statement created/updated/completed |
The name and value of one or more custom system properties. |
To include one or more types of data in the service’s calls check the relevant checkboxes. In the case of domain, organisation, system and statement properties, once the relevant option is checked, you will be presented with a table listing the properties defined for the community.
Each row in this table corresponds to a property, displaying for each its name (for organisation, system and statement properties), type and identifier. The identifier will be used as the input’s name, whereas the value to be passed will be determined by the property’s type. Simple and secret values are provided as text, whereas binary values are provided as serialised Base64 strings. To add a property to the inputs click its row (clicking it again will remove it).
Note
Including secret properties: Secret properties, if included as input, will be passed in the clear. Make sure that you are aware of this and only choose to include such values knowingly.
Once you have selected the inputs required by the service you can click the Preview and test service call button.

This will use the information provided to display the sample payload that will be sent to the service. In case this is configured to be a GITB processing service this will be the input SOAP envelope.
Alternatively, if the service is set as an HTTP service, the payload will be presented in JSON format.
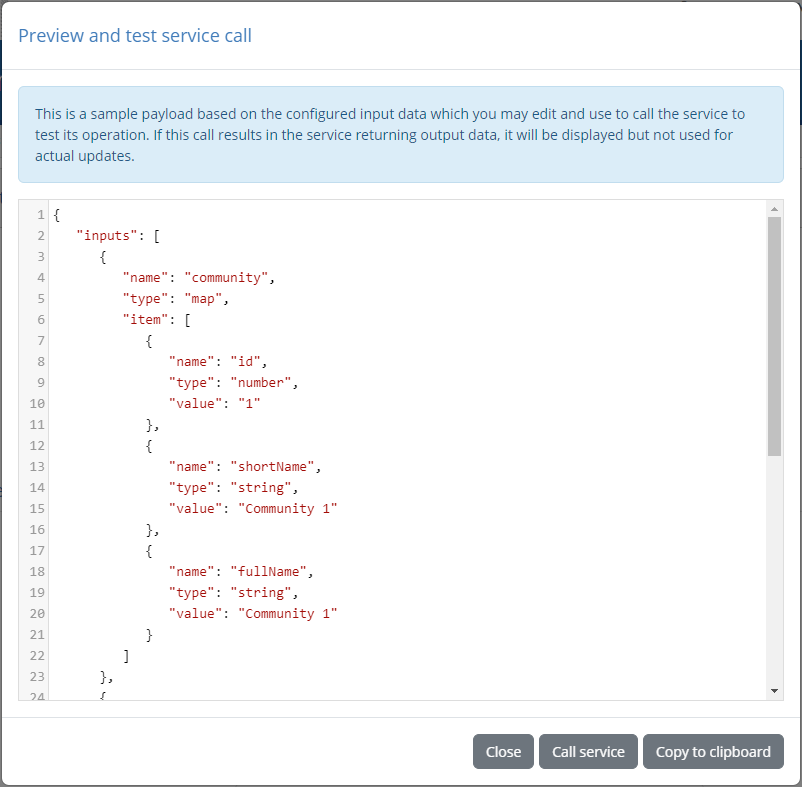
From this preview popup you can click Copy to clipboard to copy all text or Close to hide the preview. Clicking on Call service will call the trigger’s service using the presented payload, allowing you to test it directly from the trigger definition screen. Before making such a call you can also edit the payload to test different input values and potentially refer to actual information from your community.
Once the service has been called you will see its result displayed in the popup or a detailed error trace. The below example is a sample result after successfully calling a GITB processing service.
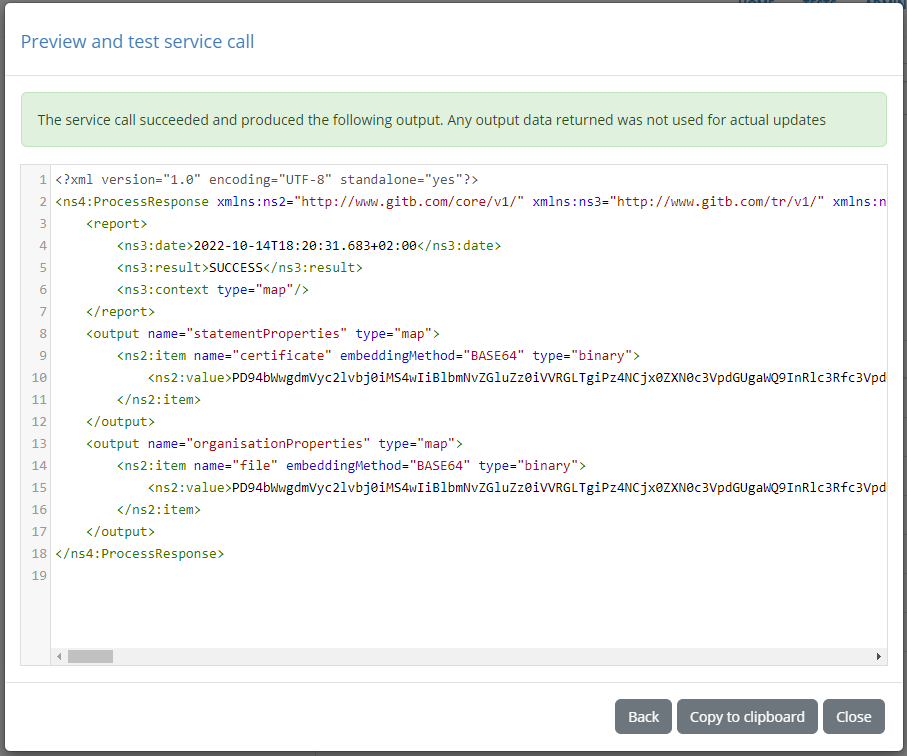
It is important to note that such test calls will never result in updating data on the side of the Test Bed. Normal trigger calls support updating data based on returned outputs but this does not apply when testing. You do however have the opportunity to inspect returned outputs that would normally be used for updates, to ensure that everything is working as you expect. If you would like to make additional test calls you can click here the Back button to return to the previous preview screen (maintaining any editing that you may have introduced manually).
Once you have provided the required information and completed your tests, you can create the trigger by clicking the Save button. Clicking on the Cancel button will discard pending changes and return to the previous screen.
Edit trigger
To edit an existing trigger click its corresponding row from the Triggers table.
Doing so will take you to a screen where the trigger’s information is displayed in editable form fields.
In this screen you can change the trigger’s information, web service details and included data. For a detailed description of each property and the available options check the trigger creation documentation. In this screen you can in addition see a section named Trigger status which indicates the result from the trigger’s last execution. This status can be one of the following:
None: Highlighted in blue, this displays if the trigger has actually never fired up to now.
Success: Highlighted in green, this indicates the trigger succeeded in its last execution.
Error: Highlighted in red, this indicates the trigger failed in its last execution.
For triggers having executed and resulting either in a success or failure, you are presented with a Clear button. You may click this to clear the latest status, resetting it to None, in case you want to ensure a subsequently displayed status corresponds to changes you have just introduced. In the case of a failed last call you also have the option to View errors. Clicking this will display the collected error messages returned from the last trigger’s execution that you can Copy to clipboard or Close.
To persist any changes you have made in the trigger’s definition click on Save. Clicking on Delete deletes, upon confirmation, the trigger, whereas clicking Back will cancel pending changes and return to the community details page.
Returning output from triggers
One of the powerful features of triggers is that they can also adapt the configuration in the Test Bed. A trigger can achieve this by having its web service return an output as per the GITB processing service API specification that can modify, depending on the trigger’s event type, the values for organisation properties, system properties or conformance statement parameters. In case of a JSON HTTP service, the same possibility exists by returning JSON output using the same names and structures as the GITB processing service API.
Each type of output is grouped in a map (or JSON object for HTTP services) which defines output items as key-value pairs, the key being the property’s key or identifier and the value being the value to set (provided as Base64 in the case of binary properties). Each value map is named as follows:
organisationProperties for organisation properties to set (applicable and handled in all cases).
systemProperties for system properties to set (applicable and handled in events linked to systems and conformance statements).
statementProperties for the properties of conformance statements (applicable and handled in events linked to conformance statements).
Note that returned properties that don’t apply (e.g. system properties when creating an organisation) are ignored. This is also the case for properties that cannot be matched with existing ones. In addition, any unexpected errors that may occur when calling triggers or processing their responses have no effect on the origin event of the trigger. For example a trigger fired for a newly created organisation that fails, will never prevent or affect the organisation’s creation.
The following sample output illustrates a case where a trigger linked to the creation of a new conformance statement is returning values to set:
For the organisation, setting its “identifier” property.
For two conformance statement properties named “client.flag” and “client.number”.
<?xml version="1.0" encoding="UTF-8" standalone="yes"?>
<ps:ProcessResponse xmlns:core="http://www.gitb.com/core/v1/" xmlns:ps="http://www.gitb.com/ps/v1/">
    <output name="organisationProperties">
        <core:item name="identifier">
            <core:value>123</core:value>
        </core:item>
    </output>
    <output name="statementProperties">
        <core:item name="client.flag">
            <core:value>true</core:value>
        </core:item>
        <core:item name="client.number">
            <core:value>ABC</core:value>
        </core:item>
    </output>
</ps:ProcessResponse>
A use case for such a trigger could be to prepare the organisation’s configuration linked to the new conformance statement so that it can begin testing. This trigger processing could also be defined as a mandatory prerequisite through the use of a hidden but required property that is used as a control flag and set through the trigger’s output.
Manage resources
In several cases the Test Bed supports the definition of rich content as documentation or as a means of customising the experience of a community’s members. Specifically, rich content is available as:
Community landing pages, legal notices and error templates.
Documentation for test suites and test cases.
Within such rich content it is possible to include additional resources, either as displayed images or download links. Typical examples are a community’s logo displayed on its landing page, UML sequence diagrams to illustrate a test case’s steps, and links to download test data. When referring to such resources, you may either point to external sources (e.g. a public documentation site for your project) or to resources defined internally within the Test Bed. The configuration and use of such internal resources is addressed in the current section.
Configured resources are displayed in the Resources section. Each resource is presented as a row displaying its file name, its reference to use when including it in rich content, and its description. For each resource you are provided with controls to copy the resource’s reference to the clipboard, delete the resource, and download it.

Above the listing of resources you have a search filter to search against resources’ names and descriptions in a case-insensitive manner. From here you may also select the Delete resources… button to delete one or more resources, or the Download all button to download all resources in a ZIP archive. Adding new resources is achieved through the Upload resource button that opens a popup in which you are asked to select the resource file and provide an optional description.
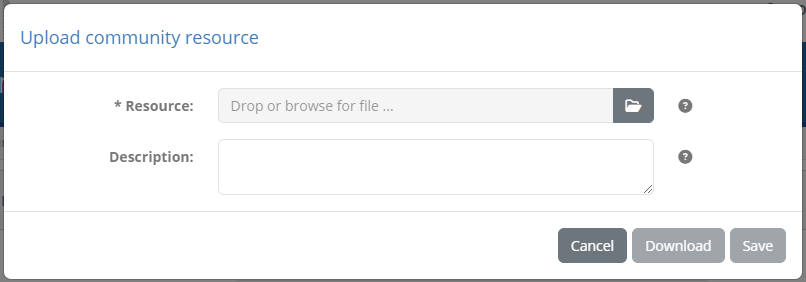
Alternatively, you may also click the options of the Upload resource button to perform a Bulk upload. Doing so will display a popup in which you can select a ZIP archive including all resources you would want to upload in one go. You may also select whether resources with the same name are to be replaced or kept.

Whenever you upload a resource with a name matching an existing one (regardless of case), the new resource will be added with an index postfix. The same applies when uploading in bulk and having chosen to keep matching resources. This is done because names of resources need to be unique within a community to allow you to unambiguously refer to them where needed.
To use a community resource in rich content you simply need to provide the resource reference as the source of an image or link. This can be done both when editing rich content through the Test Bed’s user interface, but also when preparing documentation included in test suite archives. It is important to note that resources are not publicly available, but rather require you to have access to the community in question.
Edit report settings
All reports produced in the scope of the community’s testing activities can be customised by the community administrator. This is done by clicking the Edit conformance certificate settings button from the community details’ panel:
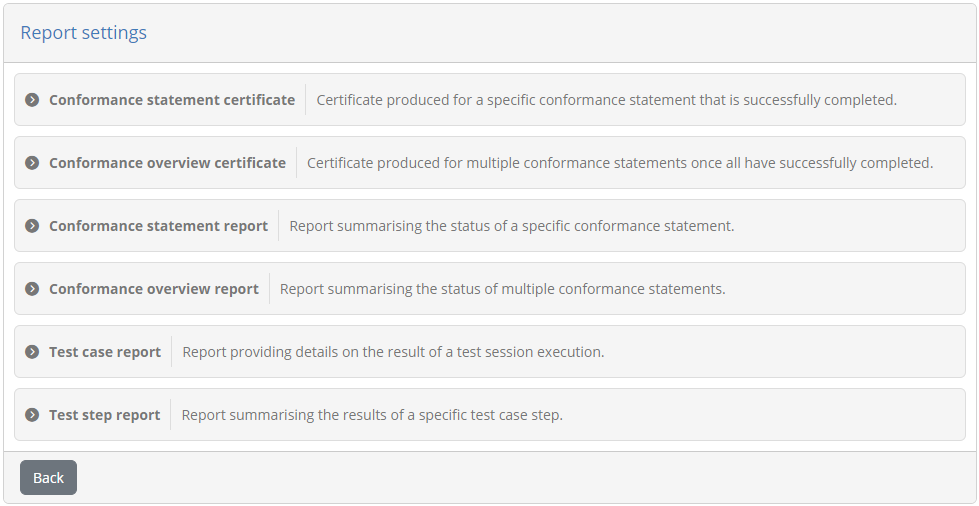
The reports that can be customised here are:
The conformance statement certificate, confirming the successful testing of an organisation for a specific conformance statement.
The conformance overview certificate, confirming the successful testing of an organisation for a set of related conformance statements.
The conformance statement report, summarising the status of a specific conformance statement.
The conformance overview report, summarising the status of a set of related conformance statements.
The test case report, summarising the result of a test session.
The test step report, summarising the result of a test session’s specific step.
Each report’s settings are managed through specific panels included in the report settings screen. Clicking each panel expands it to display the available settings, whereas clicking the Back button returns you to the community details screen.
Note
Not all elements of these reports can be customised. The settings that are available however are addressed in the following sections.
Conformance statement certificate
A conformance statement certificate acts as the official summary of an organisation’s testing activities, providing proof of successfully passing a given conformance statement. To manage the report click the Conformance statement certificate panel to display its available settings.
By default the report’s configuration assumes you will be using the Test Bed’s built-in report template. This foresees predefined but customisable sets of information, that will be used to automatically generate the certificate when requested by organisation users. When a certificate is generated by a community administrator, these settings serve as defaults that can be further customised before producing the final report.
The options you can provide to customise your issued certificates are as follows:
The title to use. If none is provided “Conformance Certificate” is used, but you may also choose to not include any title.
Whether to add the conformance statement details. These are the information on the domain, specification, actor, organisation and system.
Whether to add the result overview. This is a summary text on the number of successfully passed and failed test cases.
Whether to add the individual test cases. Doing so will include a table showing the status for each test case in the conformance statement.
Whether to add a custom message. This is a rich-text section that you can customise as needed.
Whether to add a digital signature to the report. This is done to serve as proof of authenticity and for non-repudiation.
Whether to include page numbers in the report’s footer.
By default the conformance certificate includes the same information as the conformance statement report. You are however free to customise this as you see fit for your community.
If you select to add a message, the form will expand to allow you to define its content:
This is provided by means of a rich text editor that supports several placeholders that will be replaced using values from the actual conformance statement when the certificate is generated. The supported placeholders and their meaning are listed in the following table.
Placeholder |
Description |
|---|---|
$DOMAIN |
The full name of the domain. |
$SPECIFICATION |
The full name of the specification. |
$SPECIFICATION_GROUP |
The full name of the specification group. |
$SPECIFICATION_GROUP_OPTION |
The full name of the option (specification within a group). |
$ACTOR |
The full name of the actor linked to the conformance statement. |
$ORGANISATION |
The full name of the organisation to be granted the certificate. |
$SYSTEM |
The full name of the organisation’s system that was used in the tests. |
$SNAPSHOT |
The public name of the relevant conformance snapshot (or the label for the latest status). |
$BADGE |
The configured badge for the statement’s status. |
$BADGE{width} |
Similar to $BADGE but forcing a specific width (in pixels) for the image. |
$REPORT_DATE{format} |
The date and time when the report was generated, using the defined format (as a Java data format string). |
$LAST_UPDATE_DATE{format} |
The date and time when the conformance status was last updated, using the defined format (as a Java data format string). |
$ORGANISATION{PROPERTY} |
The value of a custom organisation-level property (named “PROPERTY” here) set for the statement’s organisation. |
$SYSTEM{PROPERTY} |
The value of a custom system-level property (named “PROPERTY” here) set for the statement’s system. |
$DOMAIN{PROPERTY} |
The value of a domain parameter (named “PROPERTY” here) set for the community’s domain. |
You can review and copy all the above placeholder values to your message content using the Copy placeholder text button.
Besides placeholders, you also have a Copy resource reference control that allows you to search in-place your community’s resources, such as images to include or files to add download links for. Once you find the resource you’re looking for you can click it to copy its reference to the clipboard. You can then use this reference as e.g. the source of an image file or the target of a link.
Delegate to an external service
Besides using the built-in certificate template you may choose to delegate the report’s generation to an external service. Doing so affords you full control over the resulting report, both in terms of included information as well as styling. To use this option, select the Use external service option for the report configuration.

With this option enabled you are expected to configure an HTTP service that will:
Receive from the Test Bed a
POSTrequest having as its body the relevant conformance statement report in XML format.Respond with the produced PDF report.
Selecting this option presents you with a set of relevant inputs:
The service address representing the endpoint to handle the report’s generation.
An option to add a signature to the produced report. You can skip this if you don’t require signatures, or if the service itself adds a signature.
An option to apply a stylesheet before calling the service. Doing so allows you to configure an XSLT stylesheet that will be applied to the default XML report before providing it to the configured service.
Configure digital signatures
To ensure the integrity and trust of your report you may also choose to include a digital signature. To manage your signature setting click on Manage signature settings from the panel’s footer.
Doing so will display a popup in which you can provide information on the certificate to be used for the signatures.
You are expected to provide here:
The keystore file that includes the keypair (private and public key) that will be used. The keystore should contain a single keypair.
The keystore type. Supported types are JCEKS, JKS and PKCS#12.
The keystore’s password, used to open and read the keystore’s contents.
The key’s password, that is needed to use the private key when producing signatures.
Note
Use of a community keypair for signatures: The reason you are expected to provide a keypair for signatures is because ultimately the responsibility for issuing and signing the report, as well as maintaining the validity of the relevant keypair lies within the community.
Once the certificate information is provided you may Download or Delete it’s keystore. You may also validate your configuration to be certain that the Test Bed can read the certificate by clicking the Test settings button. Clicking Save will persist your settings, whereas Close will hide the popup.
Preview your configuration
Once you have adjusted your settings you may preview them by clicking the Generate preview button. This will produce a certificate using sample values which, in case you are using the default template, will be similar to the following example:
In case you chose to delegate the report’s generation to an external service, the preview also serves as a test that the service is accessible and responds as expected. The service will be called with the sample data in XML form, and the resulting PDF report will be downloaded. In case there is an error in the configuration or the service’s processing, a popup with detailed information will be presented to help you troubleshoot the issue.
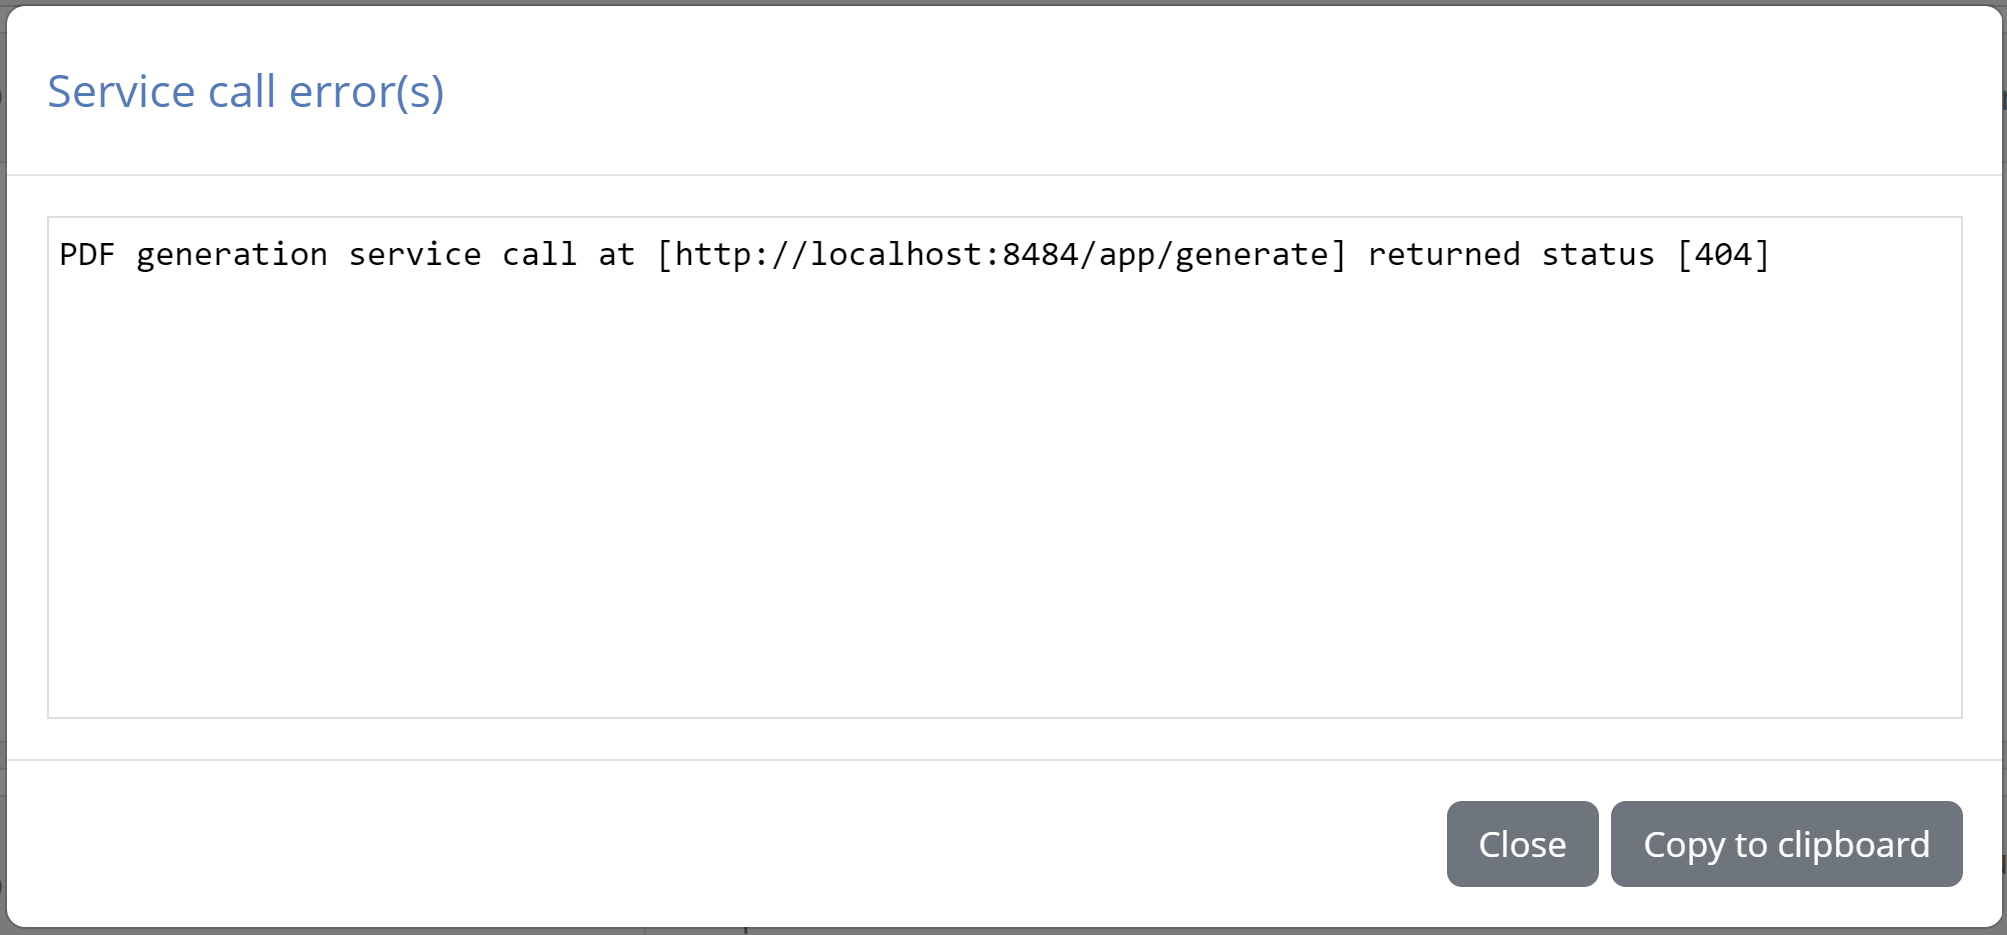
Conformance overview certificate
A conformance overview certificate is similar in nature to the conformance statement certificate in that is provides proof of successful test completion for a given organisation. The difference in this case is that it focuses not on a single conformance statement, but rather on a set of related statements at different aggregation levels. These could be the overall status of the organisation; or a specific domain, specification group, or specification. To manage the report click the Conformance overview certificate panel to display its available settings.
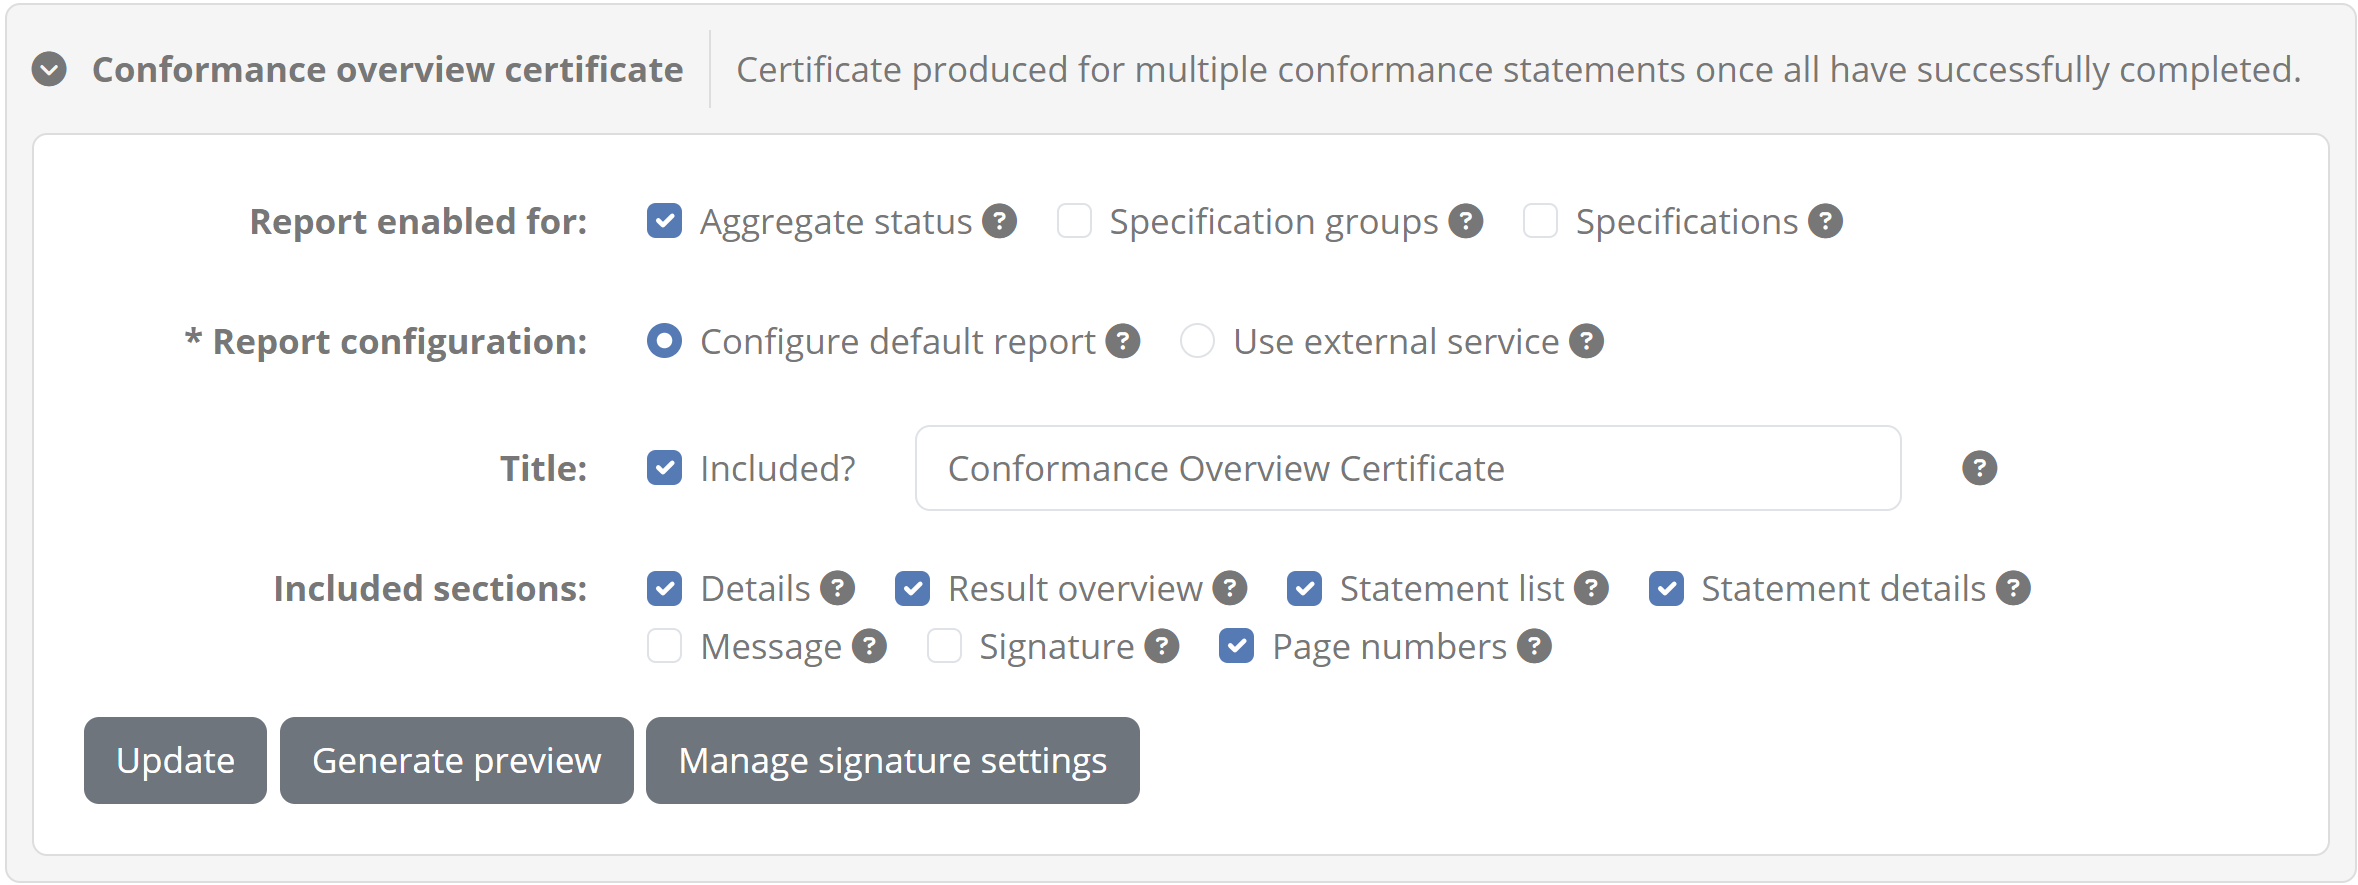
The first setting is to select the report levels for which conformance overview certificates will be enabled. By default users can produce a normal conformance overview report at any level, but no conformance certificates. If and at which levels such certificates are to be made available is determined by the community administrator with these options.
With at least one report level selected, the next option is on how to generate the report. By default the report’s configuration assumes you will be using the Test Bed’s built-in report template. This foresees predefined but customisable sets of information, that will be used to automatically generate the certificate when requested by organisation users. When a certificate is generated by a community administrator, these settings serve as defaults that can be further customised before producing the final report.
The options you can provide to customise your issued certificates are as follows:
The title to use. If none is provided “Conformance Certificate” is used, but you may also choose to not include any title.
Whether to add the conformance overview details. These are the information on the domain, specification, actor, organisation and system.
Whether to add the result overview. This is a summary text on the number of successfully passed and failed statement.
Whether to add the statement list. Doing so will include a table showing the status for each statement in the conformance statement.
Whether to add the individual statement details. Doing so will include a detailed report for each covered statement.
Whether to add a custom message. This is a rich-text section that you can customise as needed.
Whether to add a digital signature to the report. This is done to serve as proof of authenticity and for non-repudiation.
Whether to include page numbers in the report’s footer.
By default the conformance certificate includes the same information as the conformance overview report. You are however free to customise this as you see fit for your community.
If you select to add a message, the form will expand to allow you to define its content:
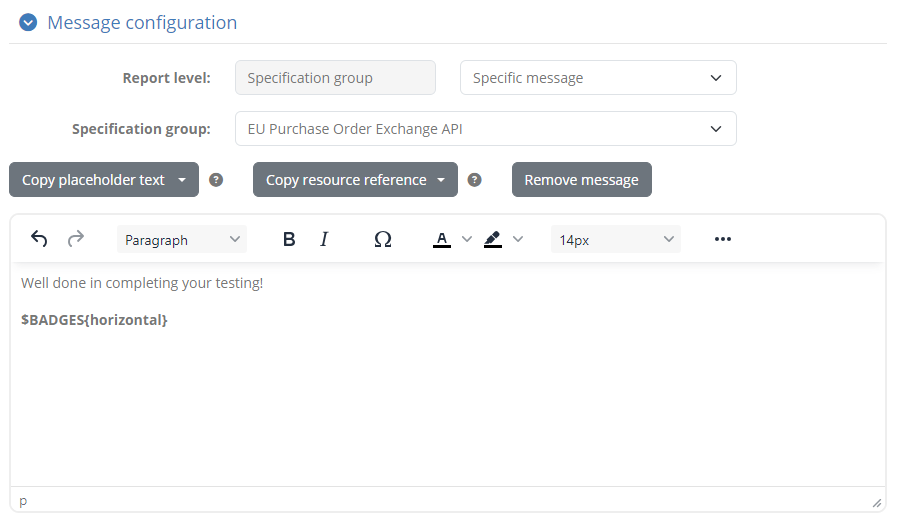
You can define different custom messages for different report aggregation levels and even specific levels, such as a given specification group. The available choices are determined by the report levels for which you have enabled certificates as defined previously (using the Report enabled for options). Depending on these levels you can define a custom message as follows:
For the overall aggregate status of an organisation.
For domains, specification groups or specifications.
In the cases of domains, specification groups and specifications you may define the default message to appear regardless of which domain, group or specification the report refers to, or a specific message for the one the report refers to. In all cases, the custom message itself is configured by means of a rich text editor that supports several placeholders that will be replaced when the certificate is generated. The supported placeholders, the levels for which they apply, and their meaning are listed in the following table.
Note
Where placeholders below include the term index, this refers to the 0-based sequential index of the overview’s included conformance statements. For example, $SPECIFICATION{0} refers to the specification name of the first included conformance statement.
Placeholder |
Report level |
Description |
|---|---|---|
$DOMAIN |
All levels (when a specific domain applies). |
The full name of the domain. |
$DOMAIN{index} |
Aggregate status (when more than one domains apply). |
The full name of the domain at the given index. |
$SPECIFICATION |
Specification. |
The full name of the specification. |
$SPECIFICATION{index} |
Aggregate status or Domain. |
The full name of the specification at the given index. |
$SPECIFICATION_GROUP |
Specification group. |
The full name of the specification group. |
$SPECIFICATION_GROUP{index} |
Aggregate status or Domain. |
The full name of the specification group at the given index. |
$SPECIFICATION_GROUP_OPTION{index} |
Specification group |
The full name of the option (specification within a group) at the given index. |
$ACTOR{index} |
All levels. |
The full name of the actor at the given index. |
$ORGANISATION |
All levels. |
The full name of the organisation to be granted the certificate. |
$SYSTEM |
All levels. |
The full name of the organisation’s system that was used in the tests. |
$SNAPSHOT |
All levels. |
The public name of the relevant conformance snapshot (or the label for the latest status). |
$BADGE{index} |
All levels. |
The configured badge for the status of the statement at the given index. |
$BADGE{index|width} |
All levels. |
Similar to $BADGE{index} but forcing a specific width (in pixels) for the image. |
$BADGES{layout} |
All levels. |
All configured badges for the statements’ status, displayed either horizontally or vertically. |
$BADGES{layout|width} |
All levels. |
Similar to $BADGES{layout} but forcing a specific width (in pixels) for the images. |
$REPORT_DATE{format} |
All levels. |
The date and time when the report was generated, using the defined format (as a Java data format string). |
$LAST_UPDATE_DATE{format} |
All levels. |
The date and time when the overall conformance status was last updated, using the defined format (as a Java data format string). |
$ORGANISATION{PROPERTY} |
All levels. |
The value of a custom organisation-level property (named “PROPERTY” here) set for the relevant organisation. |
$SYSTEM{PROPERTY} |
All levels. |
The value of a custom system-level property (named “PROPERTY” here) set for the relevant system. |
$DOMAIN{PROPERTY} |
Aggregate status (when a single domain applies), Domain, Specification group or Specification. |
The value of a domain parameter (named “PROPERTY” here) set for the community’s domain. |
You can review and copy all the above placeholder values to your message content using the Copy placeholder text button.
Besides placeholders, you also have a Copy resource reference control that allows you to search in-place your community’s resources, such as images to include or files to add download links for. Once you find the resource you’re looking for you can click it to copy its reference to the clipboard. You can then use this reference as e.g. the source of an image file or the target of a link. Finally, the Remove message button can be used to remove a specific message’s configuration.
Delegate to an external service
Besides using the built-in certificate template you may choose to delegate the report’s generation to an external service. Doing so affords you full control over the resulting report, both in terms of included information as well as styling. To use this option, select the Use external service option for the report configuration.
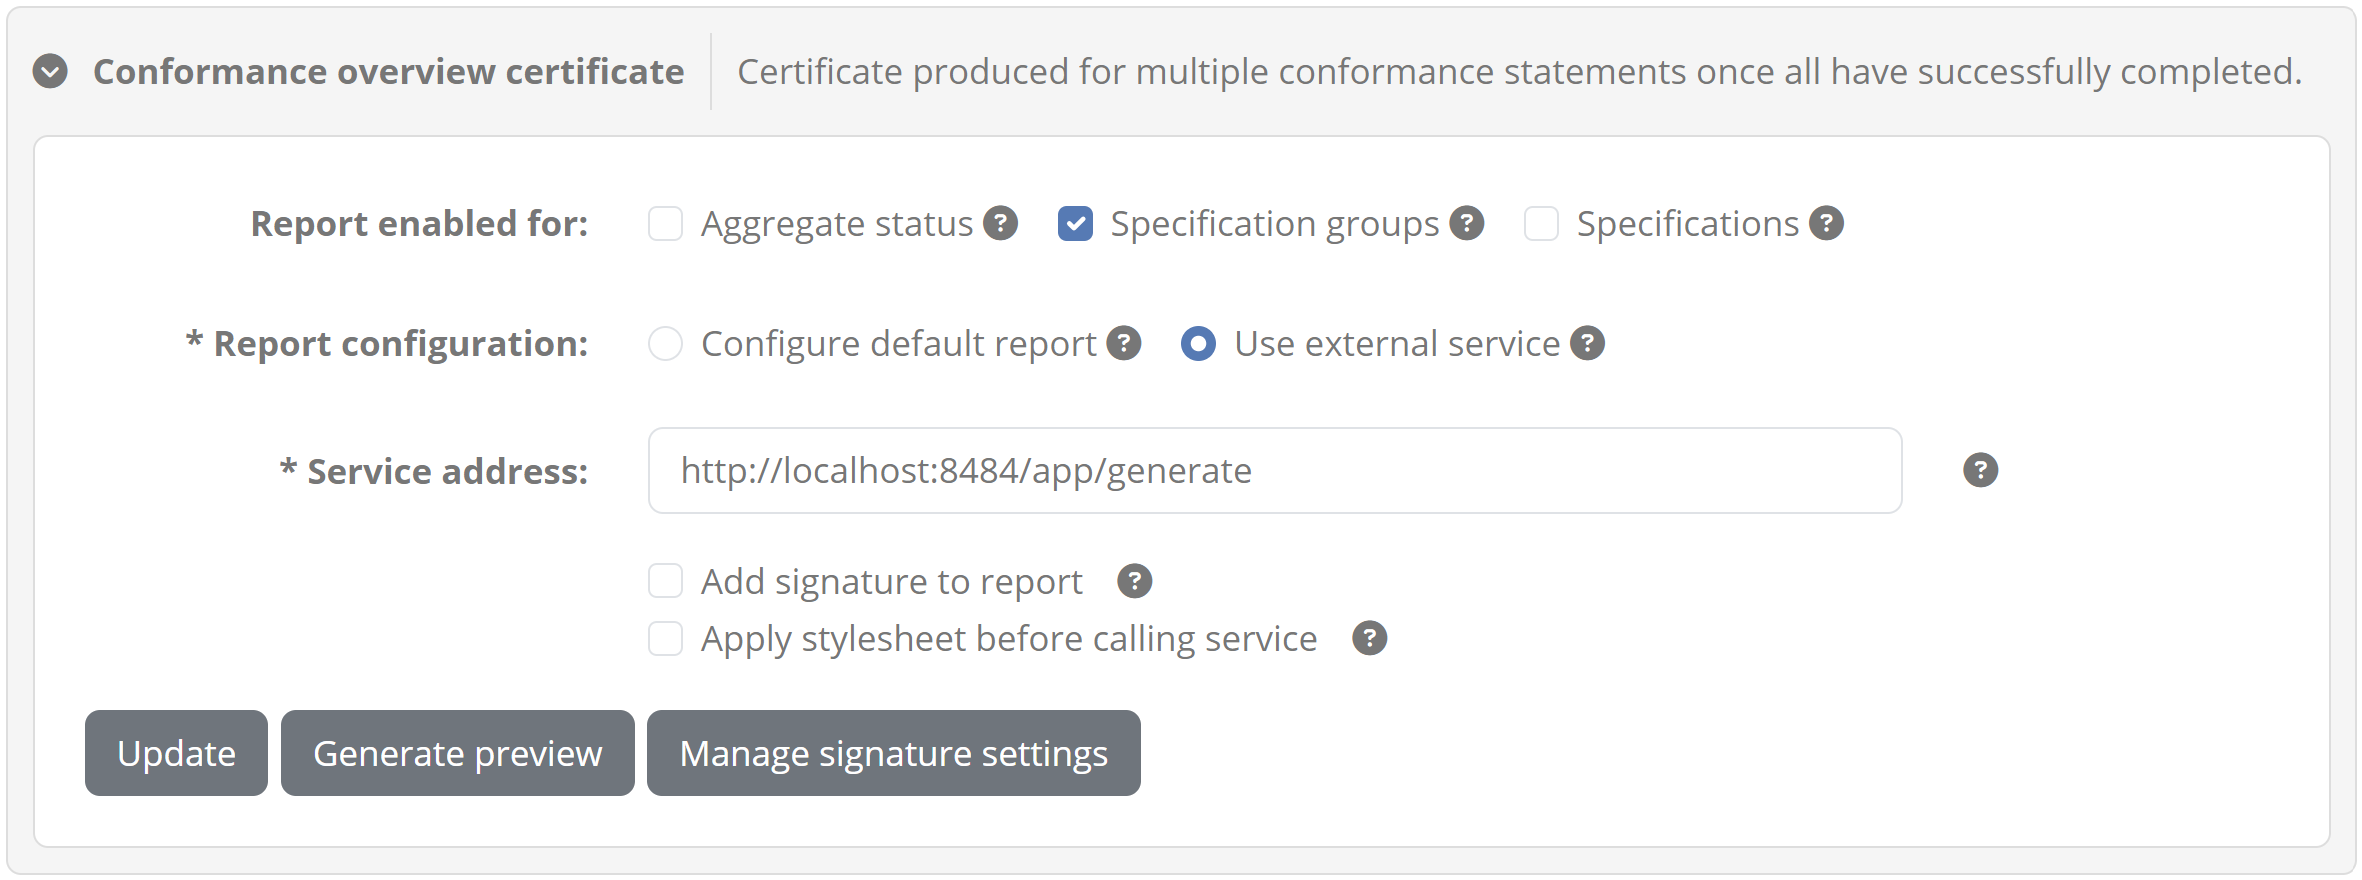
With this option enabled you are expected to configure an HTTP service that will:
Receive from the Test Bed a
POSTrequest having as its body the relevant conformance statement report in XML format.Respond with the produced PDF report.
Selecting this option presents you with a set of relevant inputs:
The service address representing the endpoint to handle the report’s generation.
An option to add a signature to the produced report. You can skip this if you don’t require signatures, or if the service itself adds a signature.
An option to apply a stylesheet before calling the service. Doing so allows you to configure an XSLT stylesheet that will be applied to the default XML report before providing it to the configured service.
Configure digital signatures
To ensure the integrity and trust of your report you may also choose to include a digital signature. To manage your signature setting click on Manage signature settings from the panel’s footer.
Doing so will display a popup in which you can provide information on the certificate to be used for the signatures.
You are expected to provide here:
The keystore file that includes the keypair (private and public key) that will be used. The keystore should contain a single keypair.
The keystore type. Supported types are JCEKS, JKS and PKCS#12.
The keystore’s password, used to open and read the keystore’s contents.
The key’s password, that is needed to use the private key when producing signatures.
Note
Use of a community keypair for signatures: The reason you are expected to provide a keypair for signatures is because ultimately the responsibility for issuing and signing the report, as well as maintaining the validity of the relevant keypair lies within the community.
Once the certificate information is provided you may Download or Delete it’s keystore. You may also validate your configuration to be certain that the Test Bed can read the certificate by clicking the Test settings button. Clicking Save will persist your settings, whereas Close will hide the popup.
Preview your configuration
Once you have adjusted your settings you may preview them by clicking the Generate preview button. This will produce a certificate using sample values which, in case you are using the default template, will be similar to the following example:
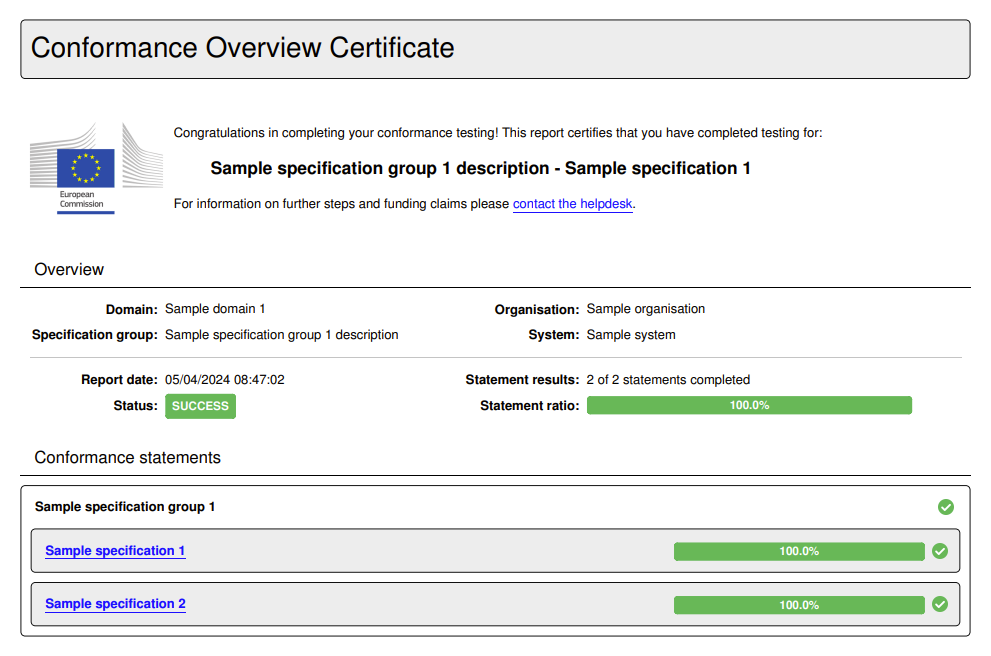
In case you chose to delegate the report’s generation to an external service, the preview also serves as a test that the service is accessible and responds as expected. The service will be called with the sample data in XML form, and the resulting PDF report will be downloaded. In case there is an error in the configuration or the service’s processing, a popup with detailed information will be presented to help you troubleshoot the issue.

Conformance statement report
The conformance statement report is used to summarise the status of a given conformance statement. Available in XML and PDF, it is available to all users and for any conformance statement status. The report’s configuration settings are available in the Conformance statement report panel.

When producing an XML report this uses by default the GITB Test Reporting Language (GITB TRL) as the output format. If you prefer to use a different structure, you can check the custom XML reports option to provide an XSLT stylesheet. This will be applied on the default XML data to produce the desired output.
When producing a PDF report the Test Bed’s built-in template is used by default. If you want to customise the report, you can check the Custom PDF reports option, in which case report generation will be delegated to an external service. In this case you will need to provide:
The service address of the endpoint that will generate the reports. This is an HTTP endpoint that will receive a
POSTwith the report data in XML, and is expected to return the resulting PDF.In case you chose to apply a custom stylesheet to XML reports, you can also choose whether the stylesheet should be applied to the XML data before posting it to the service.
Finally, regarding PDF reports you can also choose to include a digital signature to ensure your reports’ integrity and trust. You can leave the relevant option unchecked if you don’t require signatures, or if you delegate to an external service that already signs the produced PDF reports. If you have the Test Bed sign PDF reports you will need to also configure your signature settings.
Configure digital signatures
If you have selected to add digital signatures to PDF reports you will need to foresee a signing certificate. To manage this click on Manage signature settings from the panel’s footer.
Doing so will display a popup in which you can provide information on the certificate to be used for the signatures.
You are expected to provide here:
The keystore file that includes the keypair (private and public key) that will be used. The keystore should contain a single keypair.
The keystore type. Supported types are JCEKS, JKS and PKCS#12.
The keystore’s password, used to open and read the keystore’s contents.
The key’s password, that is needed to use the private key when producing signatures.
Note
Use of a community keypair for signatures: The reason you are expected to provide a keypair for signatures is because ultimately the responsibility for issuing and signing the report, as well as maintaining the validity of the relevant keypair lies within the community.
Once the certificate information is provided you may Download or Delete it’s keystore. You may also validate your configuration to be certain that the Test Bed can read the certificate by clicking the Test settings button. Clicking Save will persist your settings, whereas Close will hide the popup.
Preview your configuration
Once you have adjusted your settings you may preview them by clicking the Generate preview button. You can preview both PDF and XML reports, and in both cases produce reports with or without test case details.
When previewing your XML report settings, the produced report will be displayed in a popup allowing you to also copy and download it. If you have configured a custom XSLT stylesheet this will also be applied to the preview.
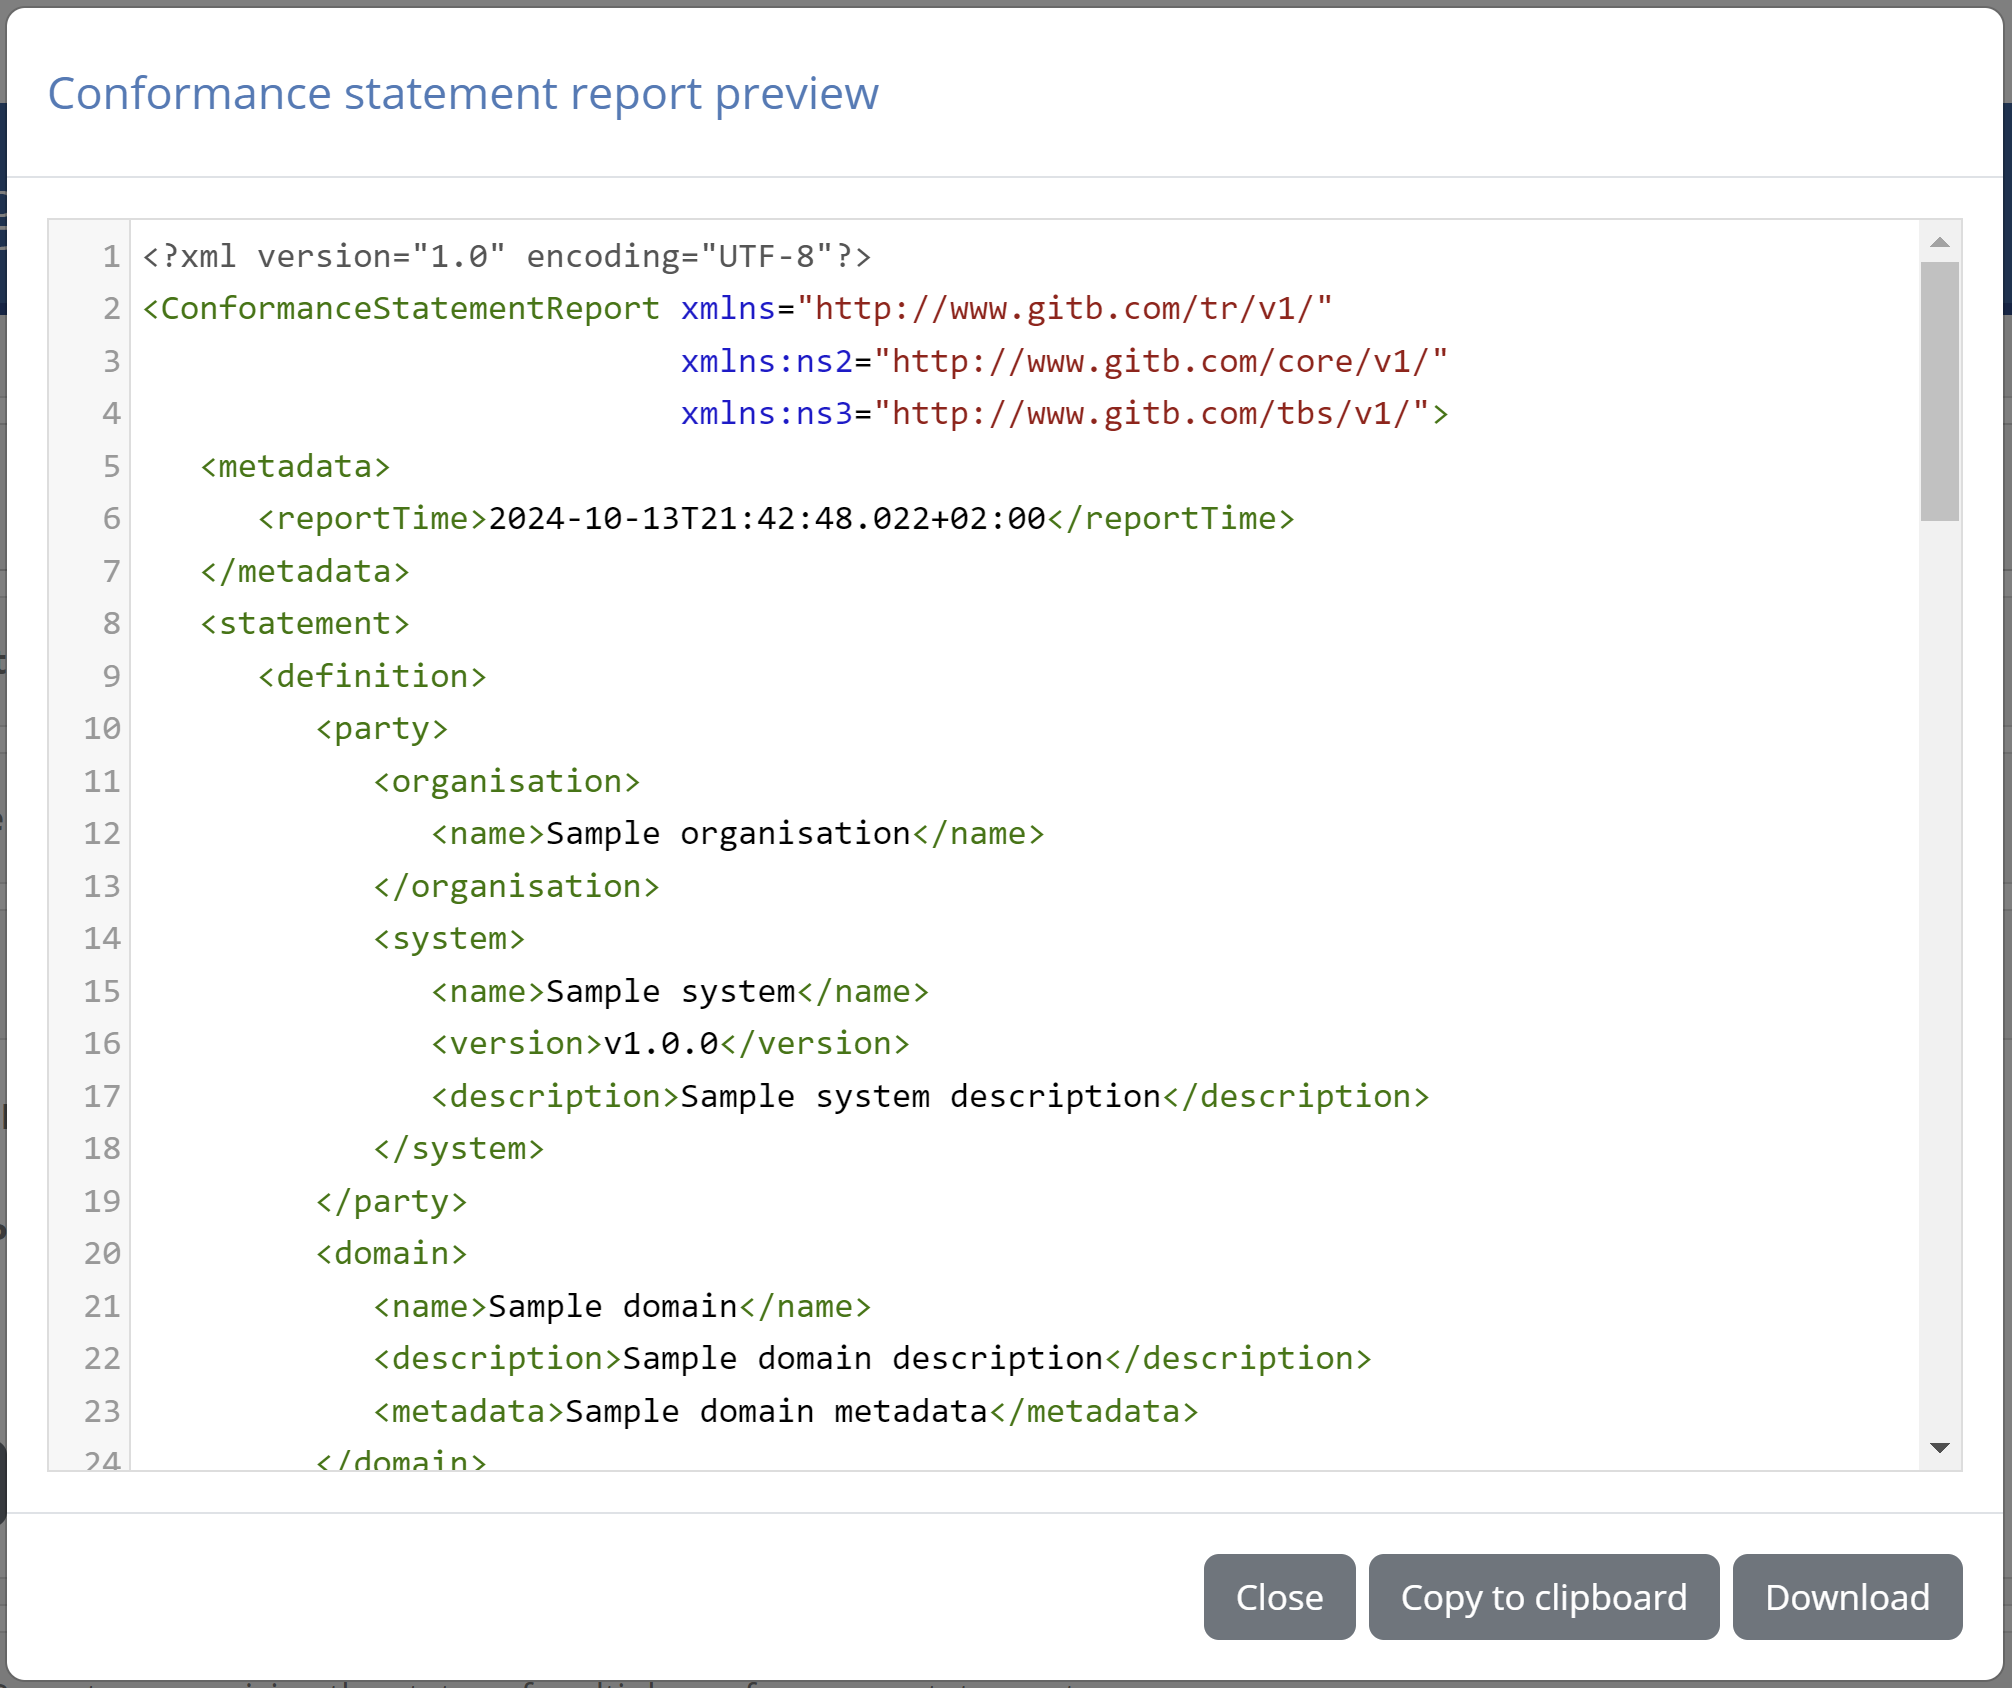
In the case of the PDF report settings, and assuming you are using the built-in template, the preview will be similar to the following example:
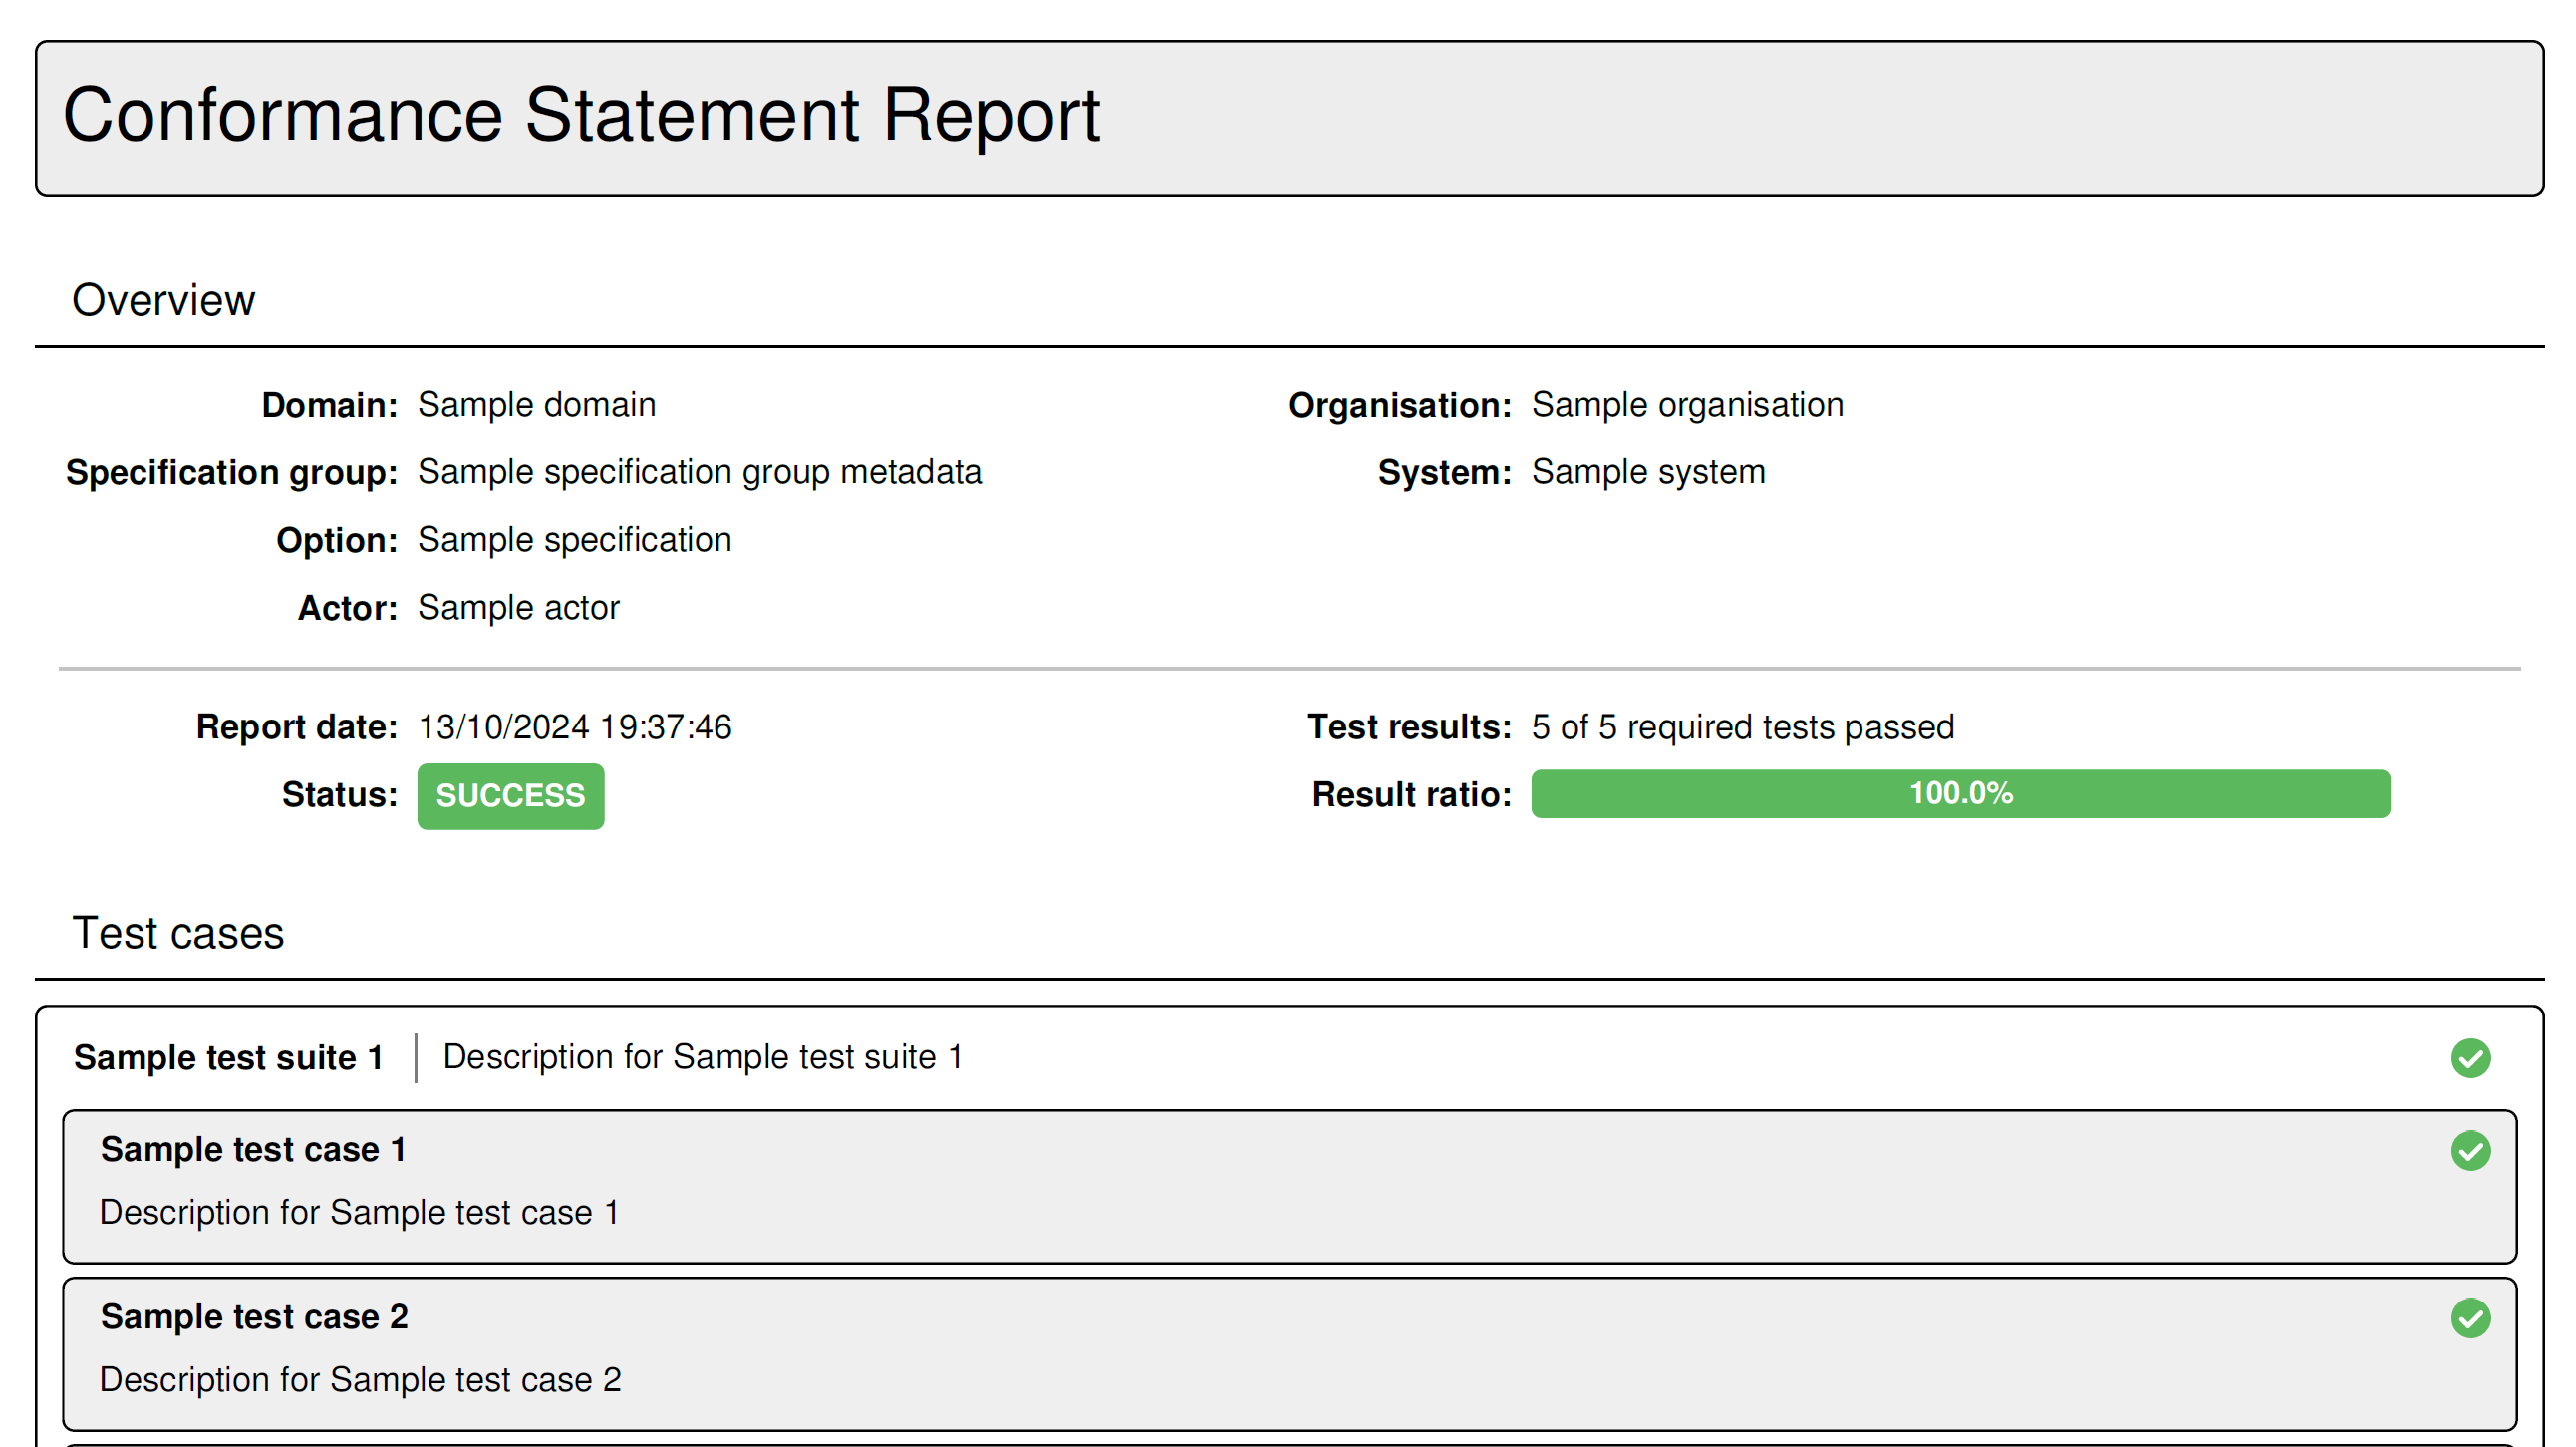
In case you chose to delegate the report’s generation to an external service, the preview also serves as a test that the service is accessible and responds as expected. The service will be called with the sample data in XML form, and the resulting PDF report will be downloaded. In case there is an error in the configuration or the service’s processing, a popup with detailed information will be presented to help you troubleshoot the issue.

Conformance overview report
The conformance overview report is used to summarise the status of a set of related conformance statements. Available in XML and PDF, it is available to all users and regardless of the status of the underlying conformance statements. The report’s configuration settings are available in the Conformance overview report panel.

When producing an XML report this uses by default the GITB Test Reporting Language (GITB TRL) as the output format. If you prefer to use a different structure, you can check the custom XML reports option to provide an XSLT stylesheet. This will be applied on the default XML data to produce the desired output.
When producing a PDF report the Test Bed’s built-in template is used by default. If you want to customise the report, you can check the Custom PDF reports option, in which case report generation will be delegated to an external service. In this case you will need to provide:
The service address of the endpoint that will generate the reports. This is an HTTP endpoint that will receive a
POSTwith the report data in XML, and is expected to return the resulting PDF.In case you chose to apply a custom stylesheet to XML reports, you can also choose whether the stylesheet should be applied to the XML data before posting it to the service.
Finally, regarding PDF reports you can also choose to include a digital signature to ensure your reports’ integrity and trust. You can leave the relevant option unchecked if you don’t require signatures, or if you delegate to an external service that already signs the produced PDF reports. If you have the Test Bed sign PDF reports you will need to also configure your signature settings.
Configure digital signatures
If you have selected to add digital signatures to PDF reports you will need to foresee a signing certificate. To manage this click on Manage signature settings from the panel’s footer.
Doing so will display a popup in which you can provide information on the certificate to be used for the signatures.
You are expected to provide here:
The keystore file that includes the keypair (private and public key) that will be used. The keystore should contain a single keypair.
The keystore type. Supported types are JCEKS, JKS and PKCS#12.
The keystore’s password, used to open and read the keystore’s contents.
The key’s password, that is needed to use the private key when producing signatures.
Note
Use of a community keypair for signatures: The reason you are expected to provide a keypair for signatures is because ultimately the responsibility for issuing and signing the report, as well as maintaining the validity of the relevant keypair lies within the community.
Once the certificate information is provided you may Download or Delete it’s keystore. You may also validate your configuration to be certain that the Test Bed can read the certificate by clicking the Test settings button. Clicking Save will persist your settings, whereas Close will hide the popup.
Preview your configuration
Once you have adjusted your settings you may preview them by clicking the Generate preview button. You can preview both PDF and XML reports, and also select the aggregation level at which you would want to produce the report at.
When previewing your XML report settings, the produced report will be displayed in a popup allowing you to also copy and download it. If you have configured a custom XSLT stylesheet this will also be applied to the preview.
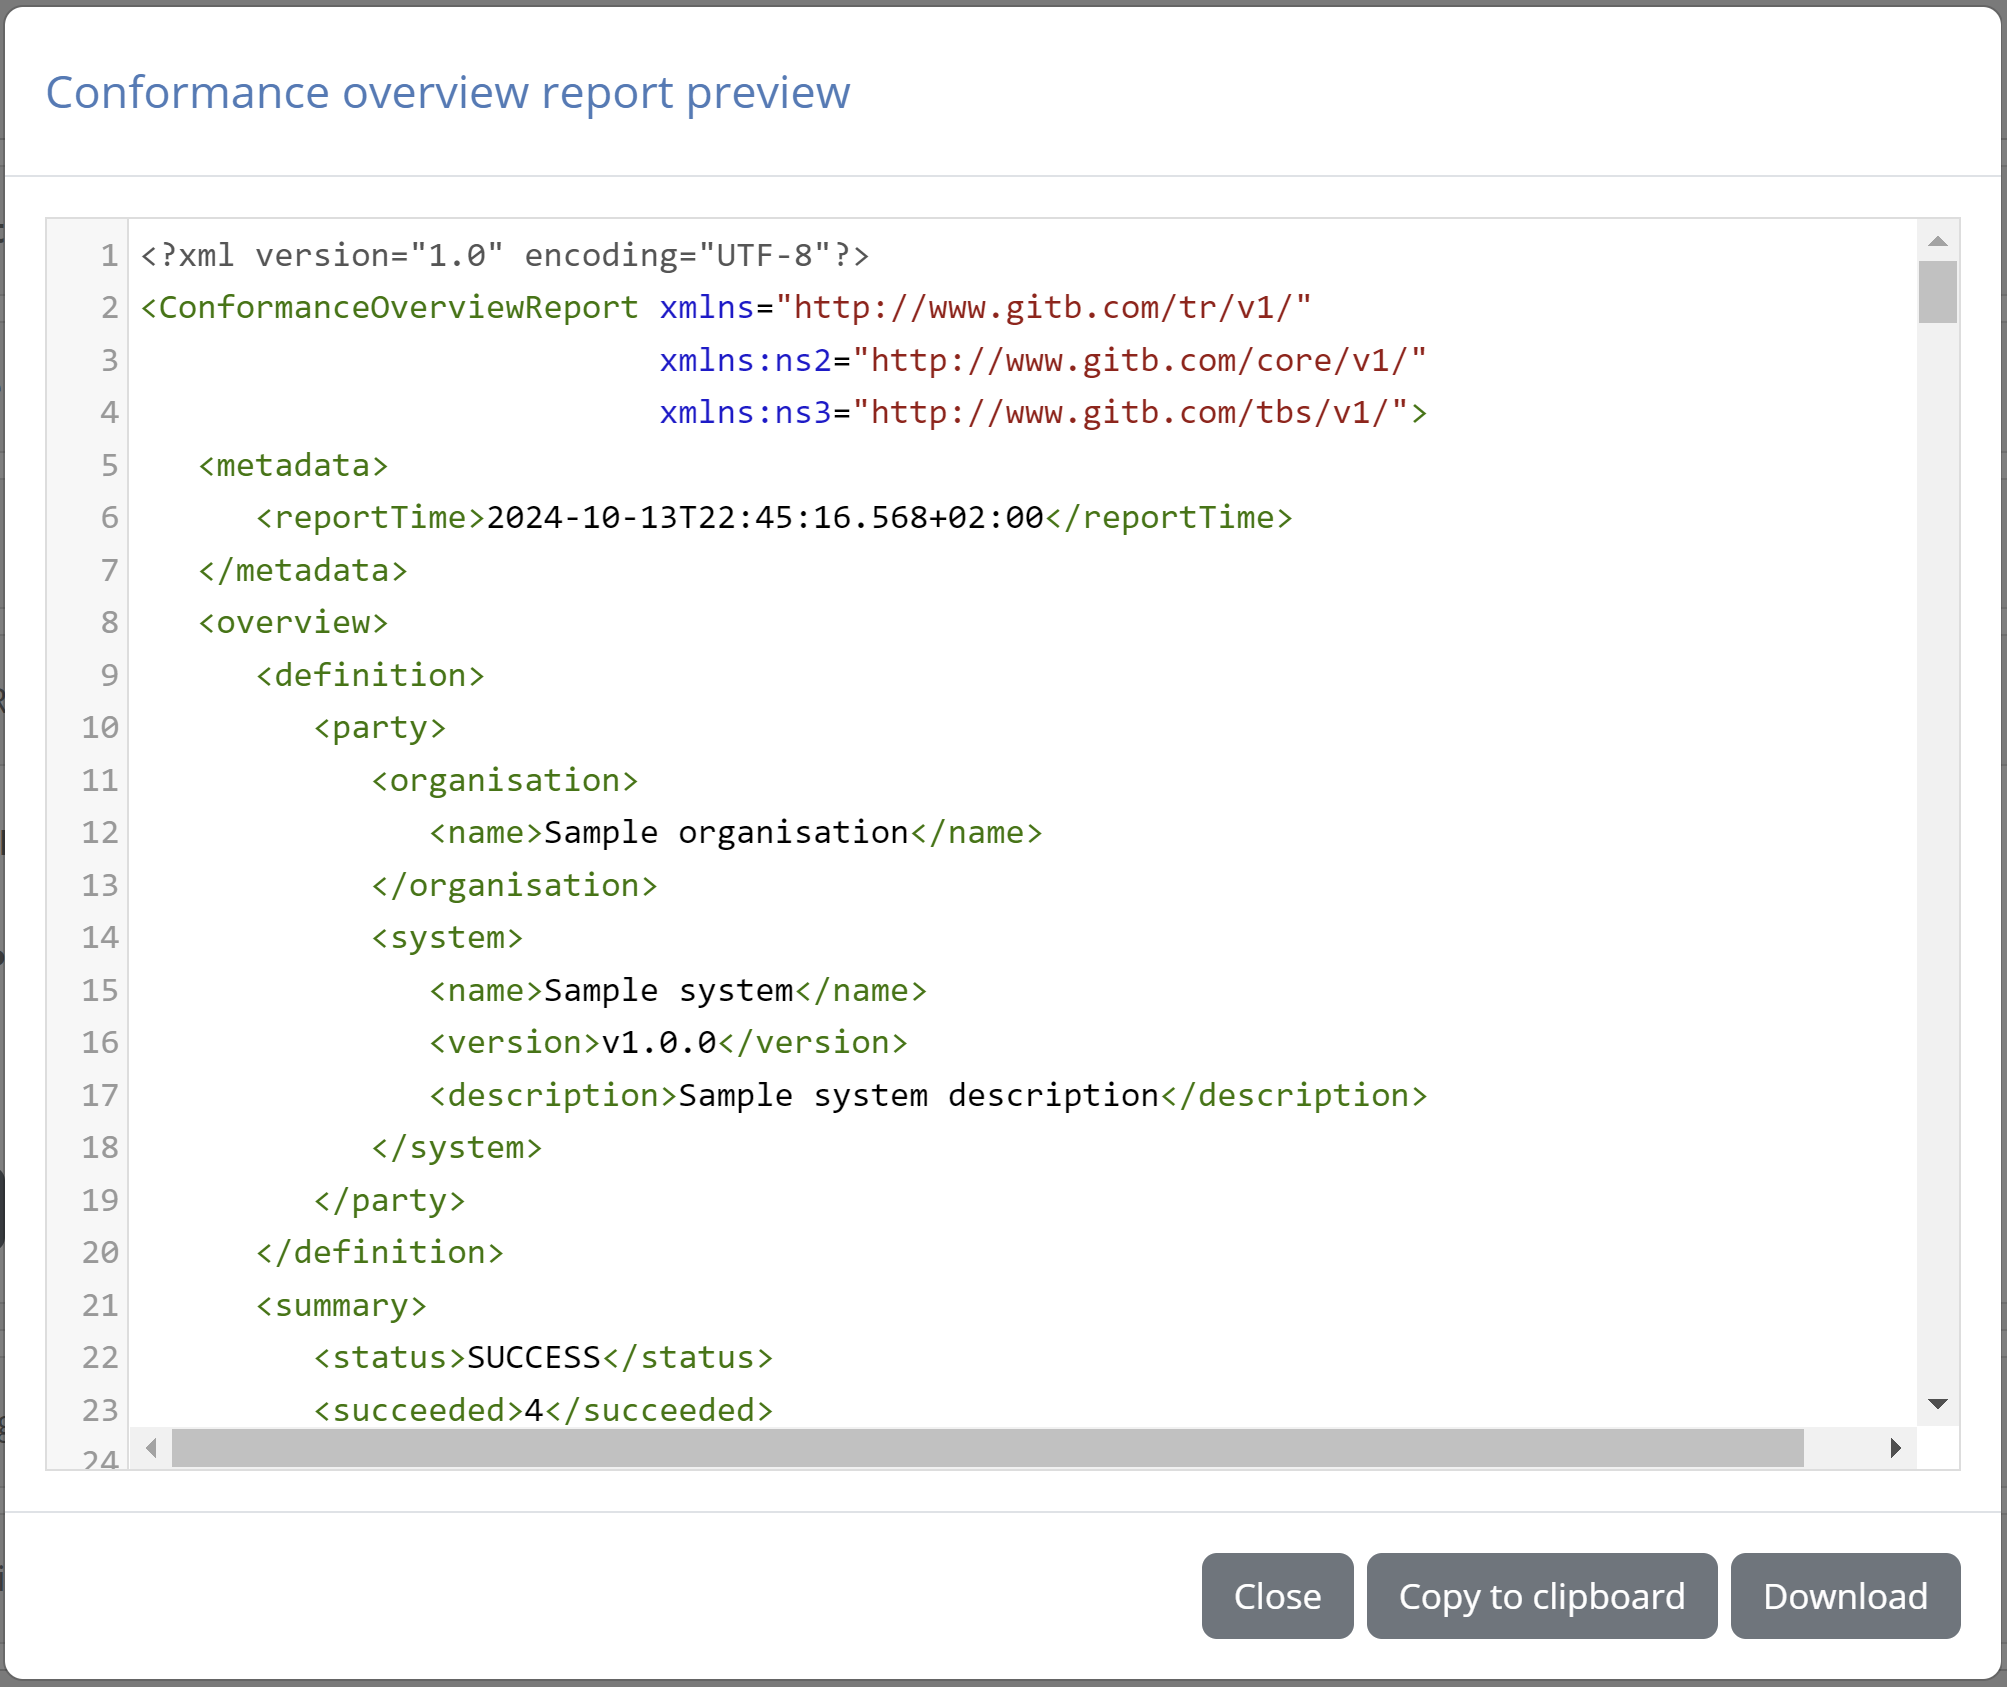
In the case of the PDF report settings, and assuming you are using the built-in template, the preview will be similar to the following example:
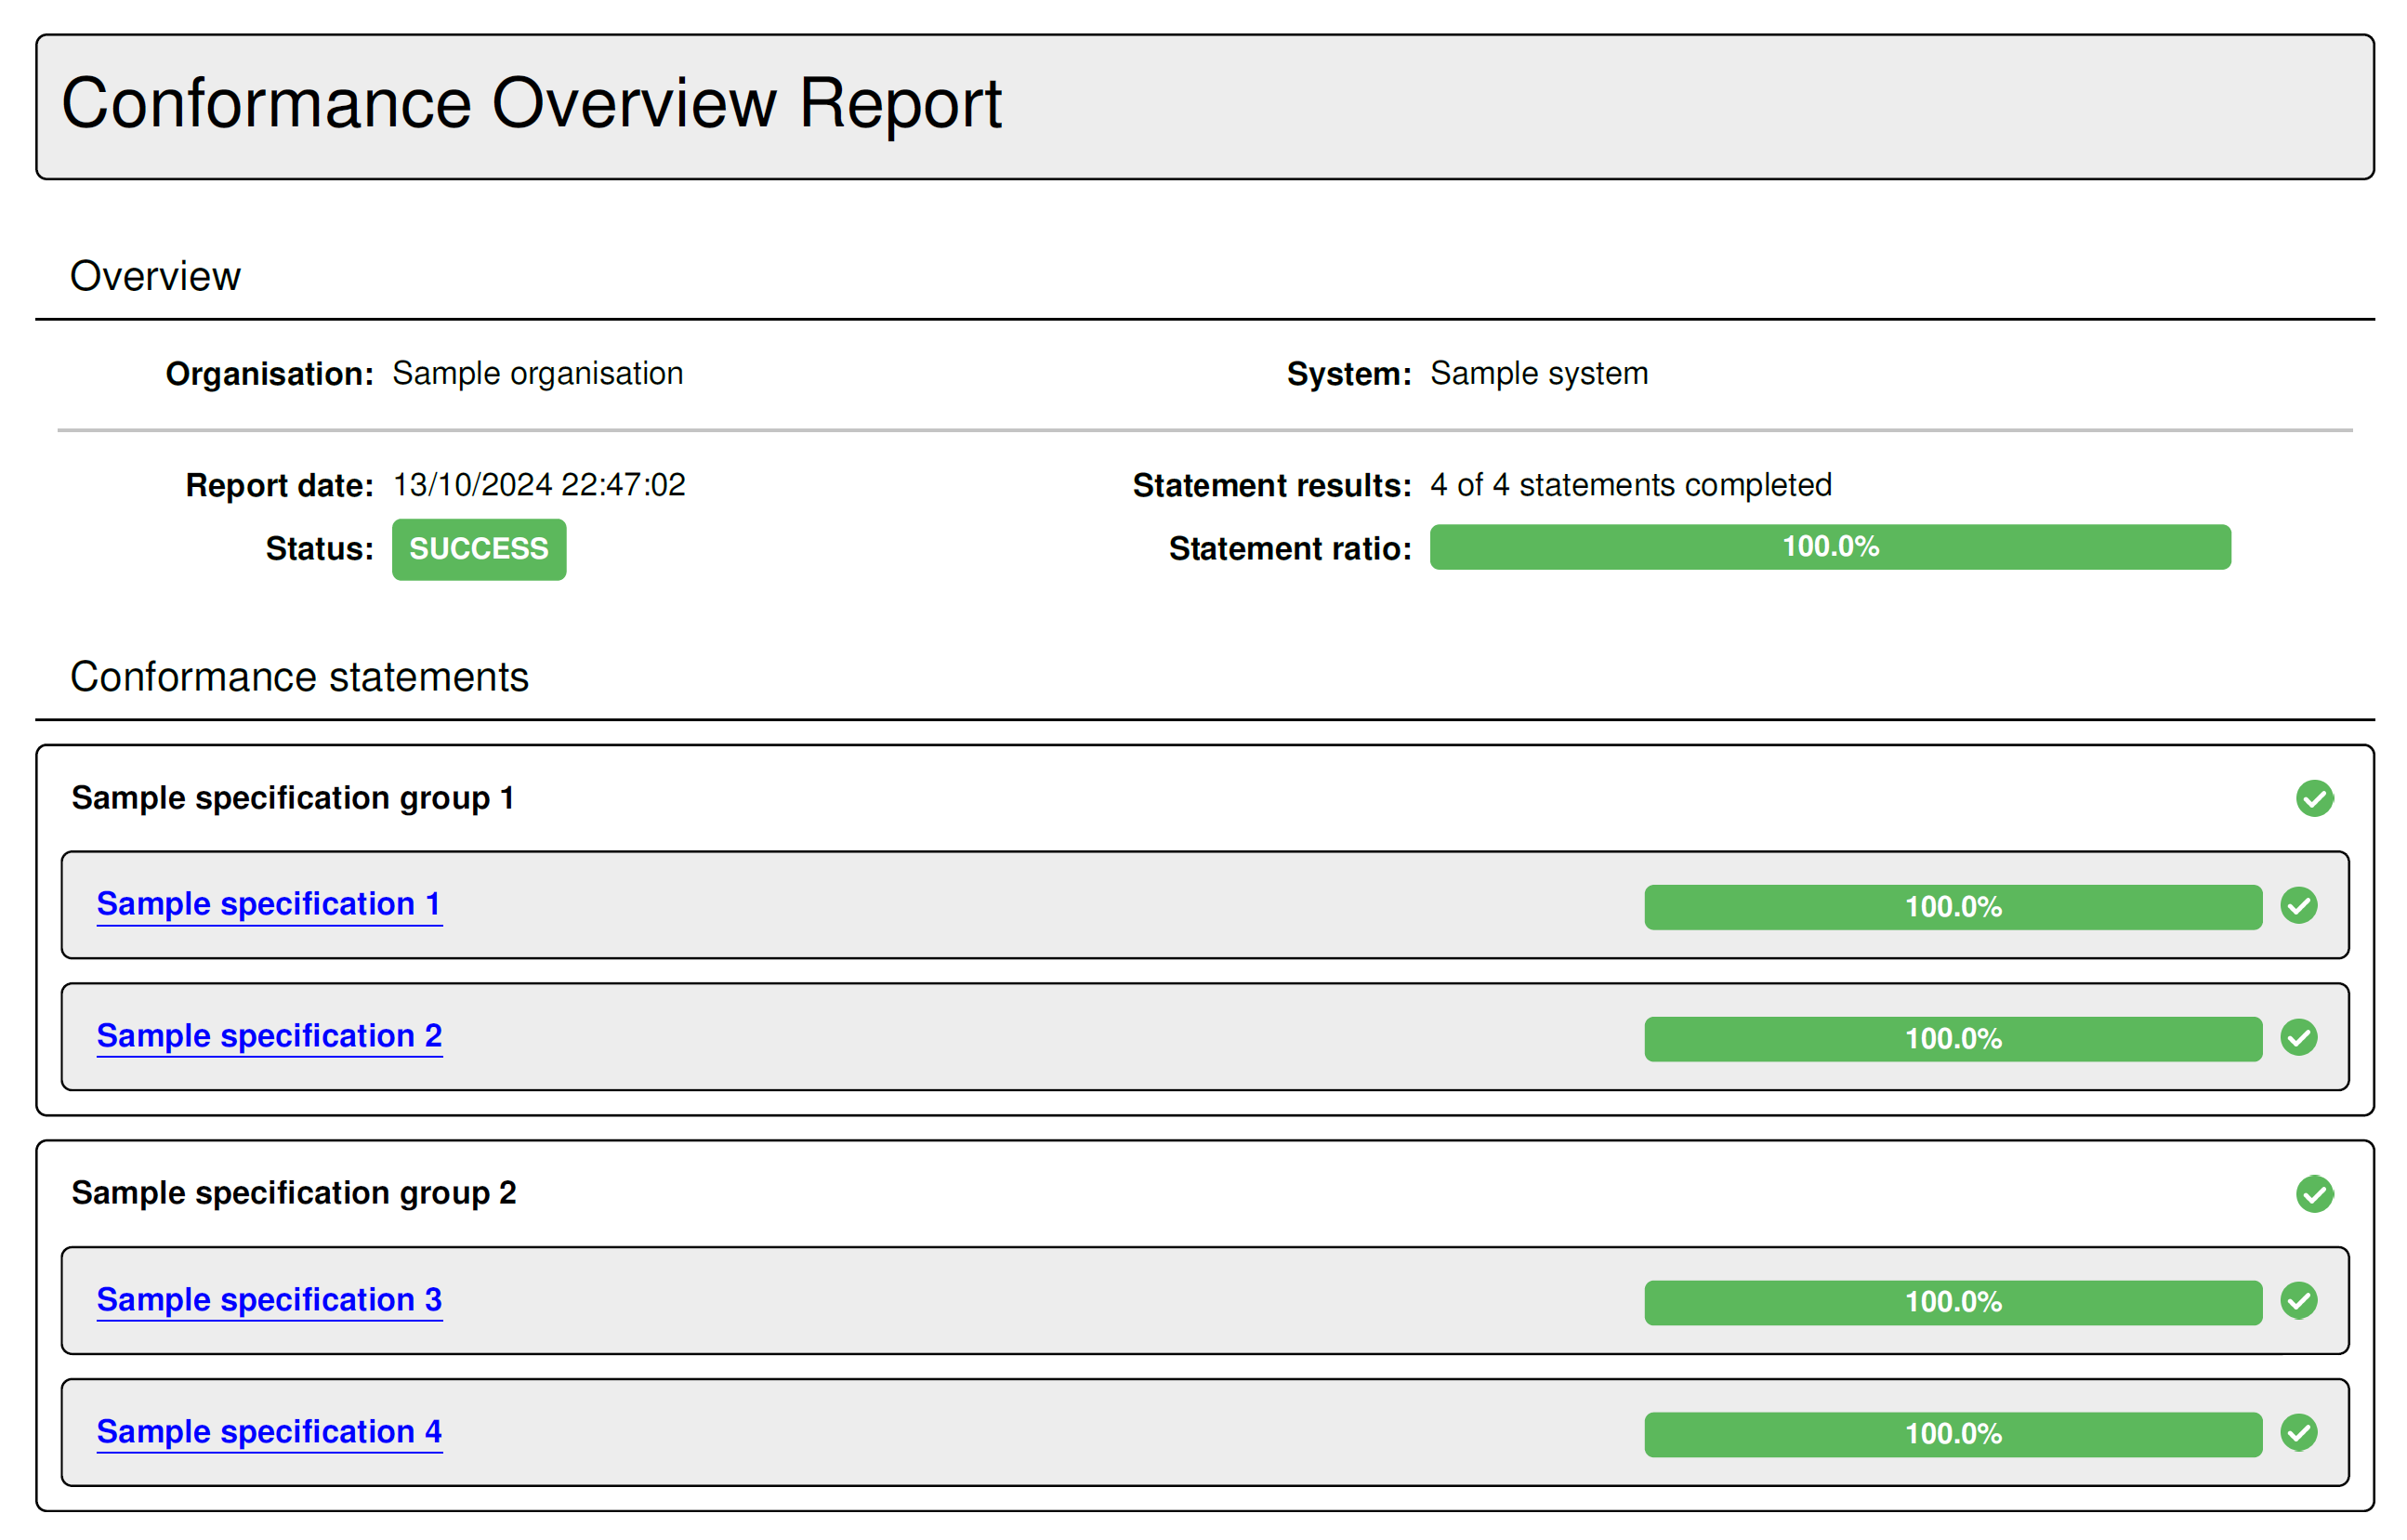
In case you chose to delegate the report’s generation to an external service, the preview also serves as a test that the service is accessible and responds as expected. The service will be called with the sample data in XML form, and the resulting PDF report will be downloaded. In case there is an error in the configuration or the service’s processing, a popup with detailed information will be presented to help you troubleshoot the issue.

Test case report
The test case report is used to summarise the result of a given test case’s session and is available in XML and PDF formats. The report’s configuration settings are available in the Test case report panel.

When producing an XML report this uses by default the GITB Test Reporting Language (GITB TRL) as the output format. If you prefer to use a different structure, you can check the custom XML reports option to provide an XSLT stylesheet. This will be applied on the default XML data to produce the desired output.
When producing a PDF report the Test Bed’s built-in template is used by default. If you want to customise the report, you can check the Custom PDF reports option, in which case report generation will be delegated to an external service. In this case you will need to provide:
The service address of the endpoint that will generate the reports. This is an HTTP endpoint that will receive a
POSTwith the report data in XML, and is expected to return the resulting PDF.In case you chose to apply a custom stylesheet to XML reports, you can also choose whether the stylesheet should be applied to the XML data before posting it to the service.
Finally, regarding PDF reports you can also choose to include a digital signature to ensure your reports’ integrity and trust. You can leave the relevant option unchecked if you don’t require signatures, or if you delegate to an external service that already signs the produced PDF reports. If you have the Test Bed sign PDF reports you will need to also configure your signature settings.
Configure digital signatures
If you have selected to add digital signatures to PDF reports you will need to foresee a signing certificate. To manage this click on Manage signature settings from the panel’s footer.
Doing so will display a popup in which you can provide information on the certificate to be used for the signatures.
You are expected to provide here:
The keystore file that includes the keypair (private and public key) that will be used. The keystore should contain a single keypair.
The keystore type. Supported types are JCEKS, JKS and PKCS#12.
The keystore’s password, used to open and read the keystore’s contents.
The key’s password, that is needed to use the private key when producing signatures.
Note
Use of a community keypair for signatures: The reason you are expected to provide a keypair for signatures is because ultimately the responsibility for issuing and signing the report, as well as maintaining the validity of the relevant keypair lies within the community.
Once the certificate information is provided you may Download or Delete it’s keystore. You may also validate your configuration to be certain that the Test Bed can read the certificate by clicking the Test settings button. Clicking Save will persist your settings, whereas Close will hide the popup.
Preview your configuration
Once you have adjusted your settings you may preview them by clicking the Generate preview button. You can preview both PDF and XML reports.
When previewing your XML report settings, the produced report will be displayed in a popup allowing you to also copy and download it. If you have configured a custom XSLT stylesheet this will also be applied to the preview.
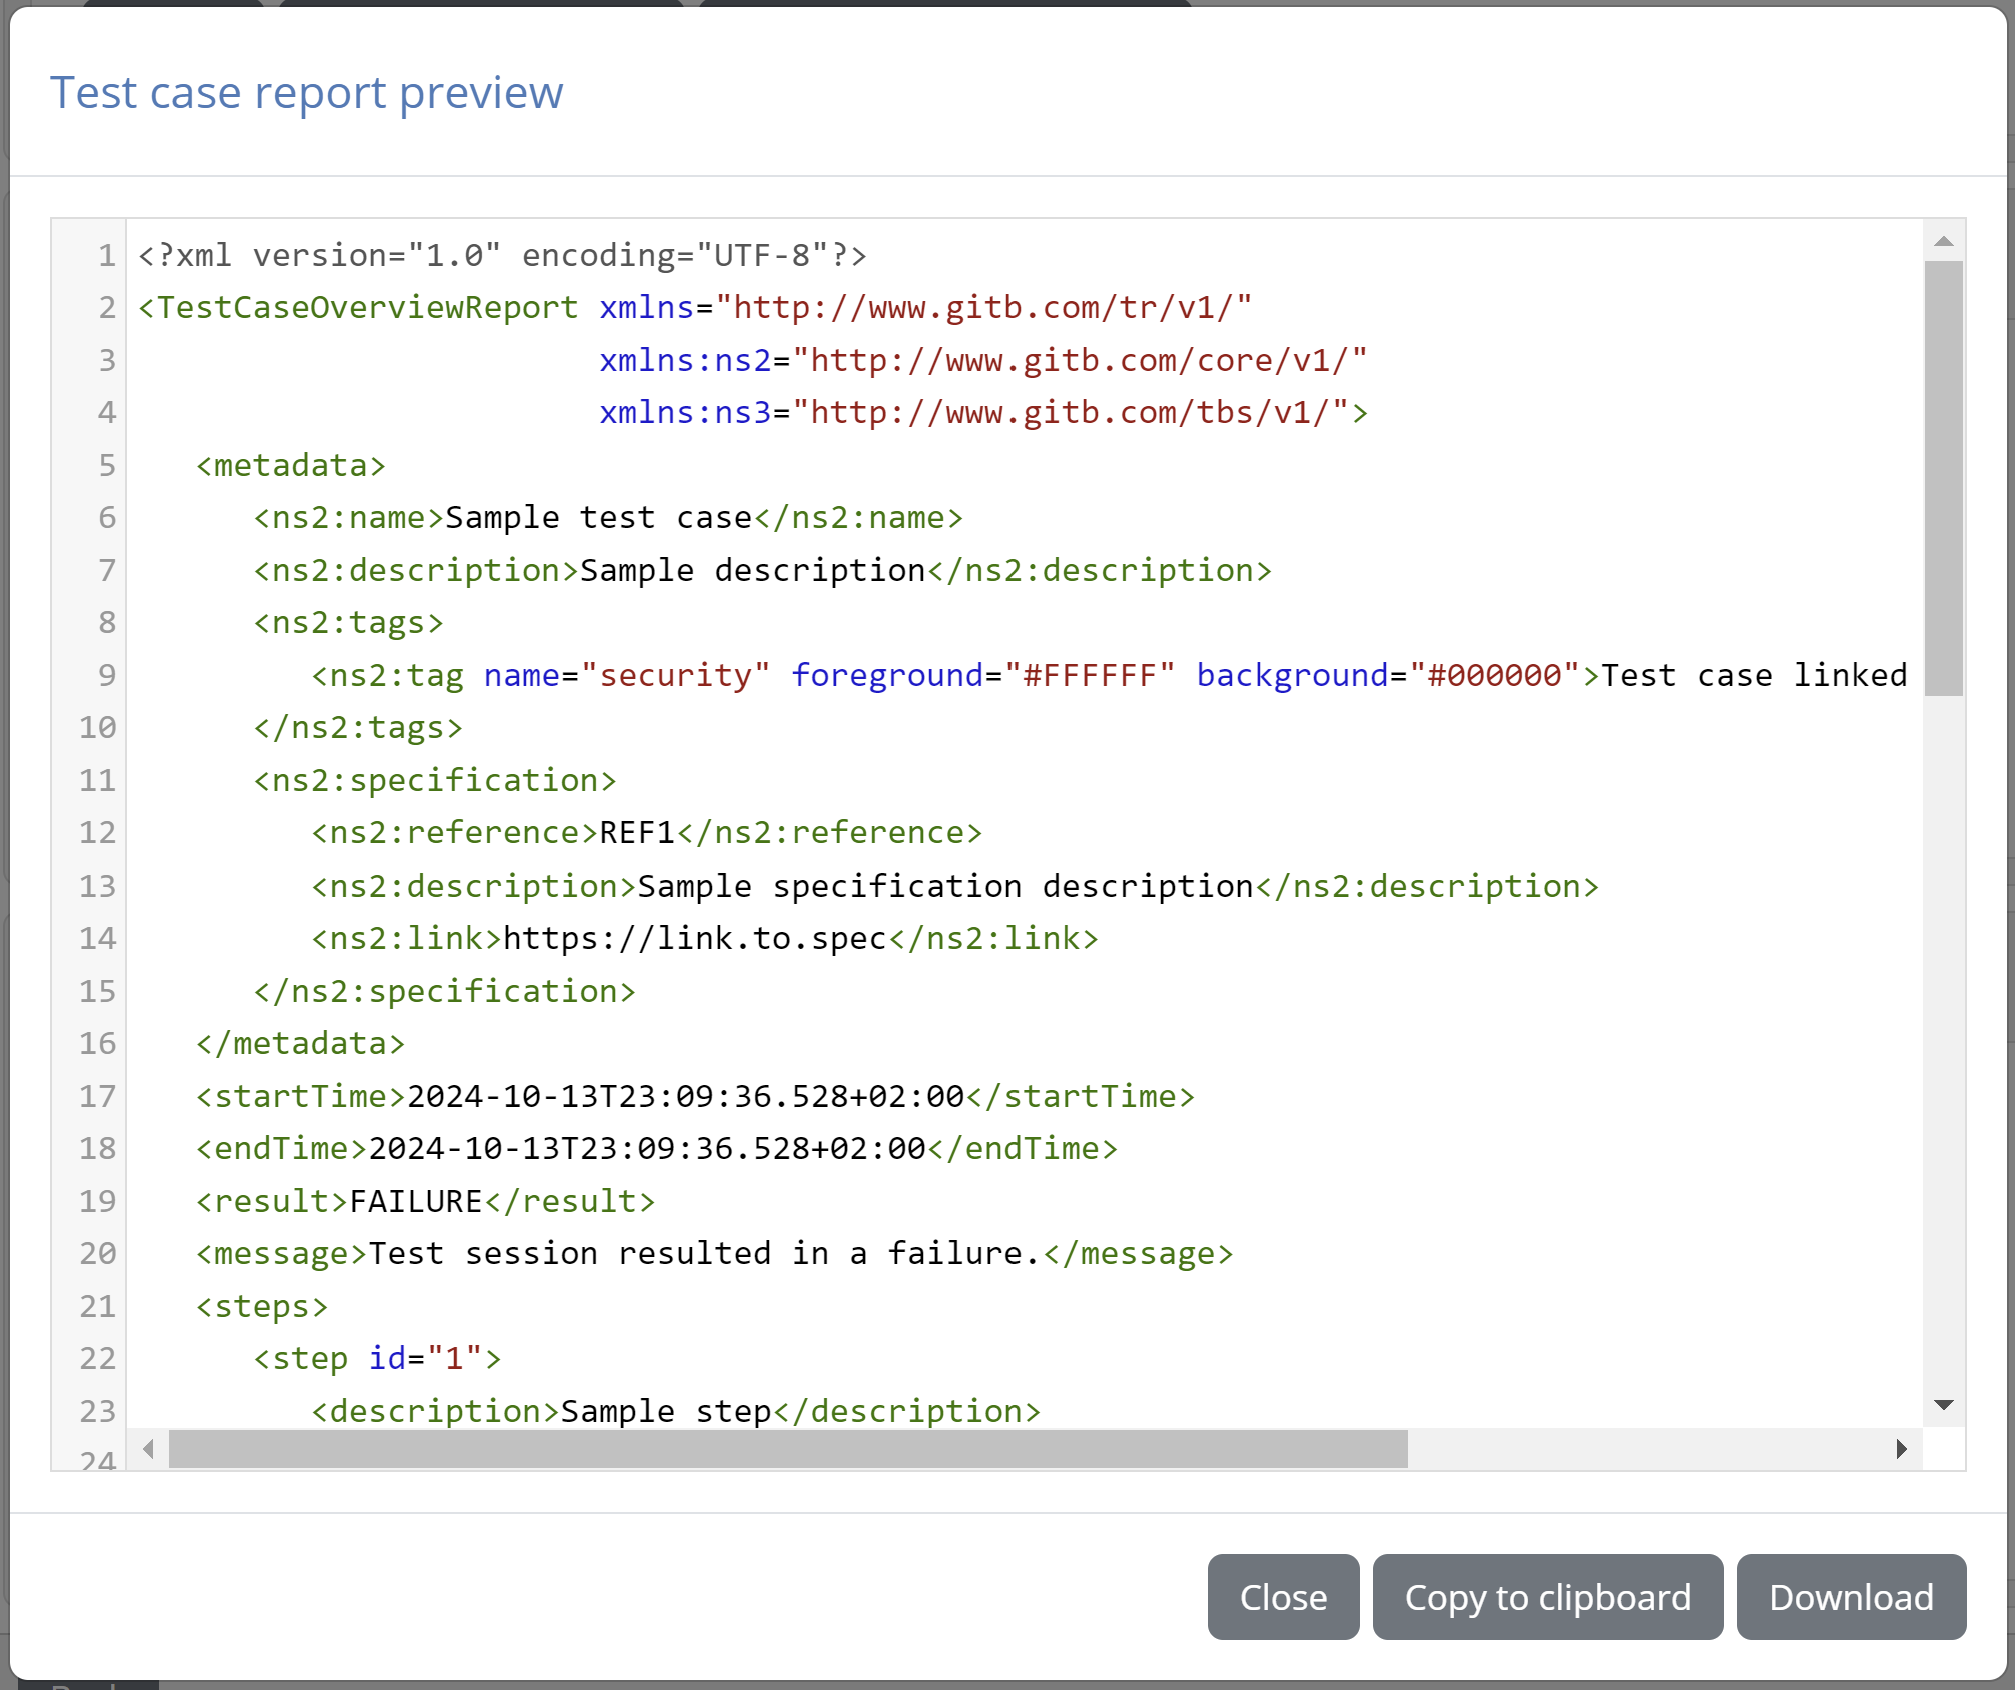
In the case of the PDF report settings, and assuming you are using the built-in template, the preview will be similar to the following example:
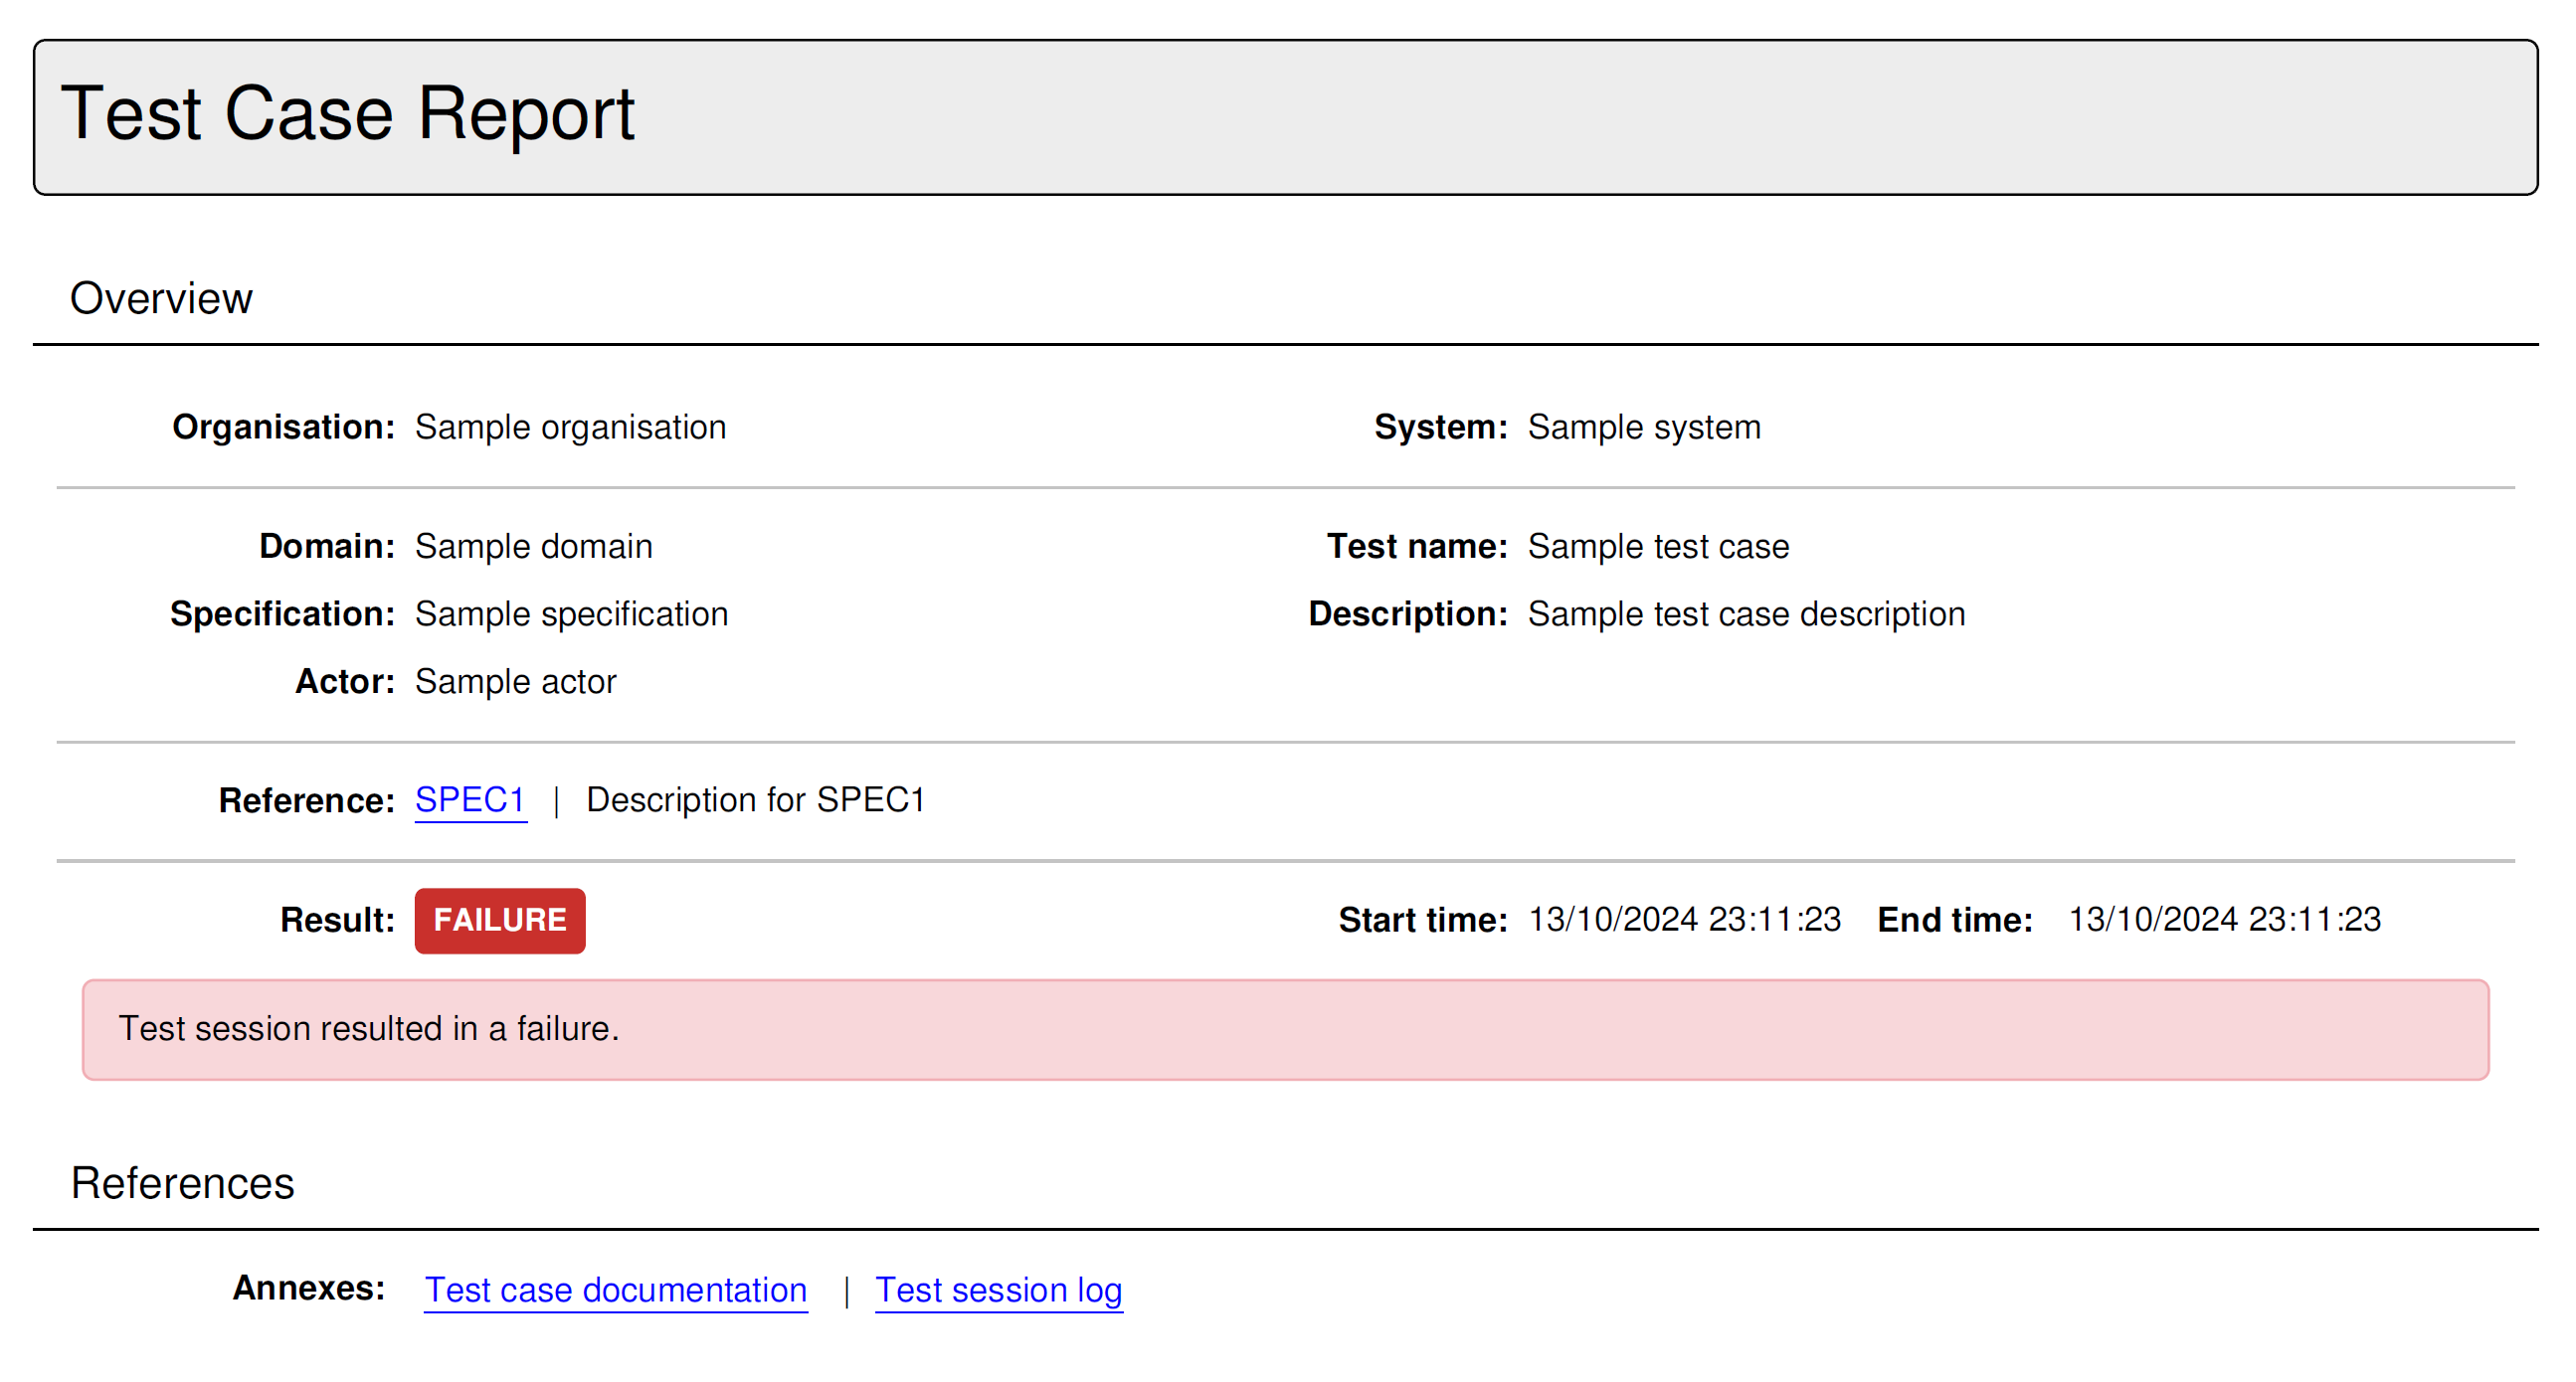
In case you chose to delegate the report’s generation to an external service, the preview also serves as a test that the service is accessible and responds as expected. The service will be called with the sample data in XML form, and the resulting PDF report will be downloaded. In case there is an error in the configuration or the service’s processing, a popup with detailed information will be presented to help you troubleshoot the issue.

Test step report
The test step report is used to summarise the result of a specific test session step and is available in XML and PDF formats. The report’s configuration settings are available in the Test step report panel.

When producing an XML report this uses by default the GITB Test Reporting Language (GITB TRL) as the output format. If you prefer to use a different structure, you can check the custom XML reports option to provide an XSLT stylesheet. This will be applied on the default XML data to produce the desired output.
When producing a PDF report the Test Bed’s built-in template is used by default. If you want to customise the report, you can check the Custom PDF reports option, in which case report generation will be delegated to an external service. In this case you will need to provide:
The service address of the endpoint that will generate the reports. This is an HTTP endpoint that will receive a
POSTwith the report data in XML, and is expected to return the resulting PDF.In case you chose to apply a custom stylesheet to XML reports, you can also choose whether the stylesheet should be applied to the XML data before posting it to the service.
Finally, regarding PDF reports you can also choose to include a digital signature to ensure your reports’ integrity and trust. You can leave the relevant option unchecked if you don’t require signatures, or if you delegate to an external service that already signs the produced PDF reports. If you have the Test Bed sign PDF reports you will need to also configure your signature settings.
Configure digital signatures
If you have selected to add digital signatures to PDF reports you will need to foresee a signing certificate. To manage this click on Manage signature settings from the panel’s footer.
Doing so will display a popup in which you can provide information on the certificate to be used for the signatures.
You are expected to provide here:
The keystore file that includes the keypair (private and public key) that will be used. The keystore should contain a single keypair.
The keystore type. Supported types are JCEKS, JKS and PKCS#12.
The keystore’s password, used to open and read the keystore’s contents.
The key’s password, that is needed to use the private key when producing signatures.
Note
Use of a community keypair for signatures: The reason you are expected to provide a keypair for signatures is because ultimately the responsibility for issuing and signing the report, as well as maintaining the validity of the relevant keypair lies within the community.
Once the certificate information is provided you may Download or Delete it’s keystore. You may also validate your configuration to be certain that the Test Bed can read the certificate by clicking the Test settings button. Clicking Save will persist your settings, whereas Close will hide the popup.
Preview your configuration
Once you have adjusted your settings you may preview them by clicking the Generate preview button. You can preview both PDF and XML reports.
When previewing your XML report settings, the produced report will be displayed in a popup allowing you to also copy and download it. If you have configured a custom XSLT stylesheet this will also be applied to the preview.
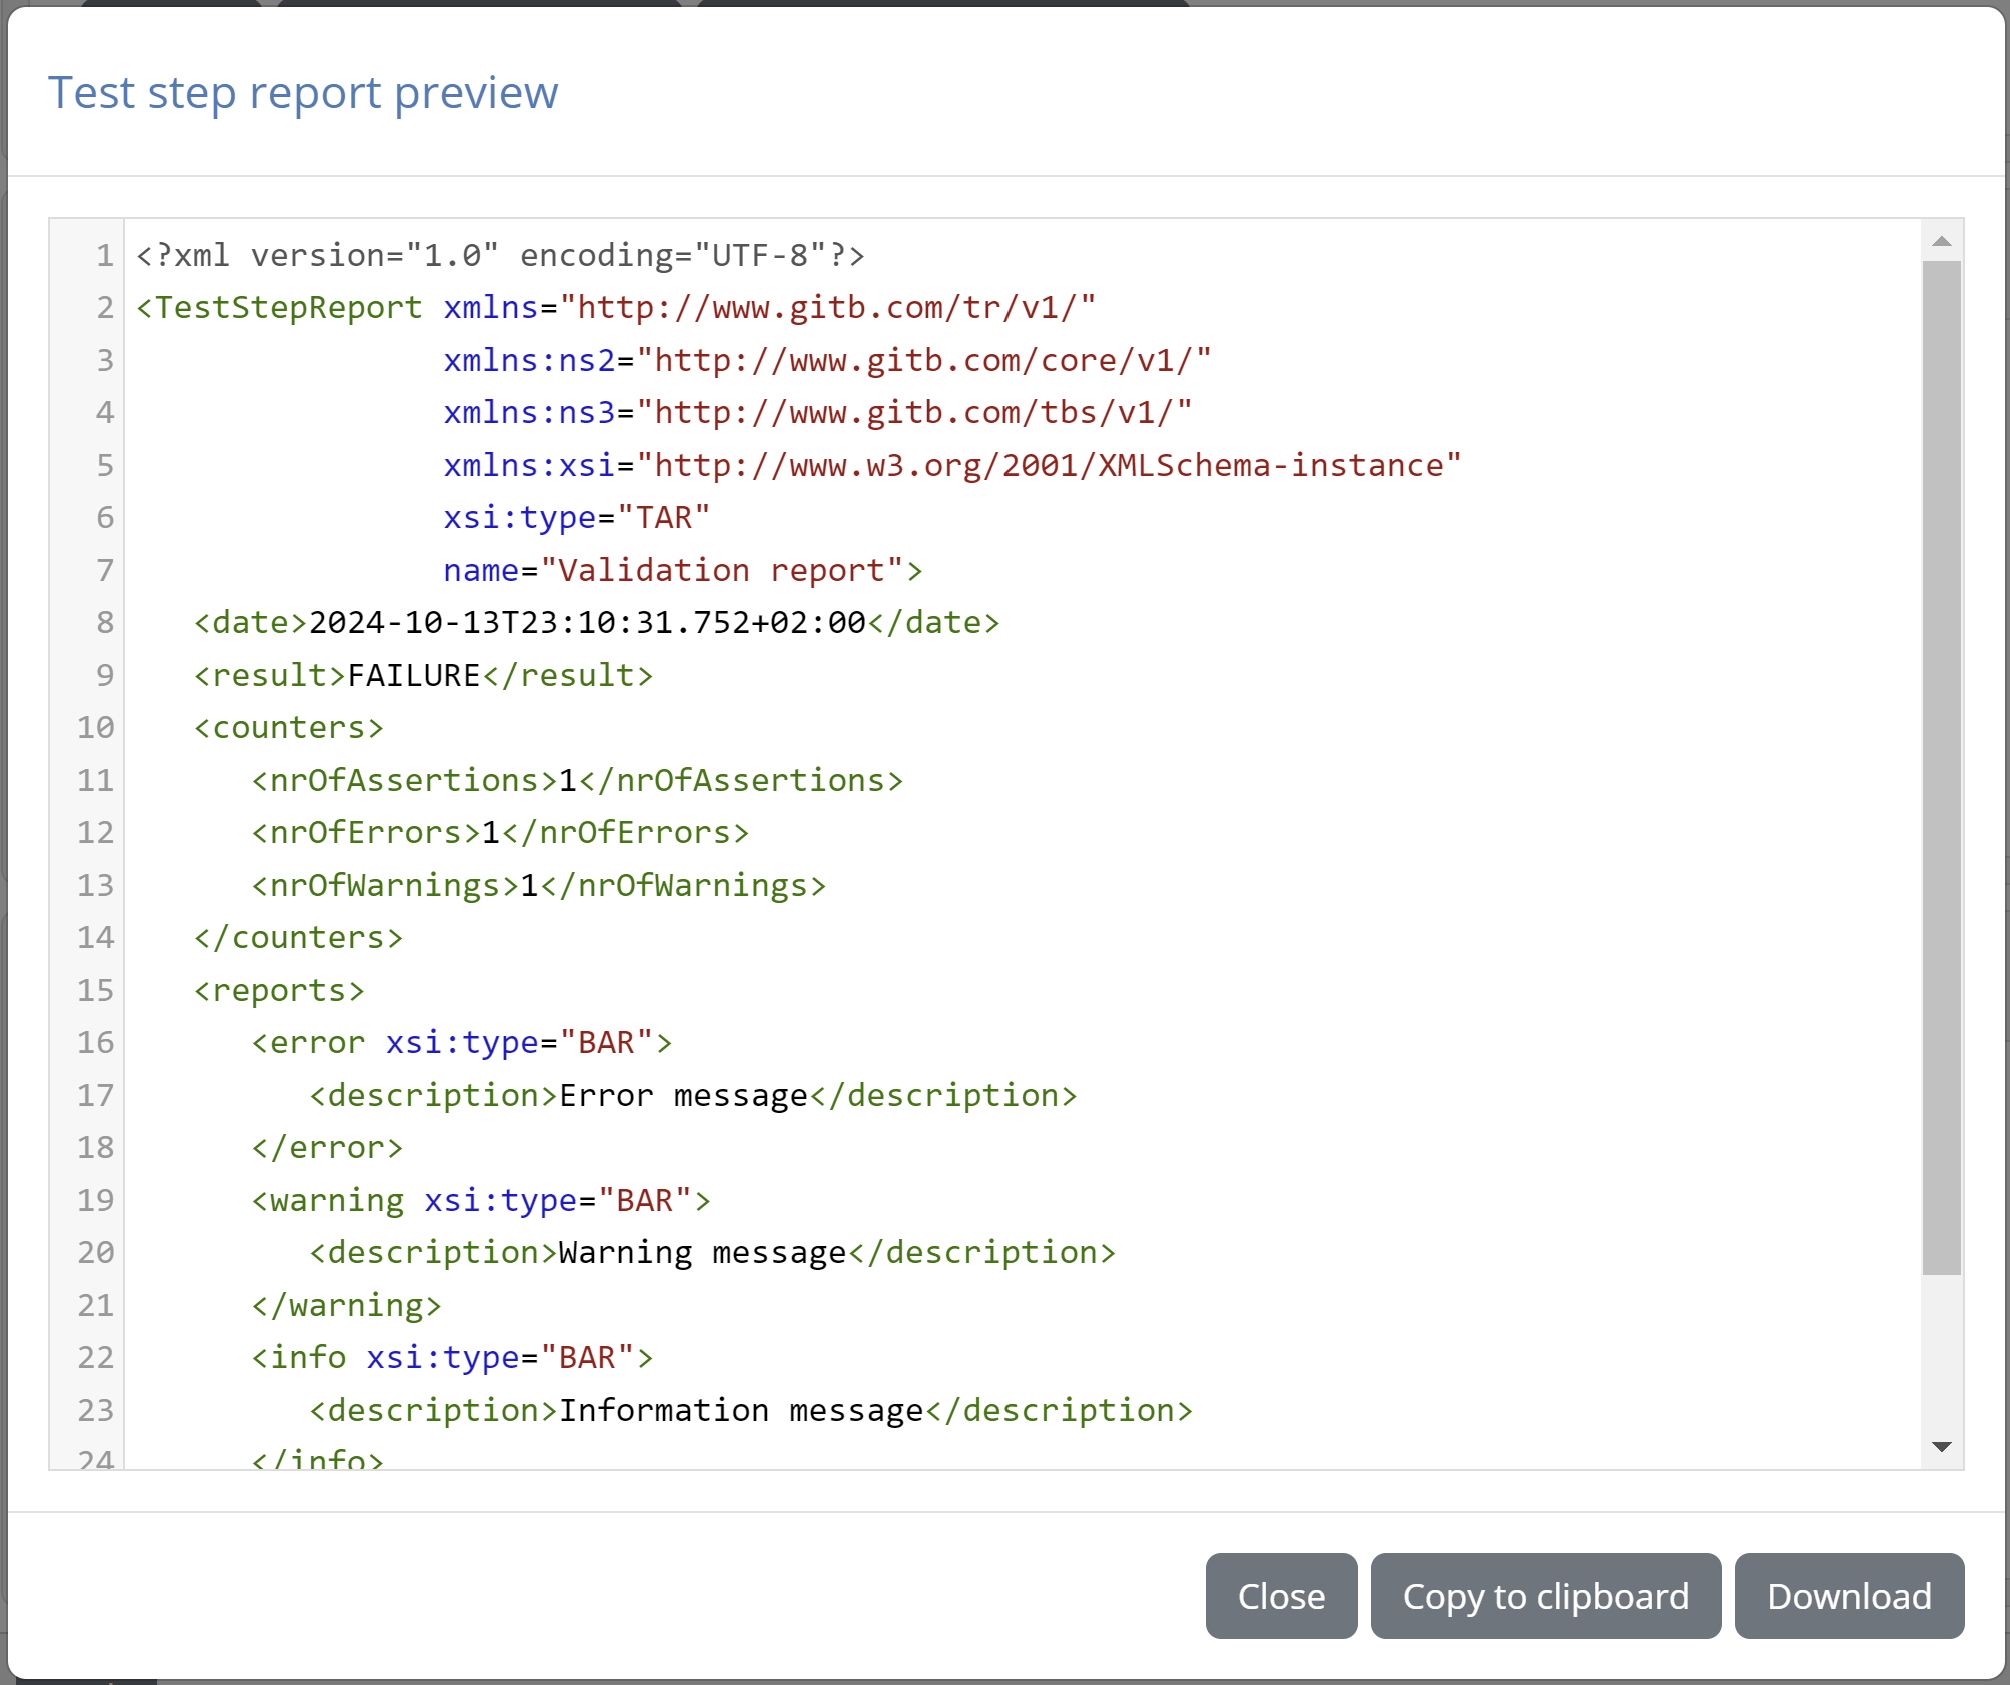
In the case of the PDF report settings, and assuming you are using the built-in template, the preview will be similar to the following example:
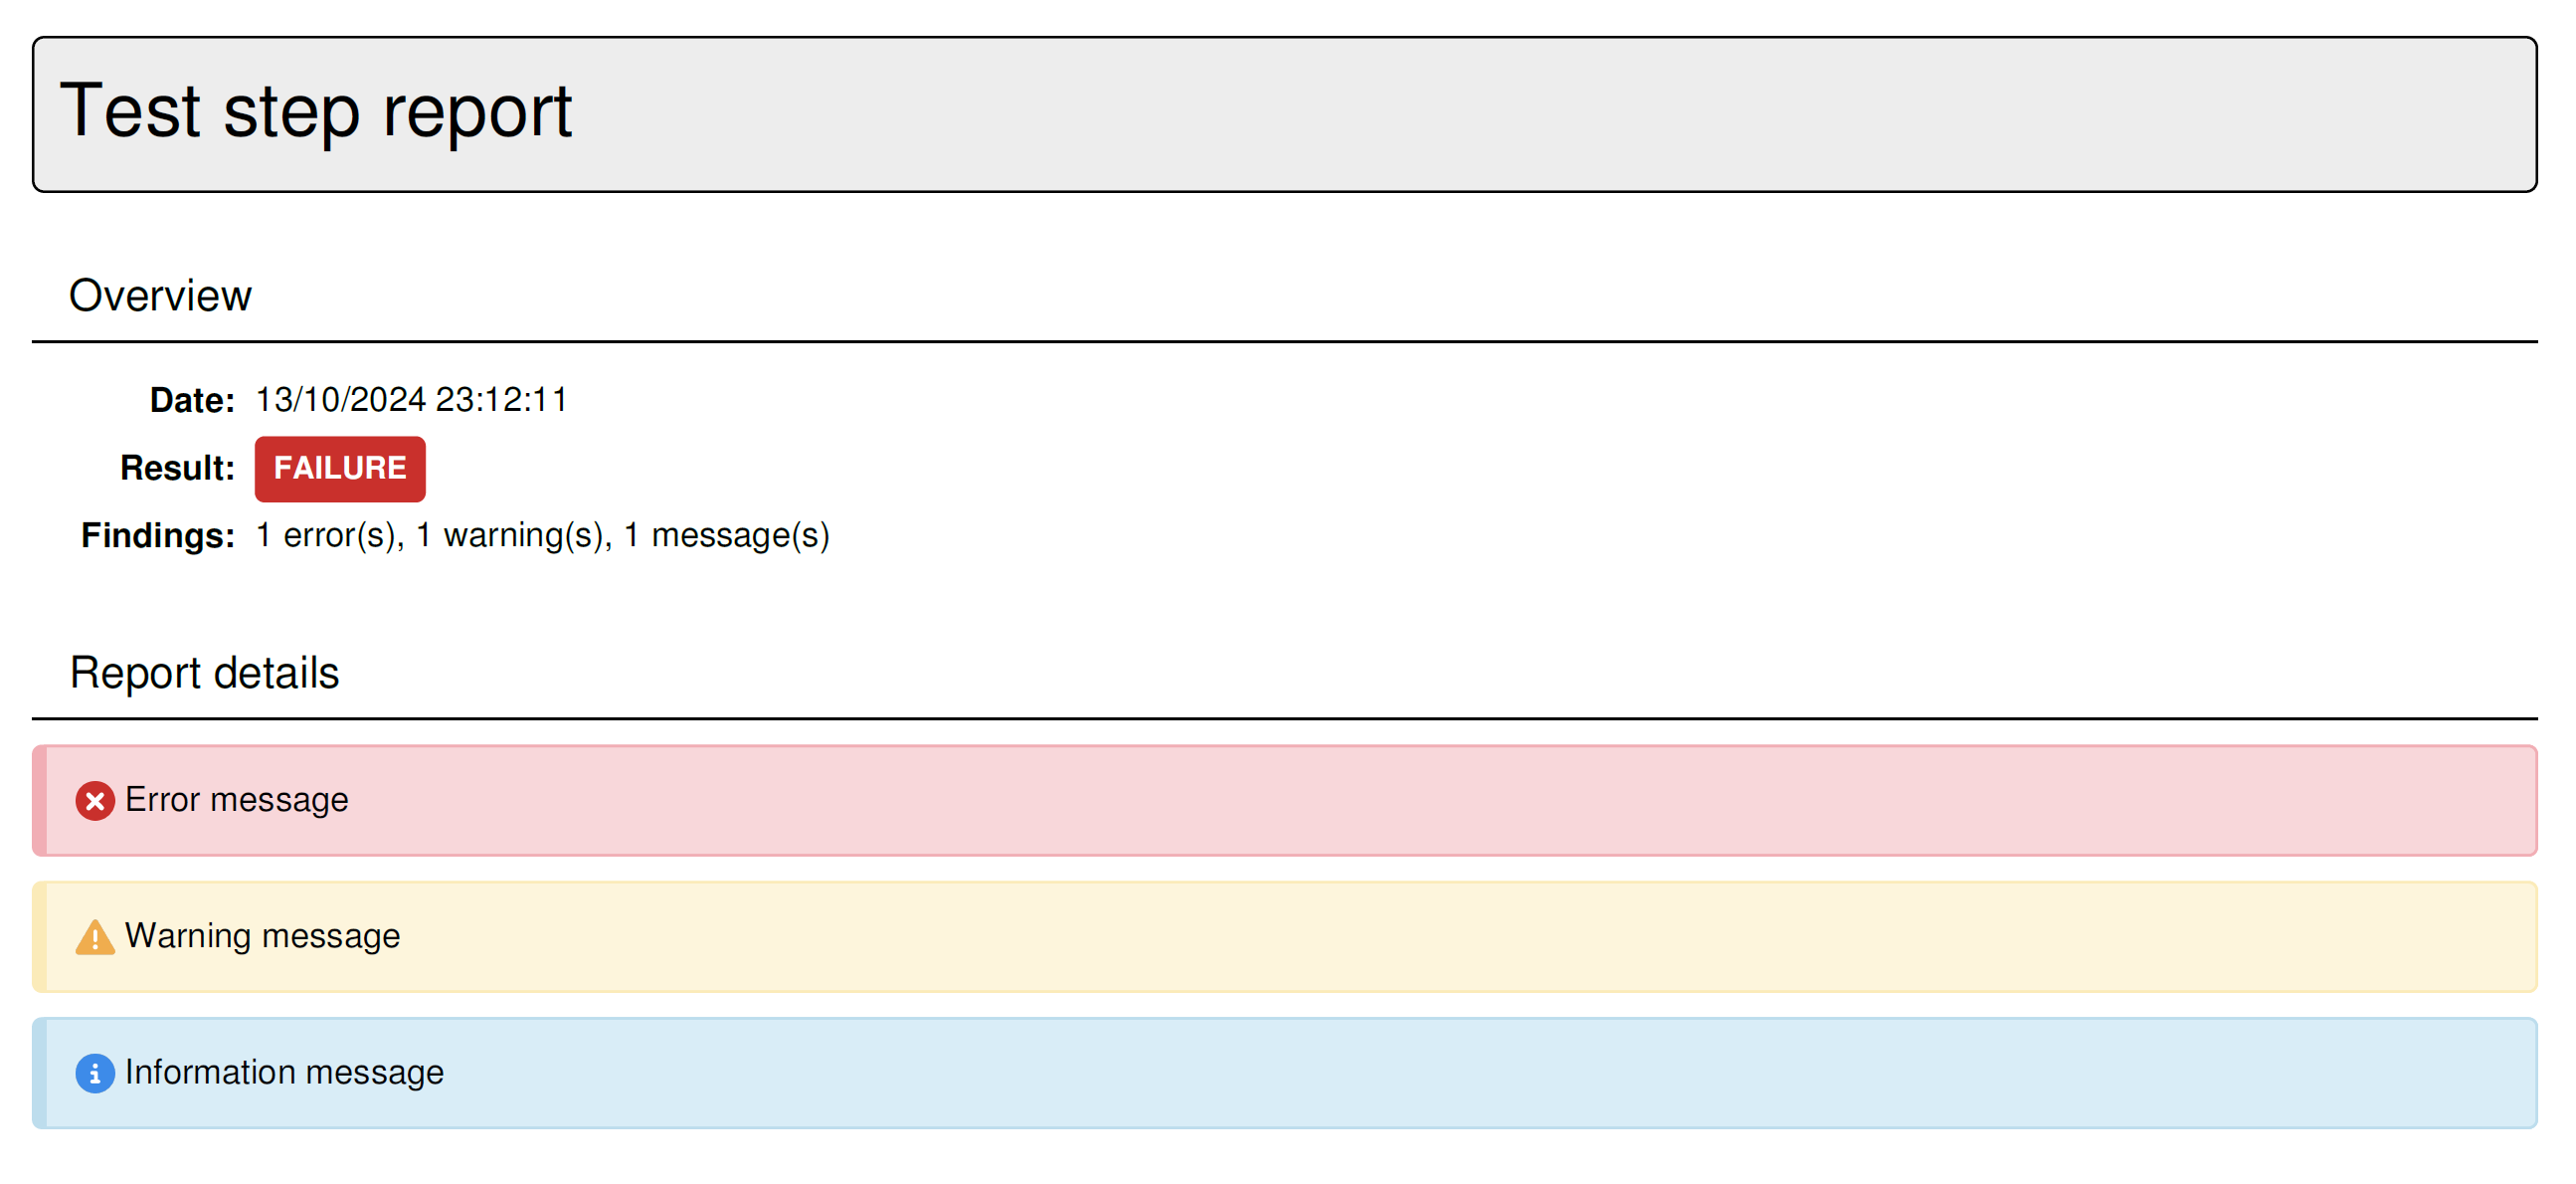
In case you chose to delegate the report’s generation to an external service, the preview also serves as a test that the service is accessible and responds as expected. The service will be called with the sample data in XML form, and the resulting PDF report will be downloaded. In case there is an error in the configuration or the service’s processing, a popup with detailed information will be presented to help you troubleshoot the issue.

Edit custom member properties
As part of your community’s configuration you can also define a set of custom properties for your community’s organisations and their systems. Such properties allow you to collect and record additional information for your organisations, extending the default, limited information (names and versions).
The additional properties that you define can be used in numerous ways:
As additional data collection for your community’s members, collecting through the Test Bed information not necessarily linked to the testing that you need for your reporting and follow-up.
To facilitate test configuration. Any properties you define can be included as variables in test sessions. By defining such information at a level higher than conformance statements you can avoid replication of properties that are of a cross-cutting nature (e.g. a country code linked to an organisation).
As additional quality control by restricting certain properties as being editable only by community administrators. Such properties can be considered as flags that you need to set before an organisation can engage in testing.
For data sharing, allowing you to configure for your users certain information that they will subsequently be able to access.
To facilitate automation via triggers or external scripting, by allowing the management of certain properties by external processes that could be used to drive automation tasks linked to your conformance testing (e.g. automatically generate certificates for new organisations).
To manage your community’s custom properties you start by clicking the Edit custom member properties button from your community details panel.
Doing so transfers you to the custom property management screen where you see your currently defined custom properties split in two tables:
Organisation-level properties for properties applicable to organisations.
System-level properties for properties applicable to systems.
Regardless of the type of property, the information recorded and displayed is the same:
Label: A text to be displayed to users as the label for the property.
Key: A unique value for the property that will also be used as its variable name in test cases.
Type: The type of the property. This can be Simple for text values, Binary for files or Secret for secret values.
Required: Whether the property must be defined before executing test cases.
Editable: Whether the property can be edited by organisation users. Otherwise this will be reserved to administrators.
In tests: Whether the property is included as a variable in test sessions. If so the name of this variable is determined by the key value and is accessed through the ORGANISATION or SYSTEM map depending on the case (see the GITB TDL documentation for more details).
In exports: Whether the property will be included in the PDF reports and CSV exports generated from administration dashboards (the session dashboard and conformance dashboard).
Hidden: Whether the property apart from being editable only by administrators is also hidden from organisation users. Such properties could be very useful as control flags that are set by administrators, triggers or external scripts before testing starts.
In the case of organisation-level properties there is an additional option In registration available. By checking this, the property will also appear as part of the self-registration form for the community. You would do this for key information you want to have users provide as early as possible, and ideally as part of their initial organisation data. Through the community’s user permissions you may also specify that such properties when defined additionally as required are to be blocking if not provided.
Regarding a property’s key, there are certain predefined values that cannot be used as these correspond to the default organisation’s or system’s information. The reserved key values per case are:
For organisation properties values shortName and fullName.
For system properties values shortName, fullName and version.
Note
The screenshots that follow illustrate the management of organisation properties. The process and information is nonetheless identical for system properties.
Create a property
Creating a new property is done by clicking the Create property button from the relevant table header.
In the resulting popup you are prompted to provide the property’s definition. The description of the property is an optional text that serves as a tooltip to assist users in the property’s completion. The Preset values apply to simple properties (i.e. text) and allow you to define a preset list of values for this property that will appear as a dropdown selection list. For each such value you can define a user-friendly label and the property’s actual value, using the provided controls to add new values, remove existing ones or change their display order.
The Depends on field is optional and allows you to define a prerequisite condition for this property. To set such a prerequisite you need to select another property from the provided list and specify to its left in the provided text field (or dropdown selection if the property has preset values) the value that it needs to have for the current property to be enabled. A property that misses any of its prerequisite conditions (i.e. its direct prerequisite or a prerequisite’s prerequisite) will be considered inactive, even if set as required, and will be excluded from input forms and test sessions. Using such dependencies is a powerful mechanism to define conditional inputs based on other properties or external processing (e.g. via triggers).
Note
Parameters of binary or secret type cannot be used as prerequisites.
The Default value input is available for simple text properties and represents the property’s default value for new organisations or systems. It will be presented as pre-entered (or pre-selected) when creating a new organisation or system, and will apply automatically if the user does not explicitly override it.
In terms of their configuration, new properties are by default set to be simple (i.e. text values) and editable by users. If the property is set as being binary or secret it will not be able to be included in exports. In addition, a property can only be defined as hidden if it is set at non-editable by users.
To create the property, complete the required information and click on Save. Clicking on Cancel will close the popup.
Edit a property
Editing an exiting property is done by clicking the property’s row from its relevant table.
In the resulting popup you can view the property’s current configuration and edit it according to your needs. Details on the meaning of properties, preset values, default values and property dependencies are provided in the create property documentation.
To update the property’s definition complete the required information and click on Save. Alternatively, clicking on Delete will, upon confirmation delete the property as well as any existing values provided by your community members. Finally, clicking on Cancel will close the popup without any action.
Change property ordering
By default properties are ordered alphabetically based on their label. You may override this default ordering by reordering the properties as needed and saving their relative positions. This is done through the table listing the properties, by using the move button at each row’s right end to drag and drop each property to the desired position.
Once you have reordered properties in this way you will notice that the Save property order button becomes enabled. You will need to click this to confirm and persist the displayed ordering.
Preview property forms
Given the multiple options available to define custom properties (e.g. preset values, ordering, prerequisites, hidden properties) it is useful to double-check that your setup matches your expectations. To help with this you may click the Preview button on each table’s header to open up a sample form based on your current configuration.
The displayed dialog offers a Preview mode selection with which you can adapt the preview based on the various available situations:
Organisation user: Presents the form visible by organisation administrators once they are logged into the Test Bed.
Self-registration screen: Presents the form that is displayed as part of the self-registration process (if enabled).
Community administrator: Presents the form visible to community and Test Bed administrators.
In case the current configuration results in an empty form (e.g. all properties are set as hidden and the preview mode is set to “Organisation user”) a relevant message is displayed.
Edit labels
A key step in designing a conformance testing strategy using the Test Bed is to make a mapping between its key concepts and the ones specific to a given community. Although the Test Bed’s concepts are flexible enough to address most needs the resulting mapping could result in terms being presented to users that may not be intuitive.
As a means to further customise the Test Bed for a given community, community administrators are able to define replacement labels for each concept. These replacements are displayed in all screens, reports and exports, both for community members and administrators.
To define custom labels for your community you start by clicking the Edit labels button from your community details panel.
Doing so transfers you to the label management screen where you can review the labels currently considered, both default and custom ones.
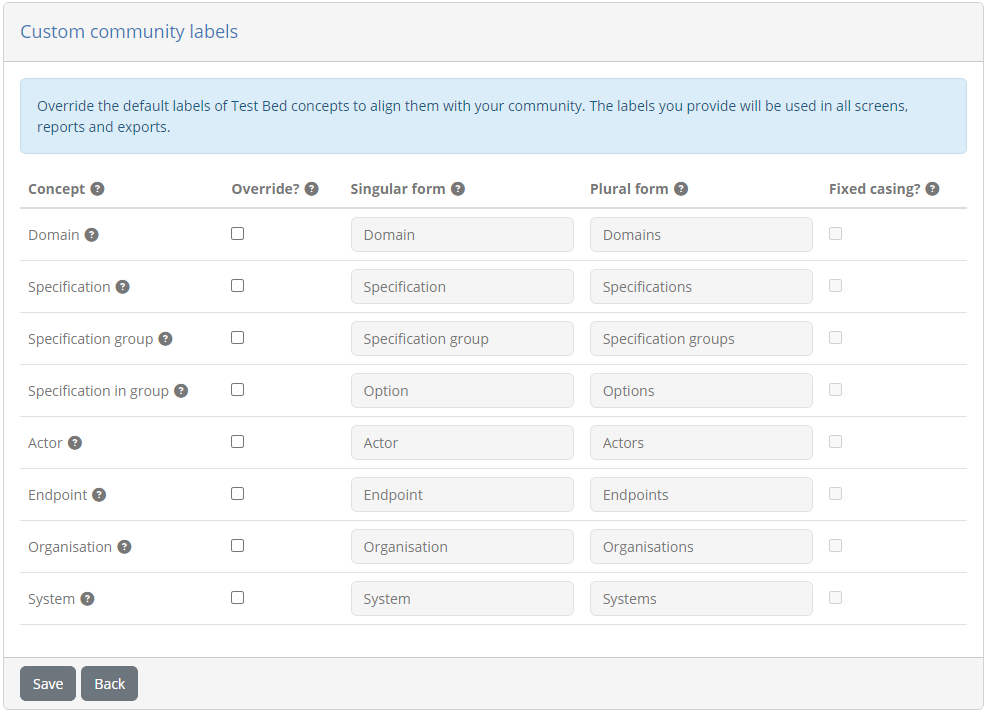
The concepts that can have custom labels defined are domains, specifications, actors, endpoints, organisations and systems. For each concept the following controls are provided:
Override: Whether or not the given label should be set with a custom value. If not, the default values apply.
Singular form: The label applied when referring to a single concept element. The default value, if not replaced, is displayed as readonly.
Plural form: The label applied when referring to multiple concept elements. The default value, if not replaced, is displayed as readonly.
Fixed casing: Whether the casing provided should be kept unchanged in all references. If not checked, labels will be lowercased when in the middle of sentences.
To provide a custom label check the Override checkbox and supply the desired labels. Once finished editing the labels, click on Save to persist your changes or Back to discard them and return to the community details’ page.